
 Download
 Download
How to Blur a Part of an Image - 4 Best Ways
Need to create a soft artistic effect to highlight the main object on your image? Or do you want to hide someone's face and other details for the sake of censorship? Adding a photo blur is the easiest and obvious solution in both of these cases.
Working with blur is tricky, though. No one wants to end up with a hazy mess. What's more, you need reliable software to get a perfect balance between the blur effect and sharpness. Not sure which one will suit your goal?
In this guide, we will suggest 4 picture hazing ways featuring PhotoWorks, Photoshop, PowerPoint and a web-based service. Each way has its own ups and downs, so the article will help you choose the one that suits your goal.
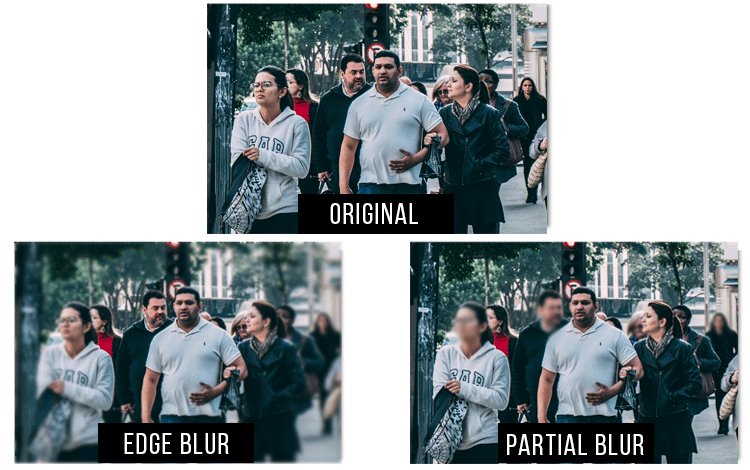
You can make other people anonymous in a click
Now, are you ready to become a master of the hazy effect? Then just continue reading and discover how to blur out parts of a picture in 4 different ways.
- 1. Blur a part of a picture with PhotoWorks
- 2. Blur something in a photo online
- 3. Hide a part of an image in Photoshop
- 4. Blur certain parts of a photo using PowerPoint
Way 1. Blur a Part of a Picture with PhotoWorks
While using other blur makers, you are probably doomed to work with various, not-very-convenient selections and spend half an hour drawing out every pixel. That's why we suggest using PhotoWorks to blur some parts of your photo. This photo editing software for Windows and Mac employs the latest AI-powered technologies. Thanks to the versatile features, it will definitely be a great choice for those who want to make their images "hazingly" beautiful. What's more, the software offers a free trial version that you can get from the official website.
In PhotoWorks, you can use a convenient brush to paint over the desired area and blur it in a click. Here are the steps:
Step 1. Start PhotoWorks
Open the software and import the photo you want to edit.
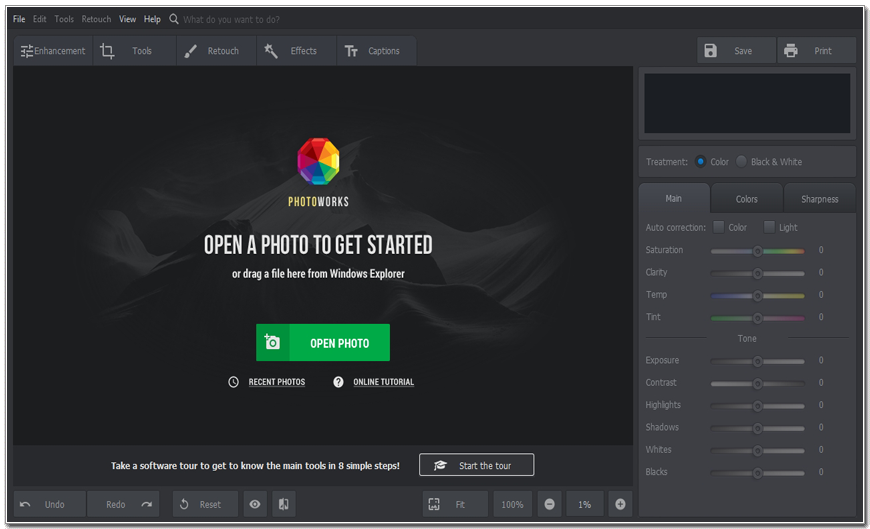
We're adding the photo that needs some correction
Step 2. Choose Adjustment Brush
Go to the Retouch tab and pick Adjustment Brush. Select the brush size, then switch to the Sharpness tab.
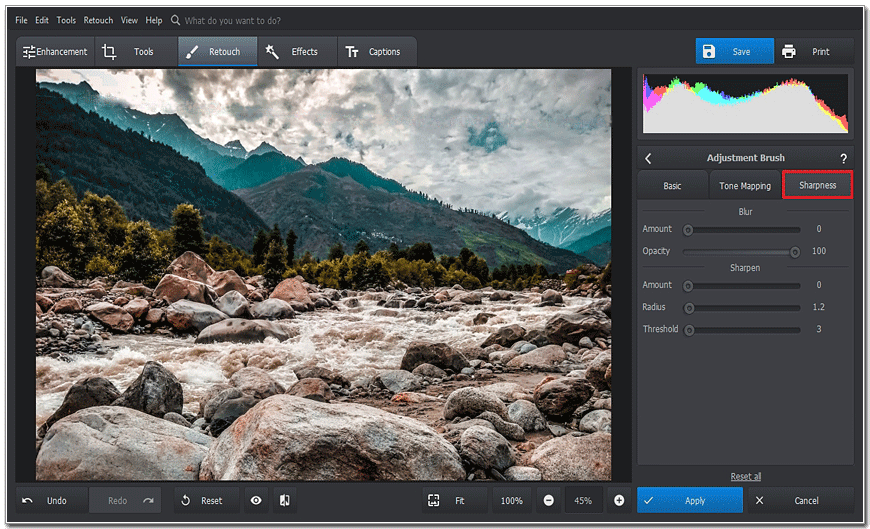
We will use Adjustment Brush to blur only a part of our image
Step 3. Paint Over the Area to Add the Blur Effect
Now paint over the area you want to blur. Use the Amount slider to blur this part of an image and control the effect strength.

To apply the blur, you will need to paint over the area
Step 4. Apply the Changes
When you’ve finished working with this tool, click Apply. Now just hit Save in the top right corner to keep your work!
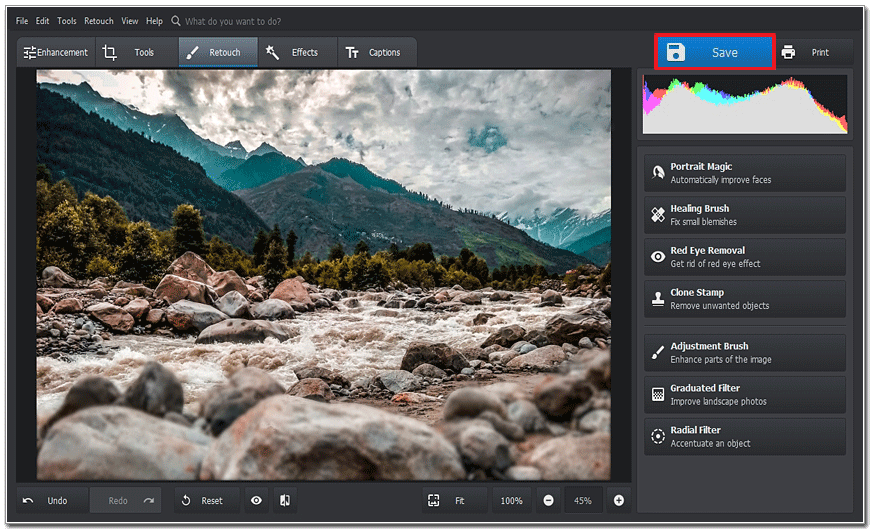
Finally, save your work to keep the edited image
Use Feather in the Basic tab to control the brush edge. Apply soft strokes to large objects like people, and switch to the hard brush while painting over small or complicated objects like faces details.
Liked this easy way? Then download the trial version of PhotoWorks for free and blur a part of an image in a click!
With PhotoWorks, you can create different kinds of haze. For example, blur a photo to get rid of extra sharpness, blur the background of your image to create a nice misty effect or blur the photo edges to highlight an object.
You can go even further while editing your photo. After adding a blur, adjust color balance, remove grain from a photo, apply cool-looking filters and get rid of unwanted objects with various convenient brushes. Or - make a photo montage that blows up everyone's minds. So, have an edit you want to perform? Bring your ideas to life with this powerful program!
Way 2. Blur Something in a Photo Online
Need to quickly conceal a face or a caption on your picture? Don't have any image editor at hand? Then use a web-based program, for example, Ezgif censor tool. It allows you to apply partial blur or pixelate certain areas on JPEG and GIF files.
Let's see how you can blur parts of your photo with this online tool:
- Upload your photo. Start with uploading your image to the service. You can also paste an URL and Ezgif will get the picture in a flash.
- Select the area. Use a rectangular selection to mark the area you want to blur. You can make only one selection at a time.
- Apply the blur. Pick the Blur method, then click Submit. In a few seconds, you will get a processed image with a blurred section.
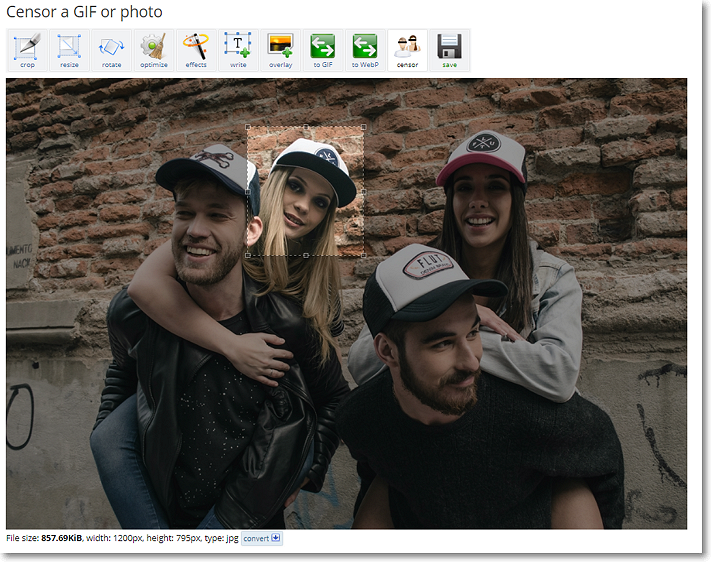
This service is suitable for blurring a text or large areas
Ezgif can become a real life-saver when you don't have any chance to use standalone image editors. However, if you need to conceal an object with intricate lines, then you'd better try some other tool since you won't be able to do much using a basic rectangular selection.
Way 3. Blur a Part of an Image in Photoshop
If you own Photoshop, you can use it to hide some areas of your picture as well. There are several ways to do that, but we will try the simplest one. This method is based on applying a filter, and it's suitable even for hard-to-hide objects.
How to blur a part of a picture on Mac or Windows with Photoshop? Here are the steps:
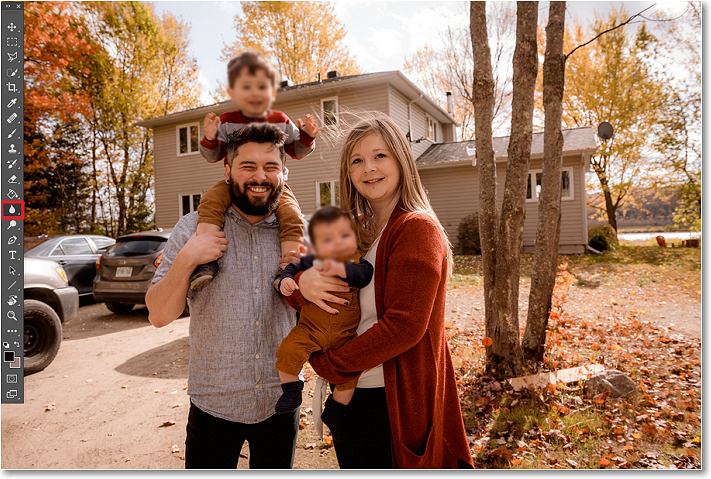
- Pick the Lasso tool. Choose the Lasso tool from the left-hand toolbar. You can also use Polygonal Lasso tool, if you want to select the area step-by-step.
- Mark the object. Select the area using the tool. Hold the right mouse button and drag the tool to make the free-hand selection.
- Apply the Gaussian blur. Go to Filter > Blur and select Gaussian blur. A new window will pop up. Adjust the Radius to blur the selected area completely. Now simply click Apply and save your image.
Alternatively, arm yourself with a Blur tool and paint over the faces
Photoshop provides you with several tools to blur out words or faces in your images. However, when using this software, be ready to learn the hard-to-navigate interface and pay for a monthly subscription.
Want to achieve an artistic effect? Then just blur the edges of your photo. This will highlight the main object, improve the composition and make your image more attractive.
Way 4. Blur Certain Parts of a Photo Using PowerPoint
Have MS Office installed on your computer? Do you know that you can use this suite to blur some areas on your photo? Well, now you know - you can do that with PowerPoint. Although this program is meant for making slideshows, it still offers a few photo editing tools.
Here is how you can apply blur with PowerPoint:
- Add a shape. Click Insert and pick Shape. This will draw a shape around the area you want to blur. Go to Shape Fill on the Format tab and fill in the shape with the color similar to the one of the selected area.
- Soften the edges. Go to Shape Effects and choose Soft Edges. Adjust the effect and apply it to the image.
- Group the layers and save your photo. Press the Ctrl key on your keyboard, select the area and the rest of the image, then click Group. Now you can use this photo in your presentation.
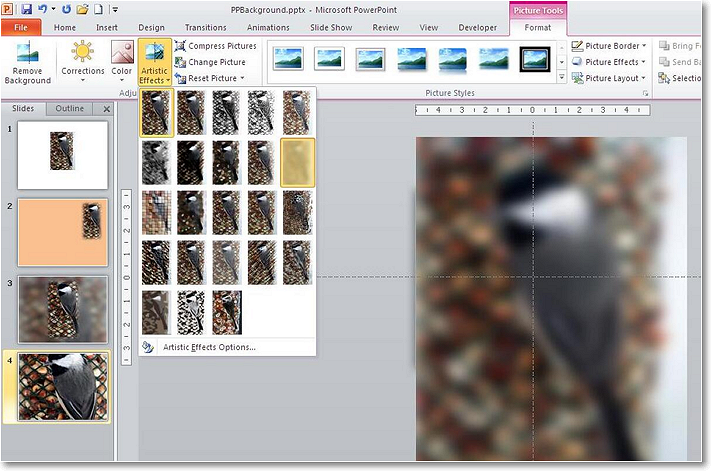
You can also use an Artistic effect to apply the blur
These steps for PowerPoint are a bit tricky, but you can follow them if you need to hide a part of your image for a presentation asap. However, there are easier ways - just look at the methods described above.
Here you go - 4 different ways for concealing certain image areas in a few clicks. If you need to quickly censor a picture on the go, use Ezgif - an online toolkit you can run in your browser. When you require a blurred picture for your slideshow, you can edit it directly in PowerPoint. However, if you want a neat result that you can achieve in a few minutes, we recommend using PhotoWorks. With its smart and convenient brush, you can apply any type of blur with ease.
Now that you know how to blur a part of a photo, it's high time to put this knowledge into use!
