
 Download
 Download


How to Sharpen a Blurry Image in a Minute
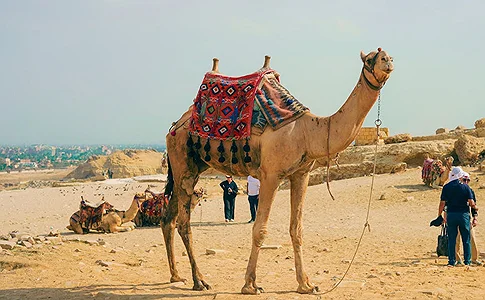
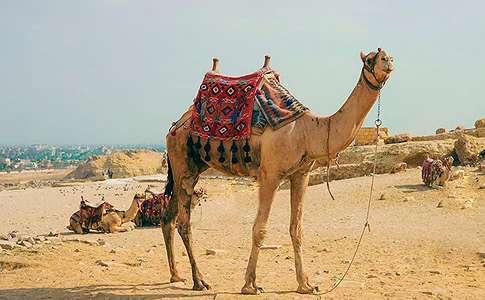
The aim of every photographer is making a high quality shot. But what if something goes wrong and otherwise eye-catching photos come out hazy? In photography, it’s a well-known defect. So, how can you fix a blurry photo? Keep reading to learn how to make your images clear with PhotoWorks or what other techniques to use.
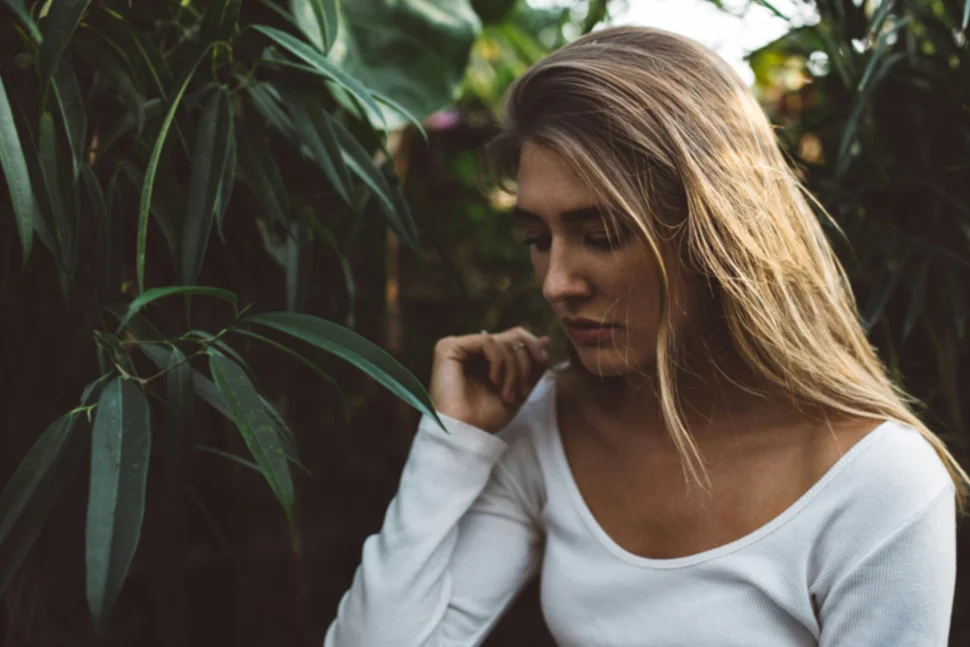

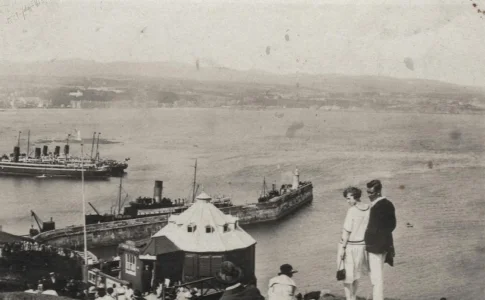
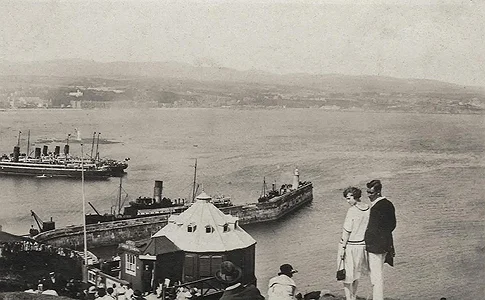
Blurry picture: before and after editing
How to Make Photos Less Blurry on Mac and Windows: 5 Tricks
There are plenty of options for picture sharpening in PhotoWorks software. Choose the tool depending on what you need to correct and what result you expect to get – sharpen the whole image or its specific areas. Let’s see what tools you can use to make a blurry photo fixed and how they work:
- Way 1. The Sharpness tool sharpens out of focus photos
- Way 2. The Clarity tool makes the entire image clearer
- Way 3. The Adjustment Brush highlights a certain object in a photo
- Way 4. The Radial Filter accentuates a specific area in a photo
- Way 5. The Graduated Filter sharpens hazy areas in landscapes or urban photos
Put those tools into practice right away - you can install PhotoWorks on Windows and Mac for free and instantly try out the tricks.
Now that you've got the program on your computer, it's time to find out step by step which way works best for your blurry picture.
1. Sharpen Out-of-Focus Photos with the Sharpness Tool
The Sharpness tool in PhotoWorks will help you fix most blurred images. In this photo editor you can work with JPG, PNG and RAW files. Here are the steps for you to follow:
- Set the Sharpness amount. In the Enhancement tab, move the Amount slider to the right will make your pic sharper.
- Change the Radius degree. To make the objects’ edges crisp and well visible, increase the Radius. This way, you will determine the size of the editing area and the amount of pixels to sharpen around the edges.
- Adjust the Threshold setting. The optimal degree of Threshold varies from 3 to 10. If you set it at 0, every single pixel will be affected by sharpening and as a result your photo will look harsh and unpleasant for the eyes.
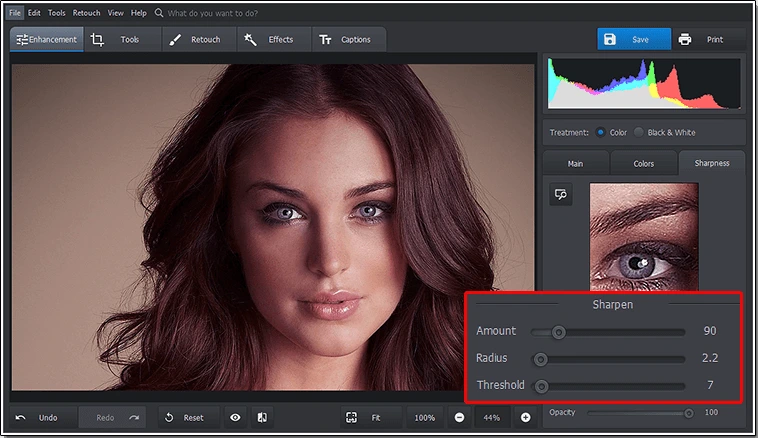
Keep an eye on the preview box to control the sharpness amount
2. Improve the Image Quality with the Clarity Tool
Whereas the Sharpness tool accentuates the borders between the areas next to each other, Clarity is used to increase the midtone contrast of the entire photo. Let’s see how to clear blurry photos with the Clarity tool step-by-step:
- Open the Enhancement tab. Since Clarity is a tool for global photo improving, you’ll find it in the main settings.
- Adjust the Clarity degree to make the photo sharper. Drag the Clarity slider out. It will help you counter undesired flatness by bringing out its texture. However, avoid increasing clarity in portraits unless you intend to emphasize spots, wrinkles and other skin flaws.
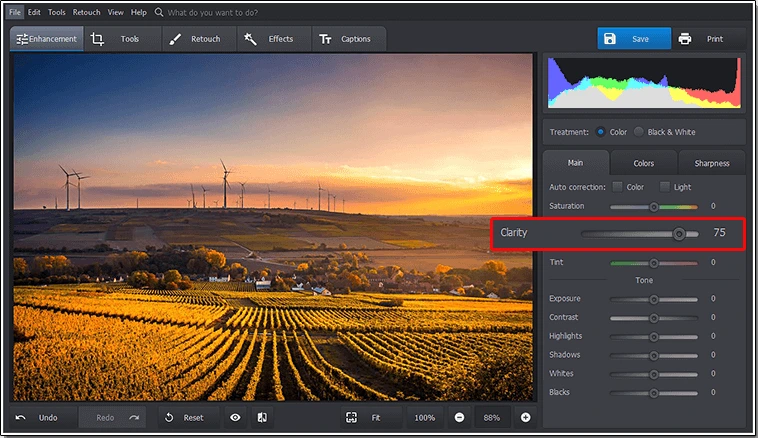
Increase clarity to bring out texture
Don’t want to repeat the same actions fixing picture after picture? Batch processing will help you out - save your time and learn how to edit all photos at once.
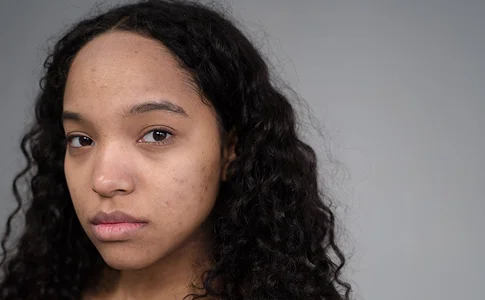
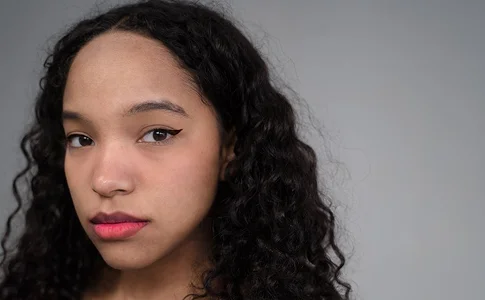
3. Accentuate an Object with the Adjustment Brush
For local sharpening, consider using the Adjustment Brush. With it, you can draw attention to a certain object in your photograph. It’s a perfect tool to make the subject’s eyes sparkling and bright.
- Select the Adjustment Brush. Open the Retouch tab and pick the Adjustment Brush from the toolkit on the right.
- Customize the brush settings. In the Sharpness tab, set the amount of the sharpening effect. Then, adjust the Radius to control the size of the area to sharpen around the edges. And finally, change the Threshold degree - at 0 each and every pixel will be affected, at the maximum degree nothing will be sharpened.
- Make the selection less blurry. Now, just ‘paint’ the adjustment on where you want to remove blurring. All the brush settings will be applied automatically.
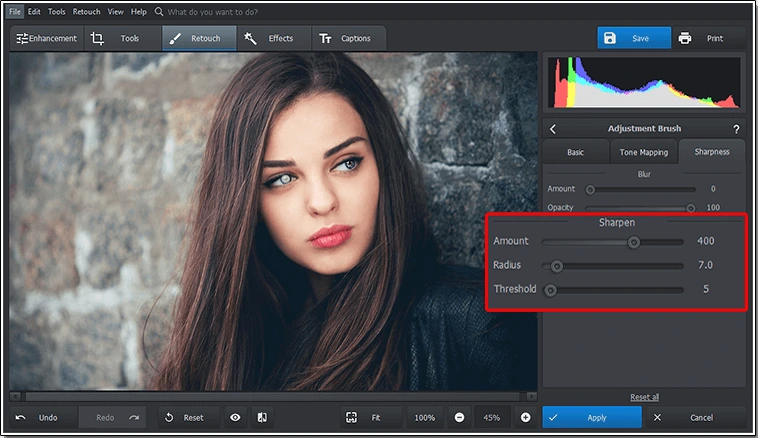
Use the Adjustment Brush for sharpening the eyes
The Adjustment Brush also works well as a delicate tool for local Color Correction. With this feature, you can either enhance the current tones and maintain a natural look, or create truly unusual pictures by swapping the colors. For more color replacement ideas, read a guide on how to make a black and white photo with pops of color.
4. Make a Certain Area Stand Out with the Radial Filter
While the Adjustment Brush is suitable to work on small details, the Radial Filter helps sharpen and highlight a larger area. Let’s learn how to enhance a blurry photo with this sharpening instrument:
- Choose the Radial Filter. Switch to the Retouch tab and select the Radial Filter in the right sidebar.
- Select the editing area. Create an elliptical selection with your mouse. To do it, click and hold its left button. It’s possible to resize and reshape your selection by dragging control handles in or out.
- Edit the selection with the sharpener. To begin with, adjust the filter settings inside the oval mask. Increase sharpness and contrast, make the region less blurred but more bright and saturated.
- Adjust the background sharpness. Now, make the same selection in order to edit the area outside of it. Desaturate it and add some blurriness. This way, you’ll make the central part sharper and more noticeable.
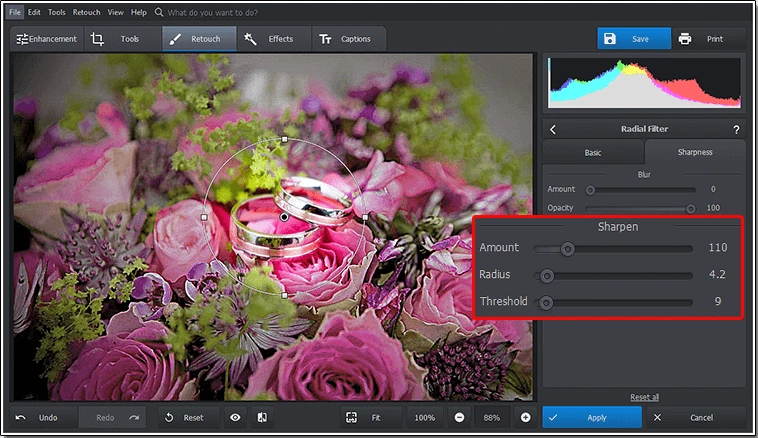
Accentuate the rings in the center of the picture
5. Increase Sharpness with the Graduated Filter
Use the Graduated Filter to make particular regions in your photo more detailed by sharpening them. This tool is suitable for correcting landscapes or city views.
- Choose the Graduated Filter. First of all, run the photo sharpener and open the Retouch tab. You’ll see the Graduated Filter in the editing toolkit - click on it.
- Select the area to unblur. Press and hold the left button of your mouse to make a selection for enhancing. You can select the upper half of the picture (the sky) or the lower one (the ground or the water), or edit them both in turn.
- Change the Graduated Filter settings. In the Sharpness tab, adjust the Amount, Radius and Threshold degree just the same way as you did while trying the Radial Filter and the Adjustment Brush. By moving the sliders, determine how strong the effect will be, how many pixels will be affected and how crisp the edges will become.

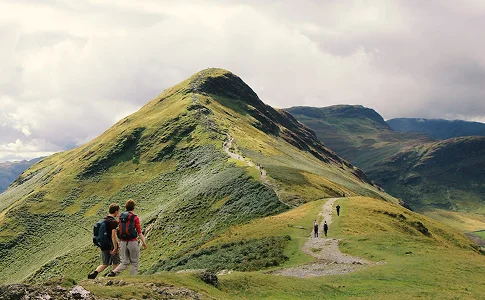
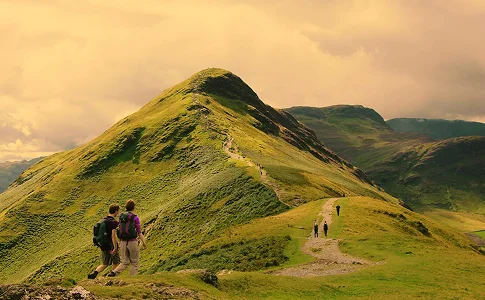
The Graduated Filter is the best tool to enhance landscape or architectural views
Is landscape photography your favorite genre? You won’t waste a minute longer figuring out any unnecessary tools - this landscape photo editor will provide everything you need for quick yet pro-level image enhancement.
Want to see what the editing process is like before trying yourself? Then be sure to watch this video tutorial.
Now you know how to make pictures clearer in PhotoWorks, so why don’t you give it a shot today? Just get your free copy below!
Whatever issue plagues your picture, PhotoWorks has a solution for it. Turn your ruined picture into a masterpiece within minutes!
Beautify Portraits with AI-Powered Face Editor
Go beyond mere sharpening with PhotoWorks and unlock the power of automatic portrait enhancement. Its face editor lets you effortlessly smooth skin, whiten teeth, and even apply natural-looking makeup. Eliminate imperfections like blemishes, wrinkles, dark circles, and distracting glare. Subtly reshape your best features – eyes, nose, lips – to create unforgettable portraits that capture your true beauty.
Restore Old Photos Without Photoshop
Are your vintage photos marred by time and damage? PhotoWorks offers powerful yet user-friendly tools to restore your old photos to their former glory, without the steep learning curve of professional software. Expertly remove scratches, creases, and stubborn stains with intuitive precision. Correct faded colors and bring back the crisp details of your historic images. Give your cherished family heirlooms a museum-quality restoration right at home.
Enhance Images for Better Quality
PhotoWorks offers a comprehensive toolkit for refining every aspect of your images and improving photo quality. Precisely adjust exposure, contrast, saturation, and white balance to achieve your vision. Add artistic flair with 200+ one-click filters and 3D LUTs. Correct perspective distortions, eliminate distracting color fringing, and reduce unwanted digital noise for crystal-clear visuals.
Edit Someone Out of a Photos
Tired of photobombers spoiling your otherwise perfect shots? PhotoWorks offers solutions to clean up images, making unwanted people vanish seamlessly. Easily erase distractions with the content-aware Healing Brush or Patch Tool. If the background is too crowded for detailed editing, replace it with a new one from the gallery of high-quality backdrops or load your own.
How to Make a Photo Less Blurry - Other Ways
To make the right choice, it’s always a good idea to experiment with several options and compare them. So here are a couple of more ways to sharpen blurry images - using mobile applications, and computer or web-based programs.
There are lots of photo editors in Google Play and App Store. But which app is better? If you’re an Android user, we recommend you try Pixlr. To remove blur, select a picture, go to the Tools tab, and tap Sharpen. Then all you need to do is drag the slider. Besides sharpening, it also offers such key features as adding captions, applying double exposure, skin retouching, writing text on photos, etc. However, Pixlr comes with distracting pop-up ads, so keep it in mind before installing it on your device.
Another app to try is Snapseed - you can download it from both Google Play and App Store. It offers a wide range of photo editing tools: selective adjustments, resizing, perspective correction, filters, double exposure, and even curves. Here’s how to make a photo less blurry in Snapseed. Open a photo from your gallery, tap Tools, and choose Details. Then adjust the Structure and Sharpening by swiping left or right, and your unblurred image is ready.
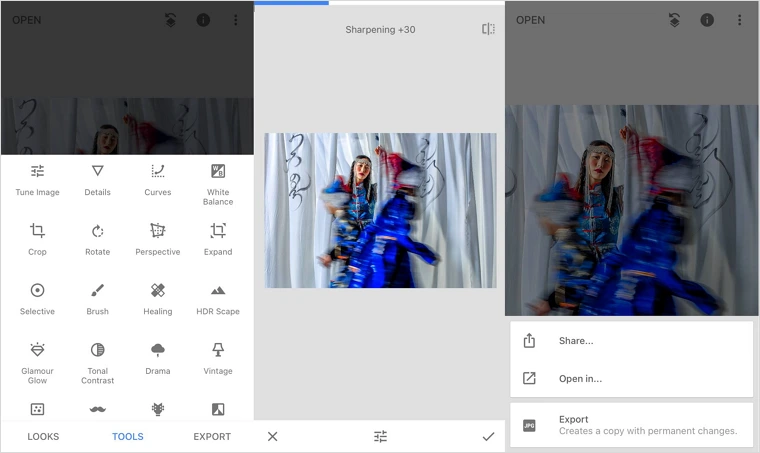
Use Snapseed to make blurry photos fixed - free & on-the-go
If you’re more into computer photo editors, then check out the following programs. We’ll begin with a well-known photo editor that we simply can’t go by - Adobe Photoshop. It remains one of the most popular programs despite the costly subscription and challenging learning curve. With Photoshop you can adjust your photo using curves, add a picture to another picture, save presets, and more. This is how to fix blurry photos with this software: pick the Sharpen tool, adjust the brush, and paint over the blurry area. But if you already have Adobe Lightroom, you won’t need to download Photoshop. To reduce blur in this program, you only need to set the amount of Sharpening - so simple.
There’s one more computer program you can use for this job - GIMP. Unlike the Adobe products, it’s free, but offers fewer features. Although the functionality is limited, you can still use it for sharpening a photo - pick the Blur/Sharpen tool, select Sharpen, adjust the brush size and finally drag over the blurry areas.
However, such photo editors tend to take up lots of space. But it’s no big deal because you can effortlessly remove blur from a photo online, free of charge, with an Internet-based tool. Just open any "blur to clear" image converter in the browser and upload the image you’d like to sharpen. Then adjust the Strength and click Sharpen. Usually, you can't preview the result, so you’ll have to repeat the action over and over until you’re satisfied with it. When the edited photo is ready, download it as PNG, JPG, or WebP.
Conclusion
In this guide, we’ve shown you how to sharpen blurry photos with a number of handy photo editors. All you have to do is choose the right software for this task - make sure the program meets your budget and satisfies all your needs. The system requirements are also important to check out before installing a photo editor on your computer or smartphone. Believe us, sharpening a photo is not a big deal - you can do it with no hassle. Now it’s your turn to tweak your images. Go and get it done today.
Frequently Asked Questions
How can I make a blurry picture clear?
There are several ways to do that - from adjusting the overall image sharpness and clarity to using special tools to unblur specific areas. Follow the link to learn how to fix a blurry picture step by step.
Can sharpening a photo make it look unnatural?
Yes, over-sharpening a photo can lead to unnatural-looking results with artifacts and halos. It's important to find a balance between sharpness and natural appearance.
Can you fix a blurry photo on an iPhone?
Absolutely! Snapseed, Pixlr, and even the iPhone's Photos app have tools to help you adjust sharpness, clarity, and detail. It's not going to work wonders on really screwed up pictures, but for those little wobbles, definitely worth trying.
How to remove face blur from photos online?
If you need to de-blur someone's face on the go, just do a quick search for "unblur image AI free". You’ll find options that use artificial intelligence algorithms to automatically enhance portraits and sharpen facial features. However, use free online tools with caution, as there may be privacy and security concerns. For more robust and secure portrait enhancement, consider desktop photo editing software like PhotoWorks.
