How to Blur the Background of a Photo - Best Ways in 2025
Do you want to save a great shot ruined by an awful backdrop? Or do you need to draw attention to a certain part of your picture and mute out the rest? Then blurring the photo background might be just the cure you are looking for. Easy and efficient, this trick will turn your pictures into true works of art. Learn how to blur the background of a picture in several different ways to find the best. For you to have something to choose from, we'll be tackling 6 methods of hazing the backdrop for a dreamy effect. They'll include desktop softwares, mobile apps, and onlive services.
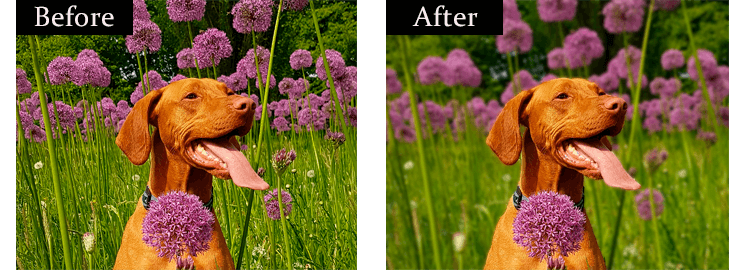
Artistically blurred background: before and after
Let’s have a more detailed look at the ways to achieve that artistic background blur:
- Way 1. Create a dream-like background with PhotoWorks
- Way 2. Focus on what's important with Photoshop
- Way 3. Blur the background of a picture on iPhone
- Way 4. Attain a surreal background effect online
- Way 5. Blur the photo background on an Android-based phone
- Way 6. Achieve that trendy hazy look while shooting
Way 1. Blur the Background of Your Photo with PhotoWorks
In the world of photo editors dominated by Adobe giants, PhotoWorks clearly stands out. Coming with a free trial version, this software boasts a vast arsenal of features and tools. The major difference between PhotoWorks and Adobe software, however, is that PhotoWorks doesn't require much time and effort to achieve a pro level result.
Now, let’s see how to use this software to blur an image background.
- Download, then start the software. Open your picture you are going to work on.
- Switch to the Retouch tab and pick Radial Filter. Draw a circular selection over the part you want to stay in focus.
- Make sure that the Processing is set at Outside. Now switch to the Sharness tab and drag the blur slider until you are satisfied with the result.
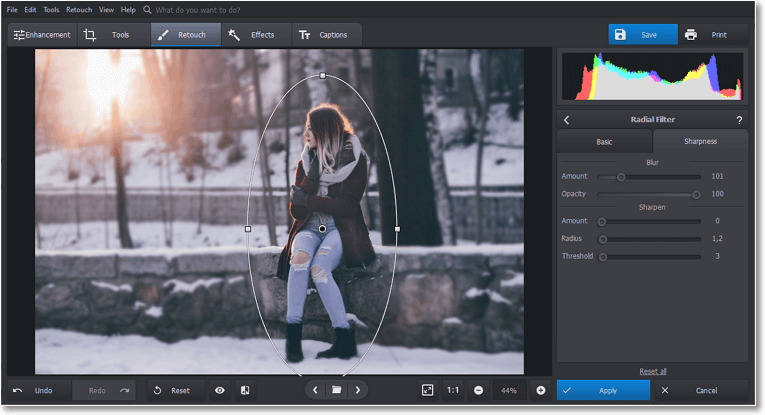
Blur the photo background by using the Radial filter tool
Want to see this background blurring technique used in a video? Then watch this short tutorial that has a bonus - a second method of hazing the background.
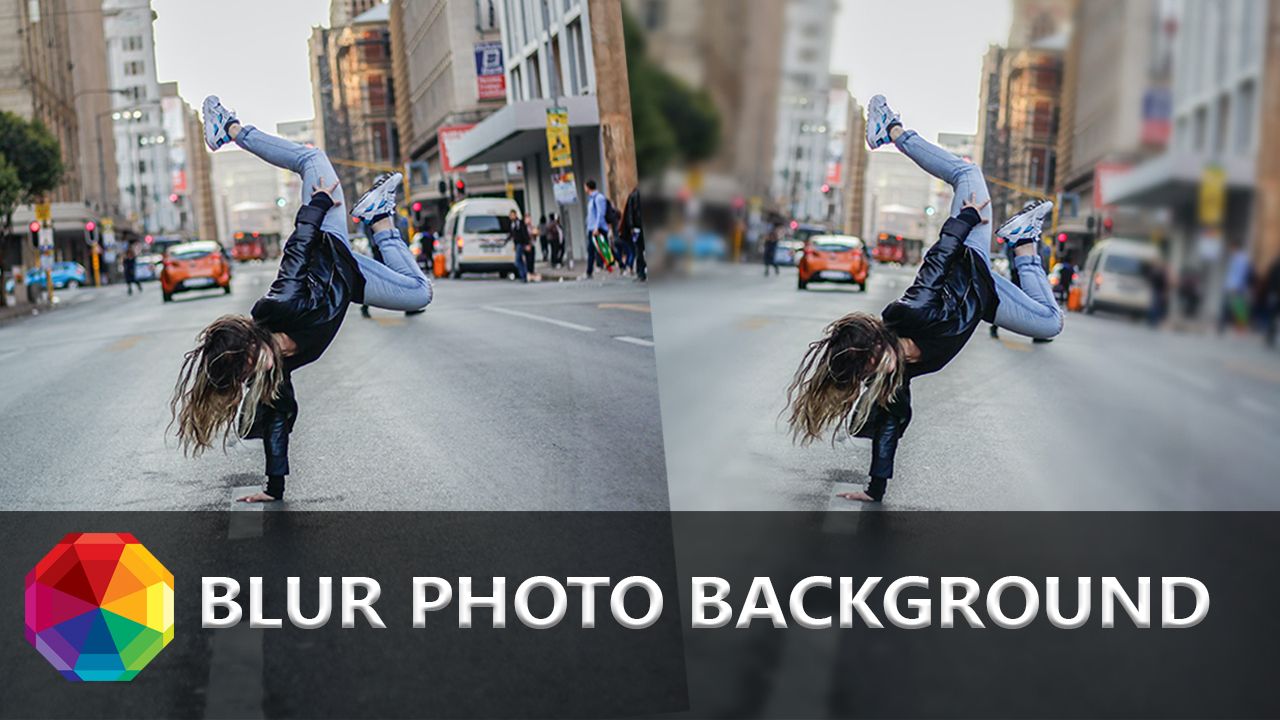
Well, wasn’t it just a breeze? If you loved how easy PhotoWorks is to use and navigate, then try it for yourself to see what other tricks it has up its sleeve:
If you like this slightly surreal dreamy effect, then give PhotoWorks a try. Use this software to add blur to a photo or just to a certain part of it.
Way 2. Blur the Background of Your Photo in Photoshop
Photoshop needs no introduction, and its possibilities are the stuff of legends. The software offers multiple ways to achieve that dreamy effect, but most of them are demanding of your skills and knowledge. Let’s learn how to blur the background of a picture on Mac and Windows with the least effort.
- Start the software and open your picture you will be working on. If you shoot in RAW, don't forget to convert RAW to JPEG without losing quality before editing it.
- Click the Select submenu and choose Select and Mask. Carefully paint over the area you want to remain sharp.
- Once your selection is done and as precise as possible, choose the New Layer with Layer Mask output and hit OK.
- Now blur the Background layer. Select Filter, then Blur and choose Gaussian blur. Adjust the effect radius to your liking.
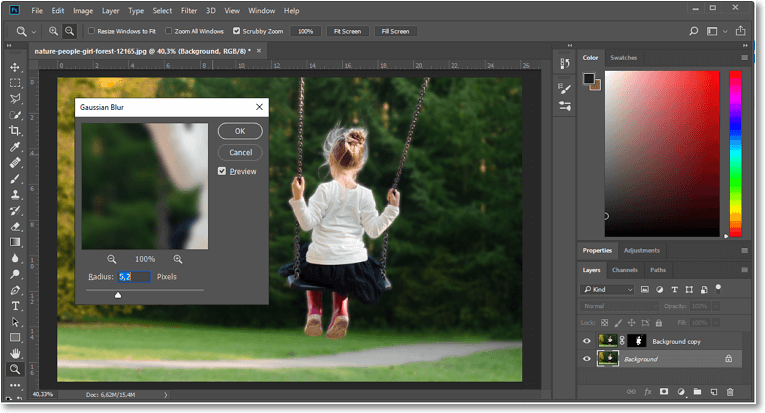
Blur the picture background with the Select and Mask feature
Well, look at this dreamy effect. That was definitely worth the effort. If you want to achieve an even more artsy result, look at the more in-depth guide on how to efficiently use Photoshop as a photo editor to blur background.
Way 3. Blur the Photo Background on iPhone
Are you a proud iPhone user? Then you know how efficient this brand’s cell phone camera is and how rich its tools are. Let’s look how you can create a blurred image background with your iPhone.
- Open the camera app and change its setting to the Portrait Mode.
- Make sure that there is enough light, then press the shutter button.
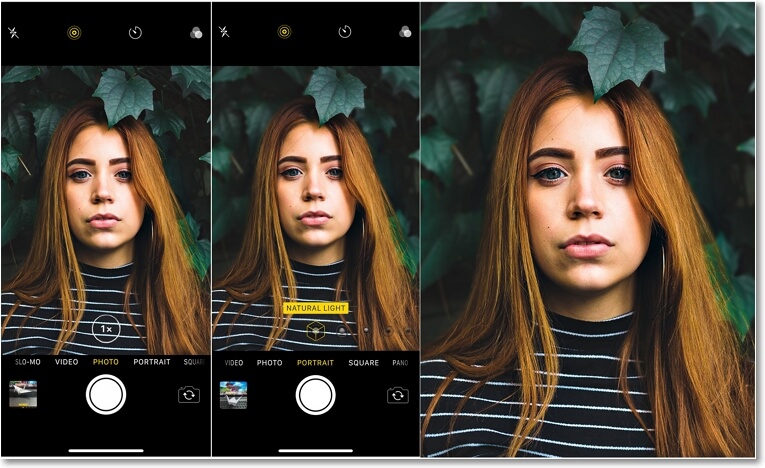
Use the Portrait Mode to blur the background of your picture
Well, that was as easy as counting 1-2-3. Now you have a photo where the focus is on what’s important, while the rest is artistically clouded. If your iPhone is devoid of this blur background maker, then make sure to read how else you can blur the background of your photo with iPhone.
Blurring the whole background is too drastic of a measure? Then consider the idea of subtly fading the edges of your image instead. Don’t quite know the technique? Find out how to blur the edges of a photo to shift the focus of attention to the center of the image.
Way 4. Blur the Background of Your Picture Online
Don’t fall under the impression that you can do awesome things with your pictures only by using desktop software. Let’s defy this notion and learn how to make the background of a picture blurry with an online service. We’ll go with BeFunky.com.
- Go to BeFunky.com. Switch to Create and choose the Photo Editor option.
- Import your picture either from your hard drive, your Google drive, or even your Facebook page.
- Now choose the Blur feature from the side panel on the left. Adjust the blur amount.
- Now switch to the Paint tab, adjust the brush parameters, then carefully brush over the areas you want to be in focus.
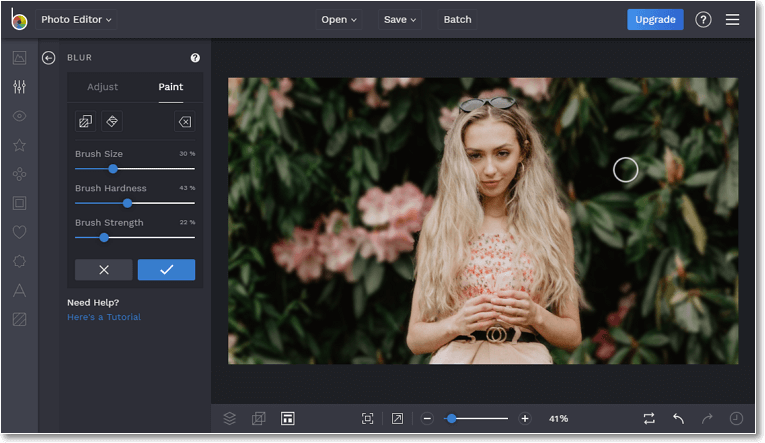
Blur the image background with a smart online application
So you see - even online services boast an extensive array of efficient photo editing tools. As a matter of fact, this was not the only method to blur your picture with BeFunky - make sure to read more.
Way 5. Blur the Background of a Picture on an Android-Based Phone
If you don’t own an iPhone but still want to blur the background of your image, there is a solution for you. Go with Auto Blur Background, an easy mobile app. Let's have a look at how you can achieve a dreamy effect with only your phone.
- Run the application. Then, choose your photo's orientation - portrait or landscape.
- Open the picture you want to edit. The app will analyze your image and blur its background automatically.
- Adjust the hazing level. If the focus needs to be tweaked, use built-in tools to redefine the edges.
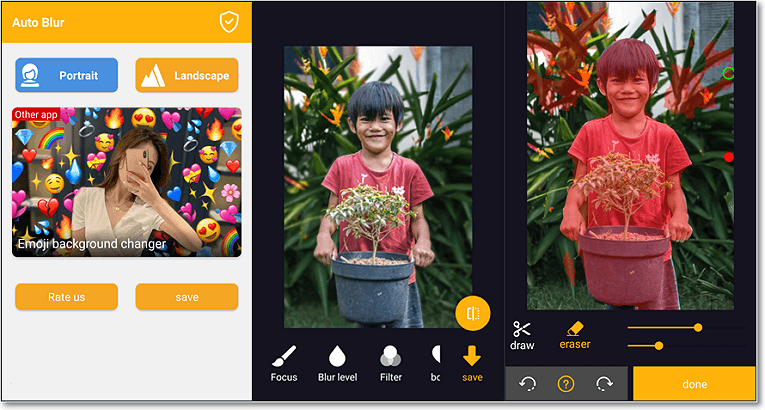
Just a single tap - and your picture has a clear focus area
And this is it. You managed to turn a regular image into a classy shot just by using your phone. By the way, Auto Blur Background also allows you to add a bokeh effect to make your shot even dreamier.
Want to try other artistic techniques like photo montage? Then learn how to superimpose images to create out-of-this-world artwork with no effort.
Way 6. Create a Blurry Background During the Shooting
The past methods mostly dealt with post-production picture editing. But is there a way to achieve the blur effect all while you take the picture? Let’s have look at how you can achieve this effect with a combination of the right gear, settings and perspective.
- Use a camera with a larger sensor. While a small sensor has a short focal length, a larger camera sensor allows longer focal length that is crucial to creating a better blur of the background.
- Place the subject farther away from the background. The more distance there is between the photo subject and its background, the blurrier the background becomes.
- Use a wide aperture lens - that is the absolutely necessary ingredient to creating a blurred background. Lower your f-value, for example by setting it at f/1.8.
- Try to blur the image background by using different angles to take pictures. You will be amazed by how easy it is to control the blur amount and type.

Use the right gear and technique to blur the photo background for a dreamy effect
Do you have a thing for blurred photography? Then be sure to find out about more ways to achieve that hazy effect.
Turn your otherwise unremarkable picture into a dreamy shot - all you have to do is to blur its background. Now you know a handful of ways to do it, so choose the best one to focus everyone’s attention on what’s truly important!

