
 Download
 Download
How to Make an Image Negative - Best Ways in 2026
Want to experiment with your photos and see how they would look in opposite colors of the spectrum? Or do you just want to make small details in a B&W photo clearer? Transform your images from positive to negative to reach the desired effect. You don’t need a professional for that. Just do it yourself in the comfort of your home!
In this tutorial, we will show you 5 ways of how to make a picture negative. You will learn to do that in photo editors of all kinds: online and offline, free and paid, advanced and beginner-friendly. We will also help you choose the best one according to your budget, skills, and preferences. So let’s move on to turning your pic unrecognizable, shall we?
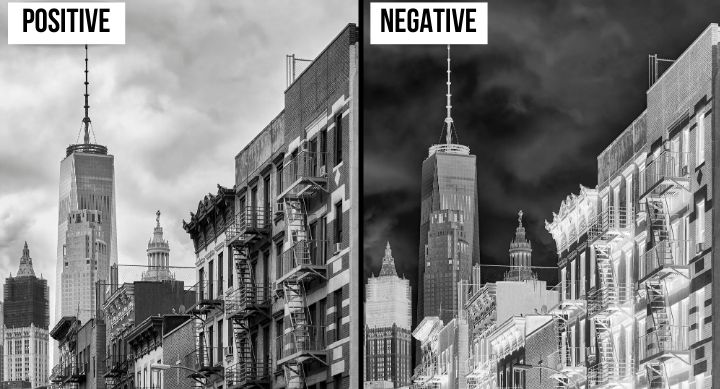
Positive VS negative picture
- Way 1: Use PhotoWorks on your computer
- Way 2: Go with Adobe Photoshop
- Way 3: Try Raw.pics.io online
- Way 4: Employ Microsoft Paint
- Way 5: Get the Negative Image app
We recommend that you read the tutorial for every program from our list. This way you won’t miss out on a program that could be your go-to choice.
Way 1: Make an Image Negative with PhotoWorks
Are you searching for a program with an intuitive interface and an easy workflow? PhotoWorks is that and even more. It is a multifunctional AI-powered tool that recognizes people and details in pictures. That makes working with the program easy for people of all backgrounds and skill levels. When it comes to transforming positive photos into negative and the other way around, it takes just a couple of clicks and drags to get a professional result. Check out the tutorial to learn how you can do that yourself:
Step 1. Run PhotoWorks on Your Computer
Get the free trial of PhotoWorks. Download the installation file and follow the wizard to install the negative image maker on your PC or Mac, and then open it.
Step 2. Import Your Positive Image
Click the Open Photo button on the startup screen and select your picture. Or just drag and drop it into the software.
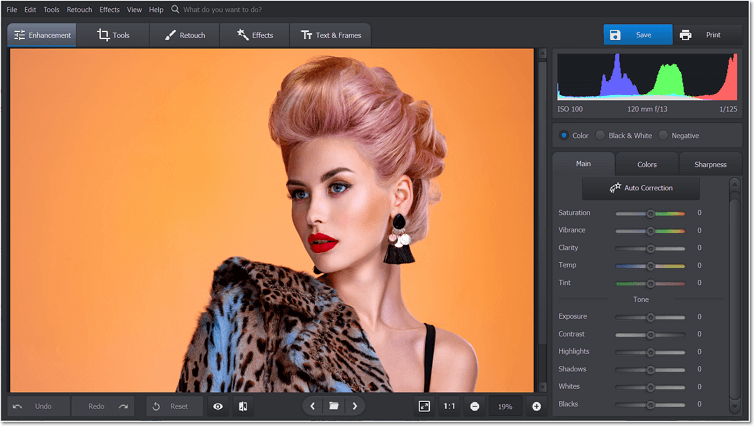
Choose the positive picture you want to convert
Step 3. Make an Image Negative
Stay on the Enhancement tab and click the Negative button. Your positive image will turn negative in an instant. You can repeat the same with your negative images to turn them into possitive ones.
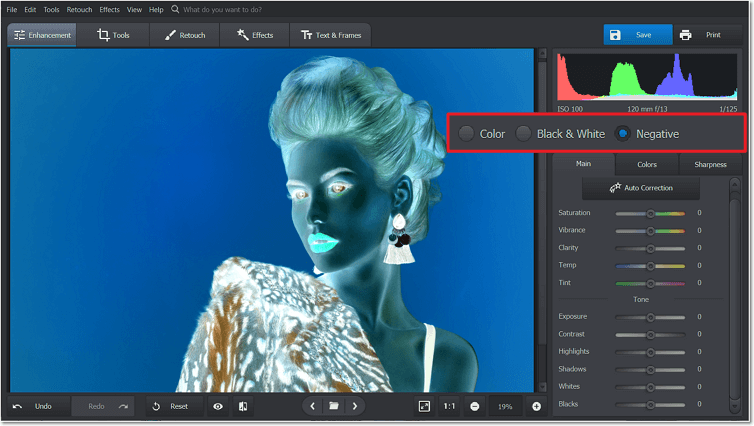
Create a negative image in a click
Step 4. Save Your Work for Sharing
Once you are done, click the Apply button at the bottom and then, hit Save. Export your image as JPEG, PNG, BMP, TIFF.
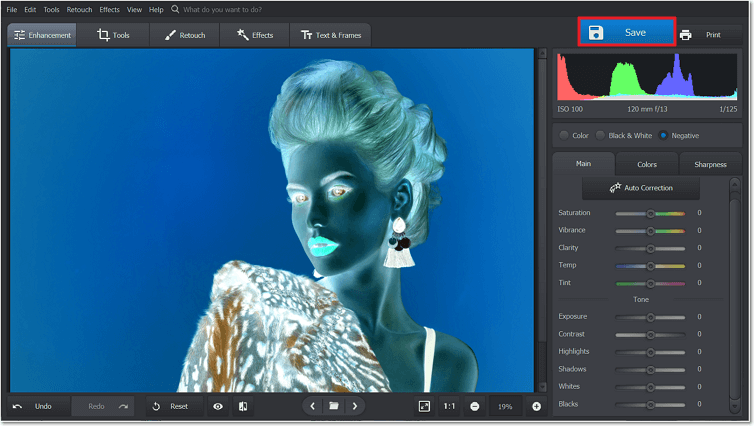
Import your stunning pic
There is nothing difficult in making your photo negative on Mac or Windows in PhotoWorks - the whole job can be done in less than a minute. So you can spend some more time trying out other features of the software. PhotoWorks is equipped with automatic tools for improving the quality of your image, a portrait retoucher, a background remover, and much more. Need to add a person to a photo or remove an object from a pic? PhotoWorks will help you do that. You can even make one color stand out in a black and white photo with it to add a unique artistic touch.
Way 2: Turn Photo into Negative with Photoshop
Are you studying to become a professional photo retoucher or simply have an Adobe Photoshop license? Then, this method is a good choice for you. Photoshop is equipped with tons of features that will help you perform all kinds of editing tasks from cropping and overlaying images to creating a painting. However, the tool is pretty complicated for beginners to master due to its confusing interface. The same goes for making images negative. If you have never used Photoshop before, you can figure out how to do that only with a tutorial.
- Open your image. Run Photoshop on your computer and open the picture you want to edit. Just click File and Open.
- Make your pic negative. Press Control+I if you have a Windows PC or Command+I on Mac, and the elements on your image will turn to the opposite colors on the spectrum. If you want a B&W negative photo, go to Images menu > Adjustments > Hue/Saturation, choose Saturation, and lower it. Go to Layers and select Soft Light.
- Export your negative pic. Go to File > Save As and choose a format to save your picture in. Then, choose a folder to export it to.
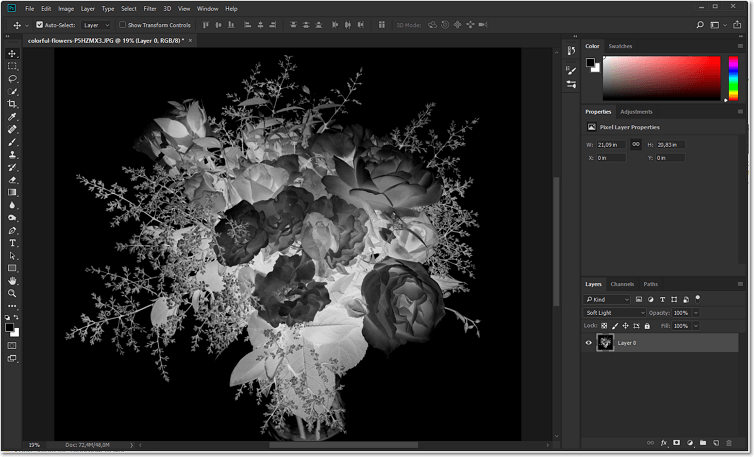
Turn a picture negative in the advanced Photoshop
Want to learn another way to convert a positive picture into a negative one? Check out the Photoshop negative image tutorial.
An experienced person wouldn’t mind all the steps it takes to make a photo negative in Photoshop. However, it might be time-consuming and uncomfortable for an editing newbie to work with such an advanced program. Besides, the tool has an expensive monthly subscription which not everyone can afford to pay.
Way 3: Use Raw.pics.io to Make Picture Negative
Prefer editing your images online? Don’t want to download any extra programs to your computer? Go with Raw.pics.io, a free web tool for making photos negative. It doesn’t require you to create a profile in it, is intuitive in use, and has a clear interface. However, using this tool might not be a great idea for people with a bad internet connection or for those who do not like giving access to their photos online. Check out the detailed tutorial on how to turn images negative with it if connection and privacy issues are not your case:
- Open your picture. Once you find yourself on the startup screen, drag and drop your image in or click the yellow button to open it from a file.
- Convert your pic into negative. Go to Edit. Scroll down the menu to the Invert tool and apply the negative photo filter.
- Save your photo. Go to File and click Save. Choose to export in JPEG or PNG. Then select the quality, size, and density of your picture.
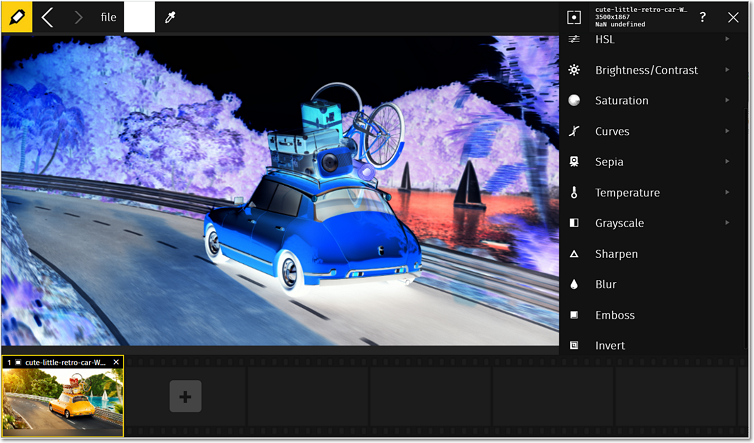
Convert your image into a negative one online
Want to learn more about this way of creating a negative picture? Visit the official Raw.pics.io tutorial.
With Raw.pics.io, it is easy to make a photo negative. Besides, it offers a nice pack of other essential editing features. However, in case you prefer to keep your media private, you will not feel comfortable with this tool. And if you are not confident about your internet connection or want to edit on the go, the tool might not be the best solution for you either.
Want to use your negative picture as a collage background? Or do you want to lay it over some other images? Learn how to put one picture on top of another in a couple of clicks.
Way 4: Turn a Picture Negative in Microsoft Paint
Want to go with a tool that you are already used to? Make your image negative in the good old MS Paint! All Windows users have this program built in, so there is no need to surf the net in search of a new program. However, this tool is not available to Mac users and is limited in editing features. Check out the step-by-step guide to learn how to make your image negative in Paint:
- Import your photograph. Open MS Paint. Go to File > Open to import the picture you want to edit.
- Make your photo negative. Switch to the Home tab, click the Select menu, and choose Select All. Click Invert Color in the pop-up menu or use the shortcut: Control+Shift+I.
- Save your picture. Go to File and choose Save As. Pick a format for your image and the file you want it to be saved in.
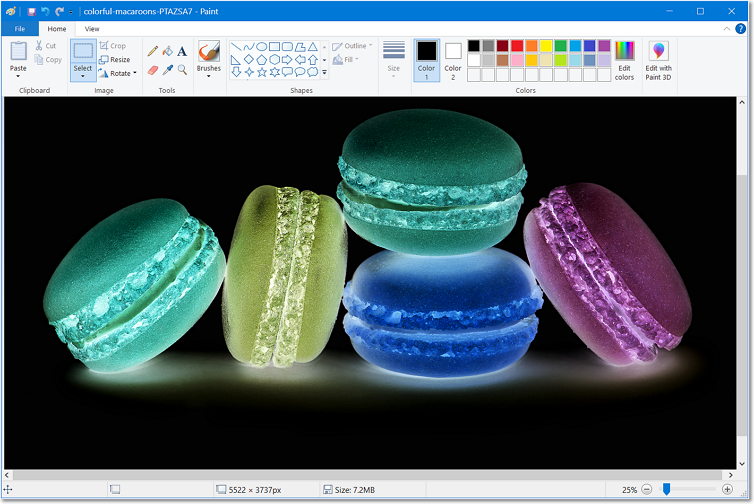
Use the good old MS Paint to make your image negative
We showed you how to make your image negative on Windows 7, 8, and 10. Have an earlier version? Check out how to change the colors of your image to the opposite on the spectrum in a detailed tutorial.
Sure, MS Paint is the tool even children are familiar with. Besides, most people already have it on their computers. However, the results you get there might turn out primitive and unprofessional. Besides, there is not much you can do in MS Paint as a photo editor. So in case you are looking forward to getting a cool photo for posting online, this tool might not work out for you.
Want to edit and color correct your picture as a whole? Discover how to enhance a photo like a professional photographer in a few slider drags.
Way 5: Go with an App to Make a Photo Negative
Are you an on-the-go photo retoucher who prefers smartphone apps to desktop programs? Then, you might like Negative Image, an Android app designed specifically for turning positive images into negative ones. There is a free version of this app but Invert is the only tool available in it. Besides, regular pop-up ads can get quite annoying. Read the tutorial to learn how to turn your picture negative in this app:
- Open your photo in the app. Run Negative Image on your smartphone. Select the photo icon on the startup screen.
- Make your photo negative. Apply the Invert effect to the whole image. Or select the area you want to apply it to.
- Save your picture. Choose the Save icon. Export the image to your photo gallery.
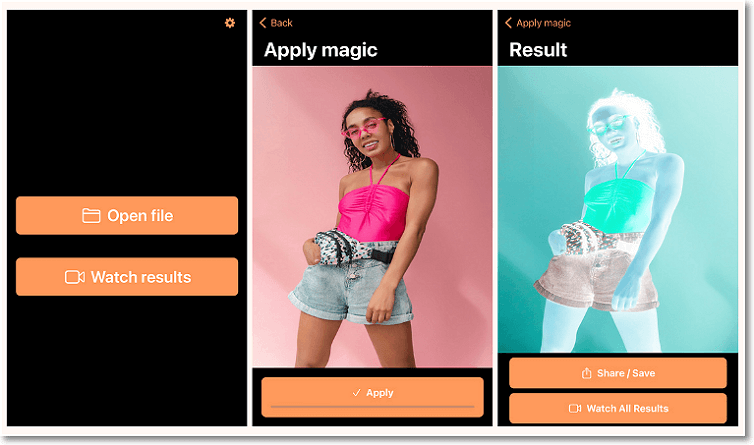
Apply the negative picture effect in a smartphone app
Turn your own pictures negative in the Android app now. Download Negative Image from Google Play.
Negative Image is easy to use, so you can quickly perform the task in it. And it is useful that the app allows making parts of your image negative. However, the tool is limited in its functionality, so consider using an alternative that can allow you to do more post-production after turning your picture negative.
Now that you have got acquainted with 5 negative photo editors, it is time to choose the right one for you personally. Want an aesthetically pleasing online tool? Go with Raw.pics.io. Are you conservative in your choices and want to use a program you know well? Employ MS Paint. Or are you an editing genius? Then, Photoshop is the tool to use. Want a universal tool? Get PhotoWorks.
Apart from being a handy negative picture editor, PhotoWorks is a reliable retouching helper packed with manual and automatic features. Thanks to its thoughtful design and an abundance of tools, it is clear and enjoyable for both professionals and beginners. What’s more, the program comes in license versions both for long-term users and occasional editors. So no matter your skills and needs, PhotoWorks is a great choice.
