
How to Make a Picture Black and White - Top 7 Ways in 2026
Puzzled about how to change a photo to black and white? Confused by different sliders in your current editor? No matter how many times you edit it, the picture just turns into a dull gray mess? Well, get ready and take a deep breath: I’ve got 7 different ways that will make this task pretty easy.
First, why black and white? Isn’t this a downgrade? Many of us consider black and white photos to be a relic of the past. However, sometimes, a colorless pic can show much more details than the one with colors. Highlight a texture, focus on silhouettes, play with the contrasts between objects, add a light noise for retro mood - no colored picture will let you do that.
Now, what about turning photos into black and white? How to do that and not break a sweat? Here are 6 different programs that will cope up with this task in no time. Keep on reading and discover a method that suits you.
Here they are:
- 1. Apply black and white effect to images in PhotoWorks
- 2. Make a black and white picture in Paint
- 3. Turn your photos into grayscale in Microsoft Publisher
- 4. Convert your images to black and white with Photoshop
- 5. Make a photo black and white in Snapseed
- 6. Create black and white effect with Movavi Photo Editor
- 7. Turn an image black and white with LunaPic
Way 1. Apply Black and White Effect to Images in PhotoWorks
Imagine that you can turn your photo into grayscale just by ticking a box. No confusing dropdown lists or menus. Is that not a dream anymore? For sure! PhotoWorks is an easy-to-use picture editor for Windows 7, 8, 10, 11 and Mac, that has a pretty simple interface and a whole lot of different tools. For instance, if you are not sure about the name of the tool you need, just type some keywords into the search field and the necessary option is found.
Here are the steps for making a black and white image in PhotoWorks:
Step 1. Start PhotoWorks
Run the program and import your picture.
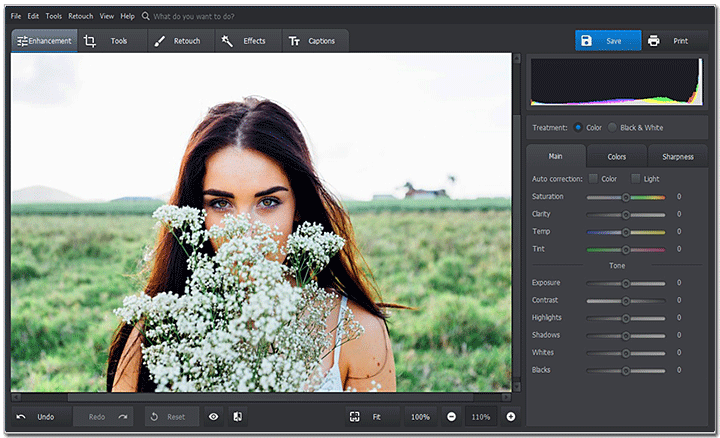
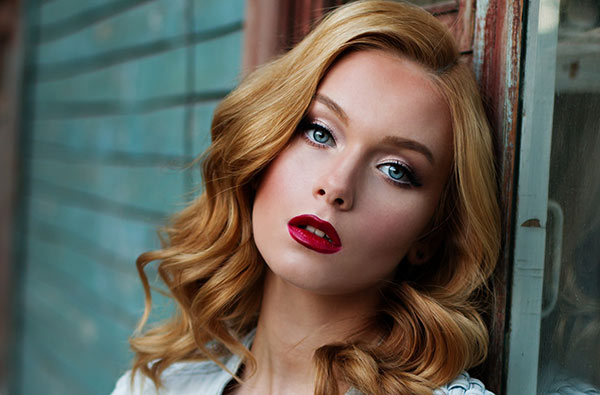
Choose a photo for applying the black and white effect
Step 2. Turn Photo Black And White
Go to the Enhancement tab and check the Black and White box to remove the colors.
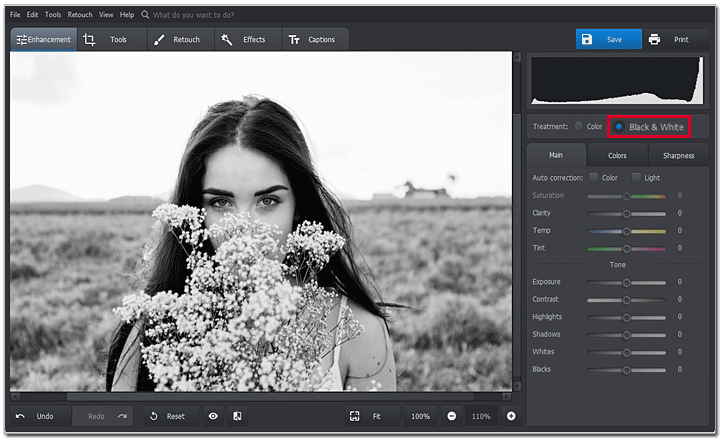
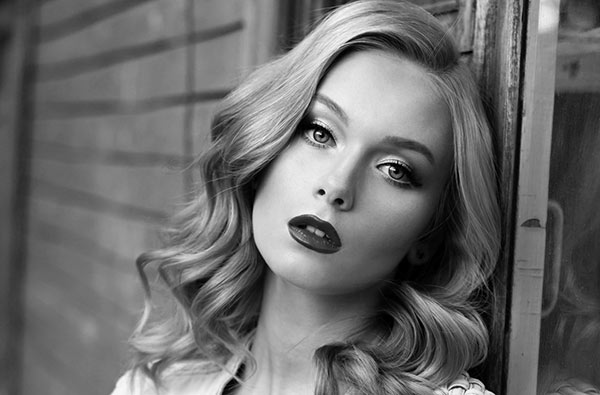
Just check the Black & White box to turn your image grayscale
Step 3. Move the Tone Sliders for Further Adjustment
If you need to tweak the result a bit, use the Tone sliders. For instance, if you have an overexposed picture, you can decrease the brightness by adjusting the Whites and Highlights sliders, while Shadows and Blacks let you bring out the darker areas.
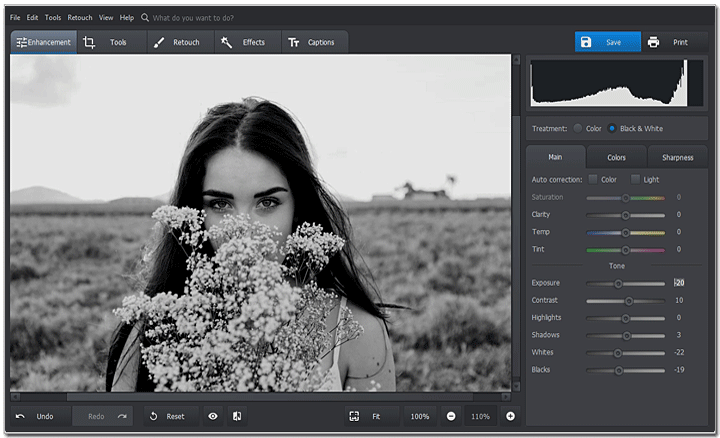
We are decreasing Exposure to make the bright areas darker
Step 4. Save Your Work
When it’s done, click Save to keep the changes.

If you like the result, save your black and white image
Got a bit noisy background after turning your image black and white? It's not a problem, just blur these areas to hide the flaws. Check out the guide on how to blur the background of a photo. PhotoWorks has an easy-to-use tool that lets you blur the background in a couple of clicks.
Up to more experiments with your picture? Want to learn how to make photos look vintage? You don't have to deal with dull sliders and numbers - just check out the Effects tab in PhotoWorks. There you will find dozens of gorgeous presets that will make your photo look retro-perfect without any editing. We recommend trying out the Vintage and Movies categories. Can't wait to check it all out? Get started with a free trial today!
 Download
 Download
That sounds really easy, doesn’t it? If you want to highlight certain objects in your grayscale photo to make it more eye-catching, be sure to check out the guide on how to add color accent to a black and white photo. Apart from turning your images grayscale, you can discover a whole lot of other creative possibilities while using PhotoWorks: from simple brightness and contrast correction to complex retouch for portraits and landscapes. Just a few clicks and your image is ready to be edited!
Way 2. Make a Picture Black and White in Paint
If you have no desire to purchase an image editor for just a few pictures, then check out other, free programs. They may have fewer tools to play with, but can definitely be a lifesaver in some situations. For instance, MS Paint. Unlike other special editors, you don’t have to pay for a yearly subscription or even download anything. If you’re using, let’s say, Windows 7 or higher, Paint should already be pre-installed with the system.
Here are the steps if you decide to try out Paint:
Step 1. Open Paint
Start Microsoft Paint and import your image.

The interface is very simple, so this method is suitable for almost any user
Step 2. Go to the Image Menu to Find the Black & White Converter
Open the Image menu and choose Properties. Now check the Black and White box.
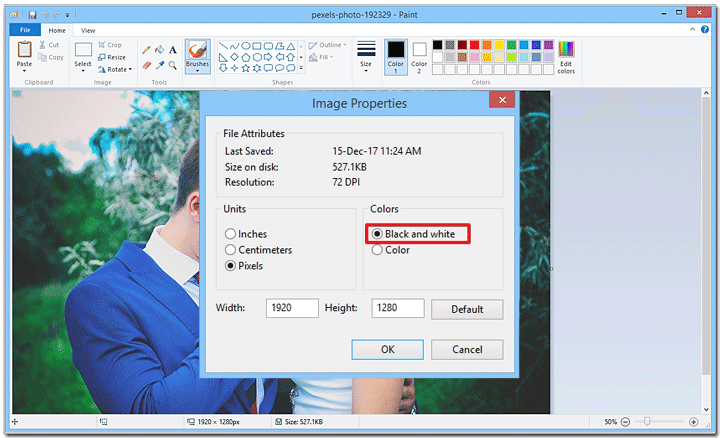
If you don't have the black and white option, then get a newer version of Paint
Step 3. Save Your Work After Changing Colors
Now click the Save icon to keep the new image.

Don't forget to save the grayscale image by hitting this small icon
Paint is a really nice and useful program but don’t expect any miracles since it’s just a built-in Windows application. But if you are running the latest Windows 10 version, you can try out Paint 3D that has an extended toolkit and offers new possibilities for editing your pictures.
Way 3. Turn Your Photos Into Grayscale in Microsoft Publisher
If you’re into making various calendars, greeting or business cards in special software like Microsoft Publisher, then this method is for you.
For those who don’t know, Microsoft Publisher is actually a part of the MS Office package, that we all use quite often for making presentations or writing documents. This one allows you to create different designs and layouts for further printing. What’s good, you can also work with images and edit them in a basic way.
If you’re using Publisher, here is how you can turn your picture into grayscale with this program:
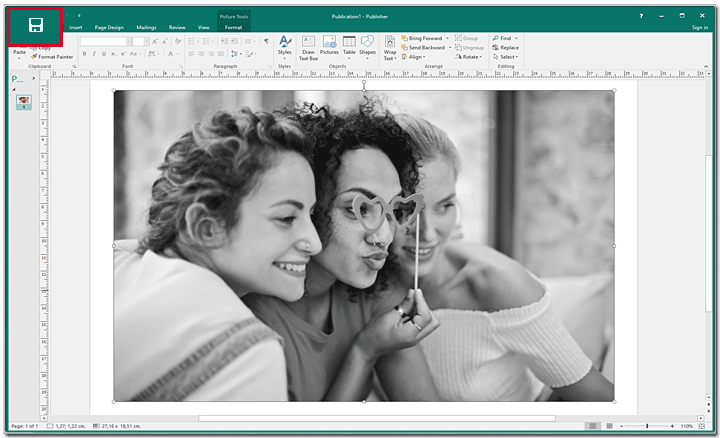
Step 1. Launch Microsoft Publisher
Start the program, create a new project and import your jpg photo. Position it on the page.
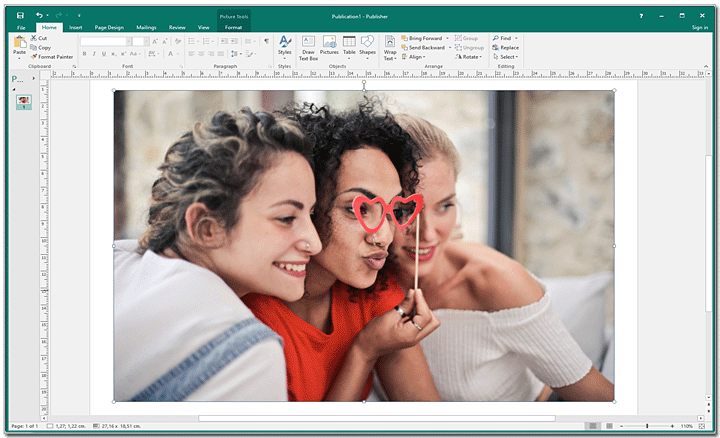
First, pick a page layout and then drop in the image you want to turn grayscale
Step 2. Make Your Image Black and White
Left-click your image to open the editing panel. Choose Recolor. Now select Grayscale from the dropdown list.
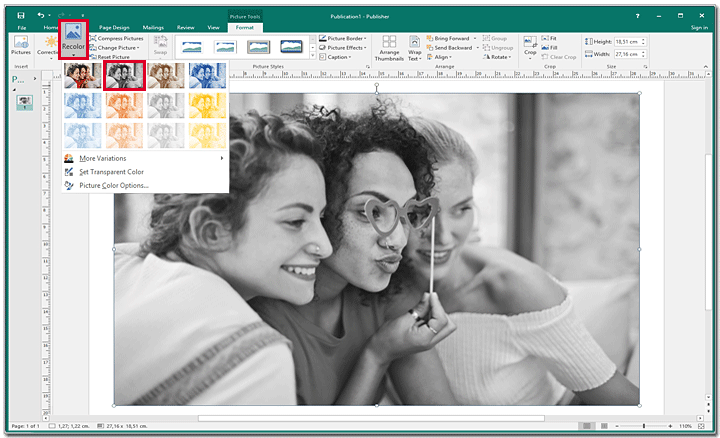
Publisher offers several color filters, we need the black and white one
Step 3. Apply the Changes
Satisfied? Click Save to keep the edited image. Save it under some other name if you need to have the colored picture too, and perhaps tweak it once again later.
There is no filter adjustment, so just save the grayscale image
Now let’s be honest, Microsoft Publisher is not an image editor. If you look for a complex retouch where applying the black and white filter is only a step in-between, then try other programs. However, if simple tweaks for a card or print is your goal, Publisher will help you achieve it for sure.
Way 4. Convert Your Images to Black and White with Photoshop
If you ask a person to name any image editor he or she knows, in 99% of all cases, Adobe Photoshop will be the first on the list. This program is truly considered to be a top-rated software for photo retouching. With it, you can bring to life almost any creative ideas.
For all Photoshop users, here is the guide on how to make a photo black and white on Mac and Windows in that program:
Step 1. Open Photoshop
Launch Photoshop and open the image you want to edit.
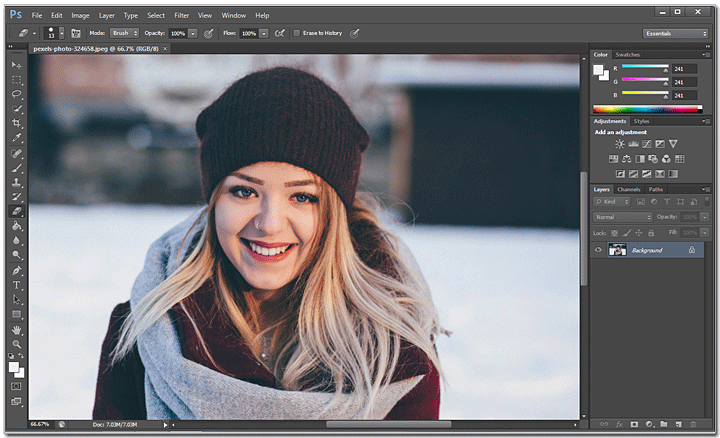
Photoshop has a different interface in each version, but the workflow is the same
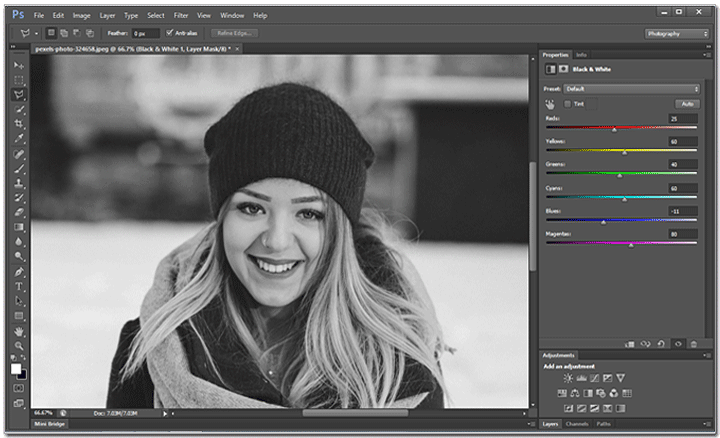
Step 2. Create a Black and White Adjustment Layer
Go to the top menu and choose Layer > New Adjustment Layer. Then pick Black and White.

Photoshop creates a new layer without damaging the pic, so you can tweak it as you like
Step 3. Move the Sliders to Adjust the Effect
Move the color sliders to lighten or darken certain areas. Alternatively, save some time and pick a pre-made preset. Don’t forget to hit Ctrl+S and save the new image.
Merge the layers and save the black and white picture
If you are working with Photoshop CS2 or Photoshop Elements, the Black and White mode described above may not be available for you. In this case, I suggest creating the Adjustment layer in the Saturation mode.
All these Adjustment layers and sliders for different colors may sound tricky for some users. But once you get into it, you will make the edits on the go. The trick is, do you want to get into this? If you don’t, look for some other black and white picture maker.
Way 5. Make a Photo Black and White in Snapseed
Prefer editing your images on the go with your mobile phone or a tablet? Then try Snapseed. This user-friendly app is available for both Android and iOS. In comparison with other mobile photo editors, Snapseed is actually quite powerful and offers you a vast toolkit for retouching portaits and landscapes. There are content-aware brushes, smart presents, cool-looking filters and what not.
Let's see how you can quickly turn your image black and white with Snapseed:
Step 1. Open Snapseed
Start the app and select the image you want to edit.
Tap on the screen to open your photo
Step 2. Select the Black & White Filter
Tap on the pencil icon to open the tools panel. Pick the the Black & White filter from the list.
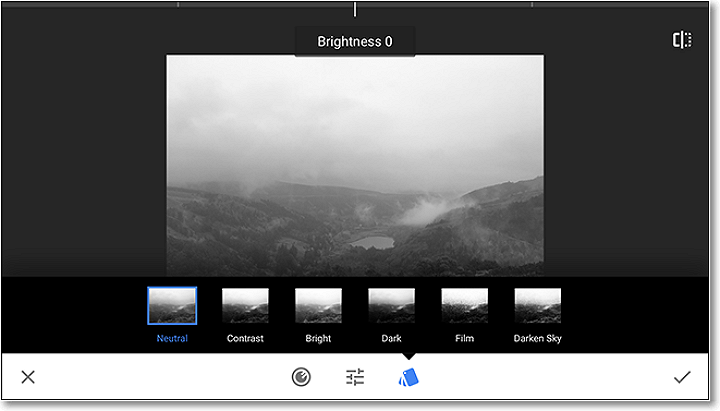
There are 6 filter presets to choose from, depending on your goal
Step 3. Fine-Tune the Effect Settings
If you like the default result, save your photo. Alternatively, you can adjust the brightness, contrast and grain of the effect using the corresponding sliders.
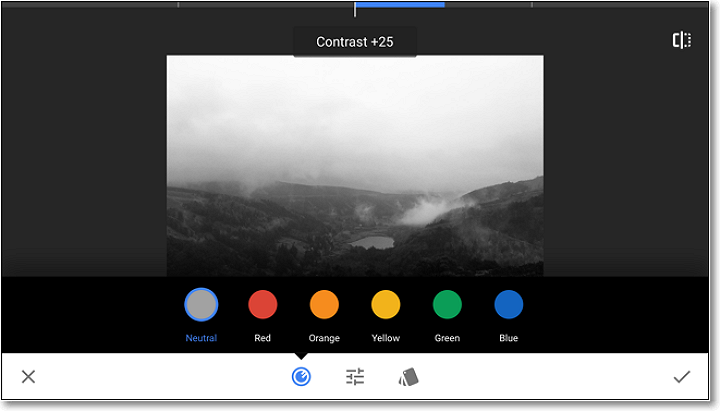
Apply the red Color Filter to darken blues and greens
Overall, this app is a good alternative if you often take images with your phone and don't want to mess with installing programs on your computer. If you want to learn more about the process, check out the full guide on applying the grayscale filter in Snapseed. However, if your photos require deep enhancement together with the black & white effect, then look for a different way.
If you want to make a photo look old and worn, then applying the black and white effect might not be enough. Try experimenting with sepia filters, film grain, etc.
Way 6. Create Black and White Effect with Movavi Photo Editor
Want a quick and easy way to edit your images? Movavi Photo Editor offers intuitive tools for enhancing your photos. The software can transform any image into a masterpiece. You can use pre-made presets, AI-powered tools, add filters, restore old photos, and more.
Here is how to make your image black and white with Movavi Photo Editor:
Step 1. Open Movavi Photo Editor
Download and install Movavi Photo Editor on your computer. Open the program and click on the Add image button to select the photo you want to edit.
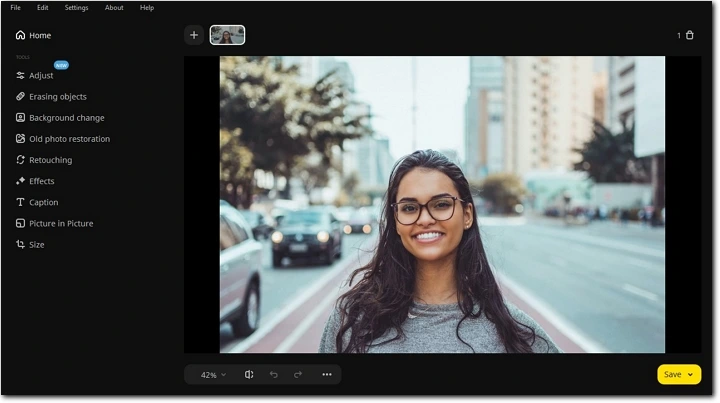
Movavi Photo Editor has a simple and intuitive interface
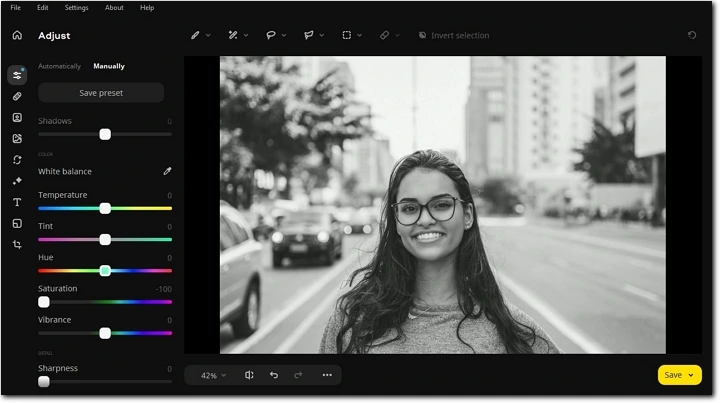
Step 2. Go to the Color Options
In the Adjust tab, click Manually and scroll down to the Color section to find the Saturation option.
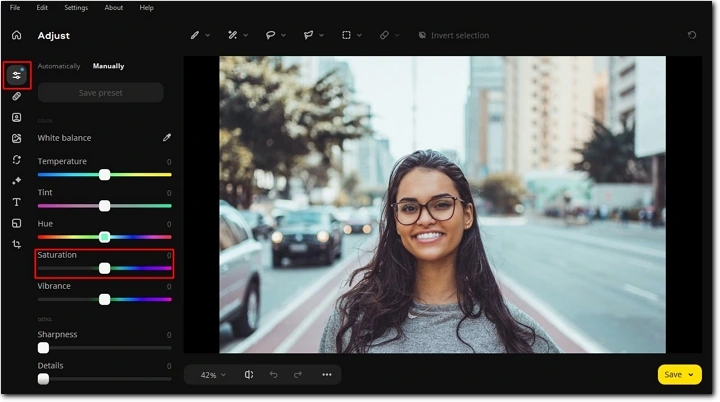
Adjust color manually or use presets
Step 3. Move the Slider to Create the Black and White Effect
Move the Saturation slider all the way down to -100. This will turn your photo into black and white. Save the edited image by clicking on the Save button.
Create the grayscale effect and save the image
Another quick way is to open the Effects tab and select the Grayscale filter to instantly convert your image to black and white. You can also adjust the intensity of the effect by moving the slider.
Way 7. Make an Image Black and White with LunaPic
Tired of using complicated photo editors? Want to try something simpler? Check out LunaPic. This is a web-based image editor that can handle different tasks: from basic crop to complex object removal. Since it's a website, you can access it whenever you need using a smartphone or a different PC.
Here are the steps for making your picture black and white in LunaPic:
Step 1. Select Your Photo
Pick the image you want to edit. You can either upload it from your computer or paste in a URL.
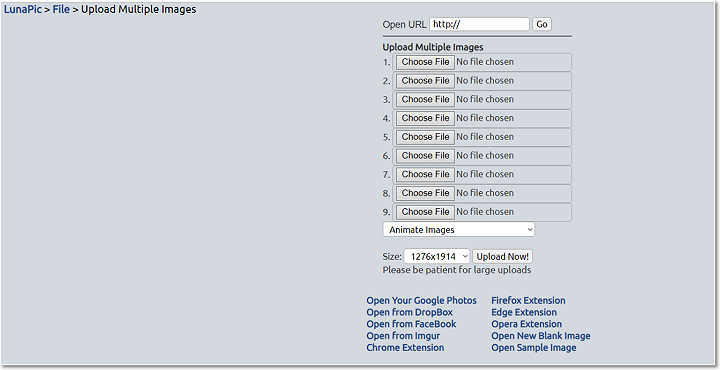
Pick your colorful photo
Step 2. Apply the Black & White Filter
Once your photo is uploaded, go to Filters and pick Black & White. The filter will be applied automatically. You can use the slider to adjust the effect strength.
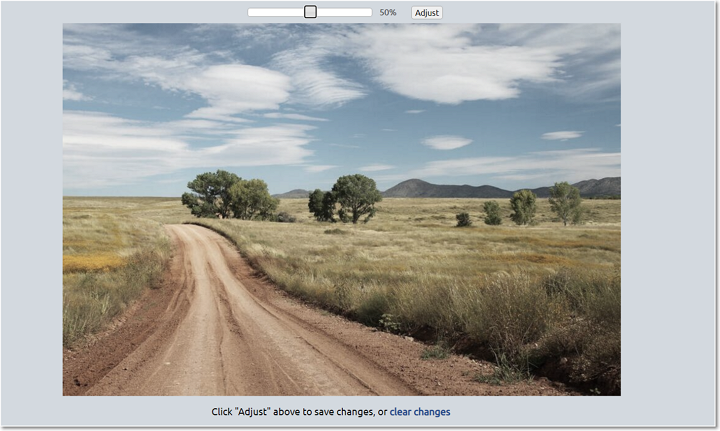
Drag the slider to the left to weaken the effect
Step 3. Save Your Image
Satisfied with the result? Click Save to keep the new image. If you want, you can share it directly on Facebook, Twitter, Imgur and other services.
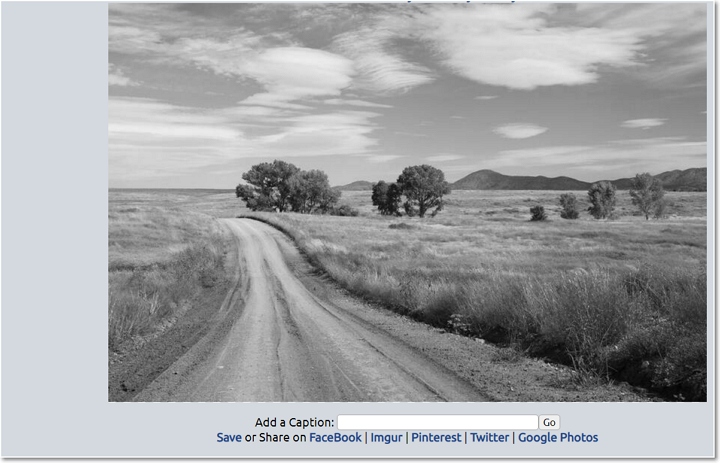
Click Save to get your new image
In general, LunaPic is a cool program with a simple workflow. However, if you are concerned about your privacy and avoid using your pics in the Internet, then look for an offline image editor.
Anyway, now you know a few ways to turn color photos into black and white. Time to decide which one is suitable for you, grab your picture and make it happen!
