
 Download
 Download
Best Face Swap Software for PC
Need a good way to merge two photos? Or just want to make a funny joke with your friend’s face? Swap the face and turn him or her into a fabulous celebrity or make your friend a part of a famous meme! You'll find all you need to know in this article оn how to insert a face into another picture.
Before you get down to step-by-step guides for various offline and online face swappers, consider their compatibility and usability. Learn more from the comparison table below:
| Program | Version for Windows | Version for Mac | Ease of Use |
|---|---|---|---|
| PhotoWorks | |||
| Photoshop | |||
| GIMP | |||
| Face Swap Online | |||
| Auto Face Swap | |||
| Faceswap |
How to Do a Face Swap on PC - Best 6 Ways to Try in 2026
Some people prefer the all-mighty but complicated Photoshop, others - less versatile but simpler image editors. Read on to learn more about each way and you will certainly find the best face swap software for PC. Let's take a closer look!
- Way 1. Insert face into another picture with PhotoWorks
- Way 2. Replace a face in Photoshop
- Way 3. Use GIMP to switch faces
- Way 4. Put face in a picture online
- Way 5. Change face with Auto Face Swap
- Way 6. Use Faceswap by Deepfakes software
Way 1: Insert Face Into Another Picture With PhotoWorks
Need a face swapper for your PC packed with features but easy to use at the same time? PhotoWorks is a perfect choice then! It has a simple and easy-to-navigate interface, with a fancy background and object replacement feature. Now you can forget about horrible selections that made you sweat and your hands hurt. PhotoWorks allows you to create photo manipulations offline in just a brush stroke.
Hard to imagine, sounds too good? Well, it's a reality - here are the steps:
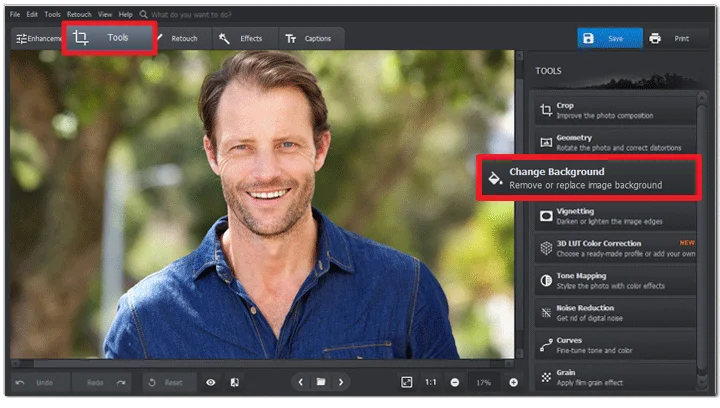
Step 1. Choose the Change Background feature
Open a photo with someone’s face. Now go to Tools and choose the background removal option.
You can use a photo even with a complicated background
Step 2. Select the Face
Pick the Object brush and highlight the face with the green line. Yes, just put a few strokes and it's done!
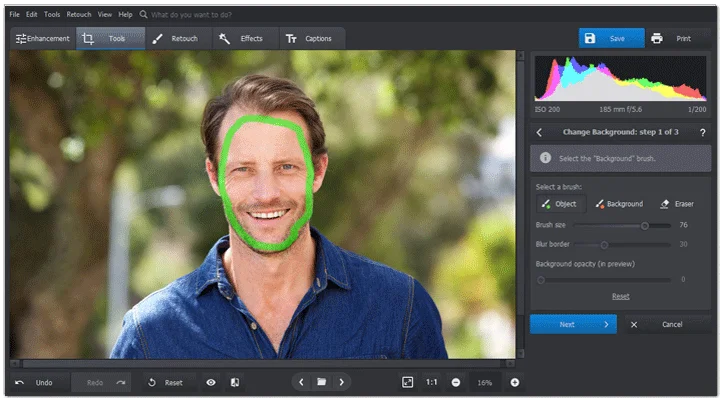
Mark the face with a couple of strokes
Step 3. Mark the Background
Switch to the Background brush and highlight the area you want to remove with the red color. PhotoWorks will separate the object from the background. Adjust the background opacity to see if there are any selection mistakes and click Next.
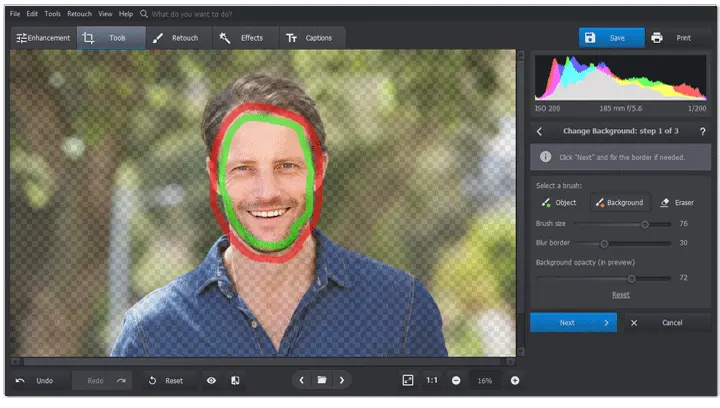
Point out the background
With PhotoWorks, you can not only swap faces, but make a photo montage that will amaze all your friends and family. Use the convenient selection brushes to seamlessly glue different pictures together.
Step 4. Swap the Face
Correct these mistakes if necessary. Now place the face on the new background: upload your image and position the main object as you like. Blur the edges to make the creation look more realistic.
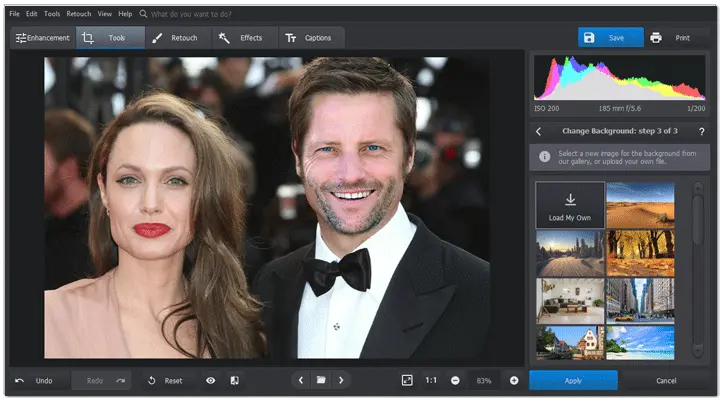
One click and you have a photo with Jolie
Need some visual guidance? Watch this video showing how simply you can swap face and body with PhotoWorks:
Looks cool? Then download the free trial version to test it out with your photos:
As you can see, PhotoWorks suggests a different way to swap things, making selections and manipulations really enjoyable. Want to polish your work a bit more? PhotoWorks has other cool features worth checking out. Use smart Auto Correction to build up the lighting, sharpen blurry image, remove skin flaws with Portrait Magic and make a picture look old with one-click effects.
Way 2: Do a Face Swap in Photoshop
Are you a fan of the all-in-one Photoshop? This photo editor is jam-packed with various features. You can create almost anything: from simple tweaks here and there to deep photo retouch and manipulations, replacing faces included. However, this freedom has a price - a monthly subscription. There are different plans, but still, you have to pay some money. What’s more, Photoshop has a very steep, better to say, even “rocky” learning curve. New users can easily drown in different modes, layers and filters.
So, if you are ready to face these minor inconveniences, then let’s see how to put your face on a different body with Photoshop:
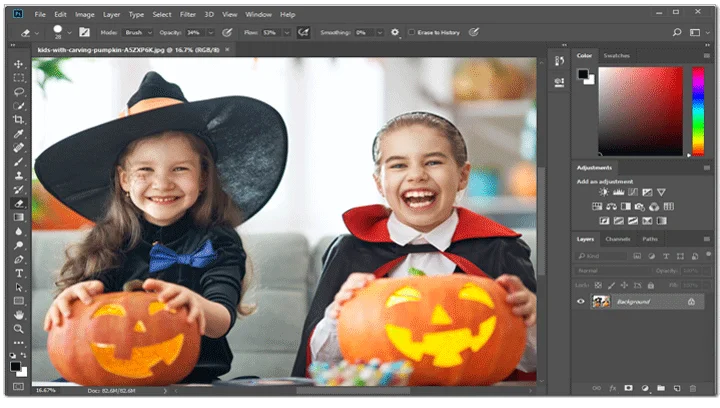
Step 1. Add Face to a Photo
Open a picture with the face. Go to Select > All, then press CTRL + C on your keyboard to copy the selected picture. Open your background image and press CTRL + V to paste the pic there.
Copy and paste your picture over the background
Step 2. Erase the Unnecessary Parts
Here, we decided to swap children's faces from one picture to the other so they look directly into the camera. Select the freshly pasted layer and drag and drop it to position the face. Pick the Eraser tool and remove everything except the face. You can adjust the eraser size to make the process more convenient.
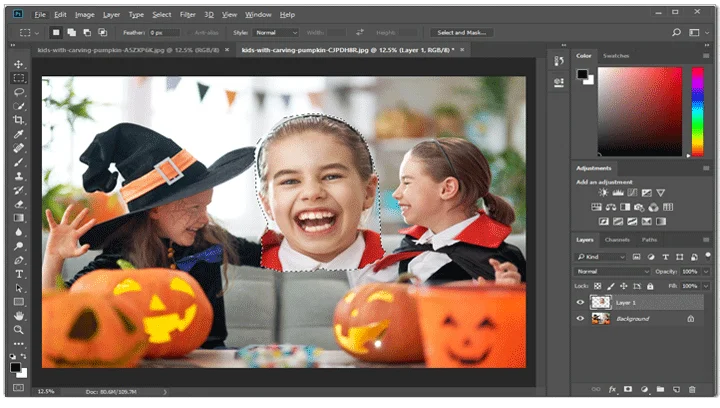
Erase everything except the face
Step 3. Fix Minor Flaws
Use Healing Brush to mask some flaws and make the face swap look natural. Just select the brush and paint over the problem areas.
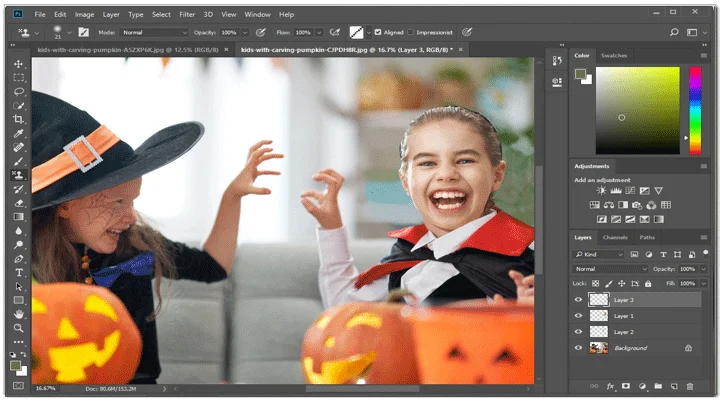
Get rid of minor imperfections like hairs with the Healing Brush
Need a more detailed instruction? We suggest checking out DPS how-to for replacing a face in Photoshop then. The six steps described there will definitely help you out!
Photoshop is one of the most popular image editors. Still, working in it requires some skills. Layers, tools, key combinations… Not a real time saver, you know. So if you need to do a face swap on a PC in a few minutes, it’s better to look for a different way.
Did a cool face swap but a date stamp in the background is stealing attention away from the main subject? Learn how to remove timestamp from a photo in a few clicks!
Way 3: Use GIMP to Switch Faces
GIMP is like Photoshop's younger brother. It has all the necessary tools, including layers, masks and layer modes. Practically everything you can do in Photoshop, you can do in GIMP. Its biggest advantage, though, is that this program is free for use. However, you may find the interface a bit all over the place, even in comparison with Photoshop. Without a proper guide, new users may be overwhelmed with many icons, buttons and windows.
Don’t get discouraged - let’s see how you can edit photos offline with GIMP:
Step 1. Select the Paths Tool
Open both photos. Select the one with the head you want to copy. Now choose the Paths tool.
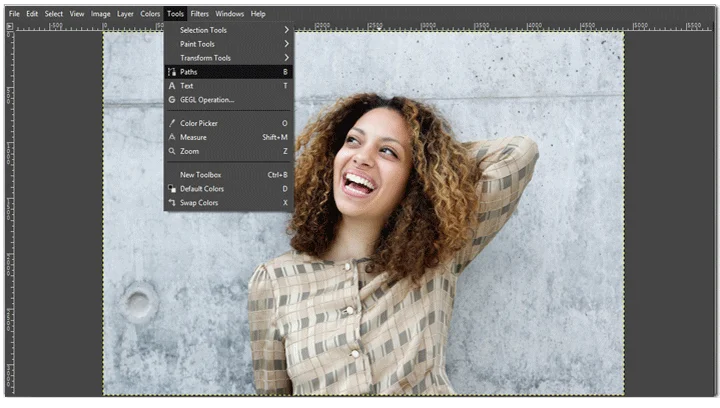
We will use the Paths tool for making a selection
Step 2. Trace the Object
Start tracing the face: just left-click to place the first marker. Each click will make a marker, so no need to hold the left mouse button. Then continue clicking until you create a complete loop.
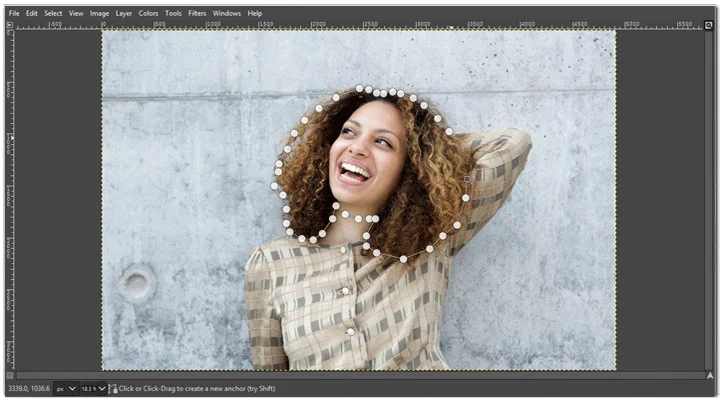
Comtinue placing markers to select the whole head
Step 3. Select and Paste the Face to Your Picture
Now click the Selection from Path button at the bottom. GIMP will create a selection based on your tracing. Press CTRL+C on your keyboard to copy it, then open the second picture and press CTRL+V to superimpose the selected image. Position the face on the new image.
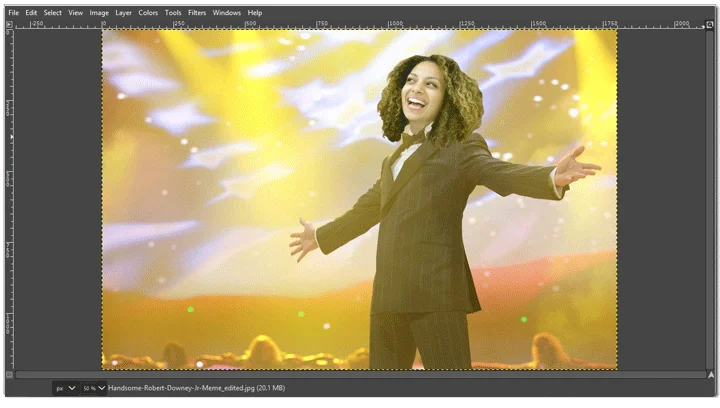
Place the face on a new background to get a funny meme
Although GIMP suggests the easy way, sitting and clicking around the faces is rather time consuming. If you aren’t fond of complicated interfaces and have little time, it’s better to go for a different face swap app for PC.
Need to replace faces and have only a mobile phone at hand? Pick one of the best Face Swap apps for mobiles, and swapping faces on your smartphone will be a child’s play.
Way 4: Do a Face Swap Online
Don’t want to install additional programs on your computer? Then change the faces using the online method. For example, with Face Swap Online. It’s a website based solution allowing you to make very simple photo manipulations. All you need to do is drop in your photos and follow the GIF instruction placed at the top of the page. Thus using this service is easy and you can access it from any device.
Now, what are the steps for changing faces in Face Swap Online?
Step 1. Upload Your Photos
Click Insert and add your photos one by one. You can drag and drop their edges to resize and fit the face into place.
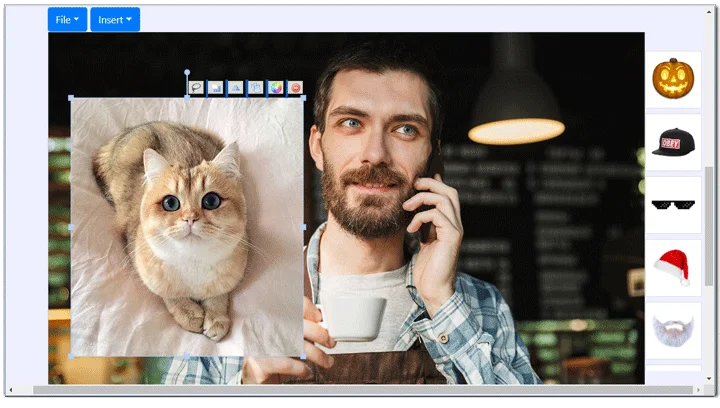
Add two photos you want to swap
Step 2. Cut Out the Object
Use the Cut tool for cutting out the face and inserting it into the new picture. Transform its edges to fit in the piece better. You can rotate it as well.
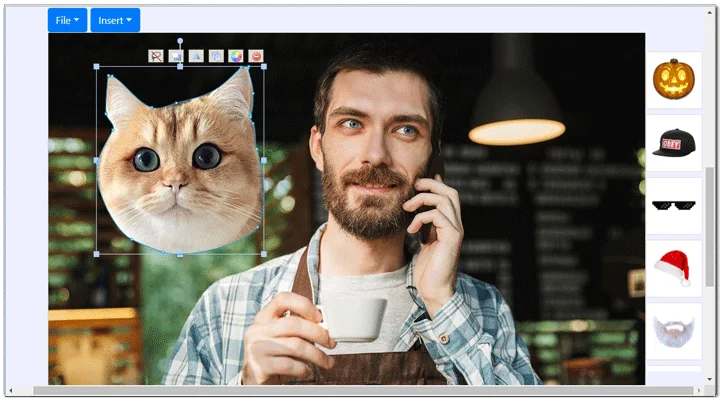
Cut out and paste the face into the new picture
Step 3. Replace the Face In Your Photo
Decrease opacity, adjust brightness and colors. If you want to cheer up your friends with this creation, add some stickers and captions.

Adjust brightness, contrast and color balance
Face Swap Online is definitely a fast and easy way to do photo editing on the go, from any device: desktop or mobile. Especially with the step-by-step GIF in front of your eyes. However, not everyone will light-heartedly upload their photos online due to privacy problems.
After creating a faceswap, you need to improve its quality and make it look more realistic. The process won't take much time with a complete guide on how to enhance an image.
Way 5: Change Face With Auto Face Swap
Need to swap faces while recording video on a webcam? Or just prefer clicking one button over tracing and selecting? Then check out Auto Face Swap from Microsoft. This program allows you to change face in photo with another face or from a live webcam. What’s more, it lets you morph faces from photos in a click. It sounds like an advanced software but in fact it’s pretty simple to use and has a minimalistic interface.
Decided to give Auto Face Swap a try? Here are the steps:
Step 1. Add Your Photos
Click Load and select two pictures. Since the software swaps faces automatically, it’s better to use images with people looking straight at the camera.
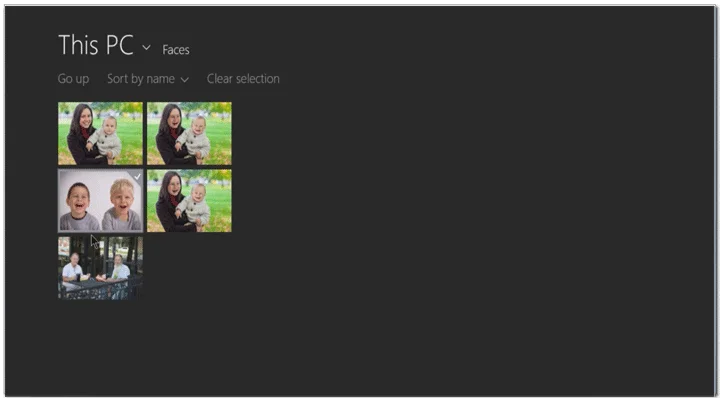
Pick several photos
Step 2. Choose Swapping Mode
Pick Copy or Swap, depending on what you need: morphing or replacing. Since we need a complete replacement, we go with the Swap option.
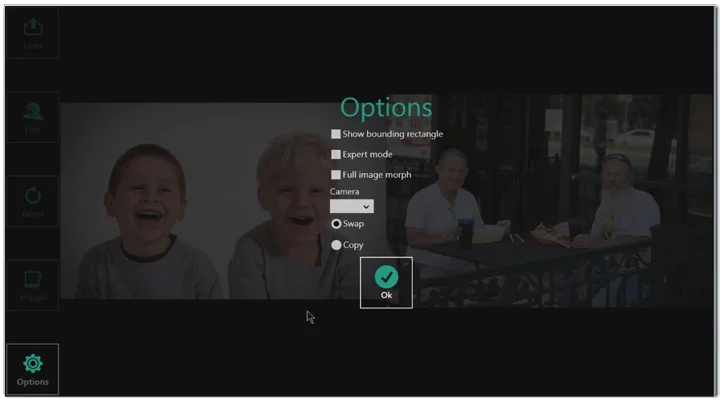
Select the swap mode
Step 3. Switch Faces in Pictures
Drag and drop the face onto the other picture. The program will recognize the facial features, putting the new face over.
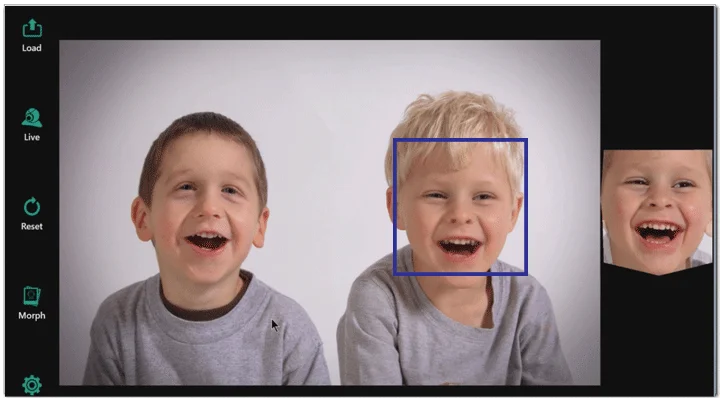
The automatic swap is fast but sometimes looks funny
Using Auto Face Swap is pretty easy, even for a complete newbie. You don’t need to make any manual selections, just drop in your photos and click a button. However, not every photo will be suitable for the automatic algorithms, and you won’t be able to tweak the result.
Way 6: Use Faceswap by Deepfakes Software
Want to make a video face swap to surprise your friends? If you think that's not possible, at least at home, then you're wrong - the future is already here. All you need is your PC, two videos and Faceswap software. It's a free-to-use, community-created program based on neural networks. After short-term training, the face swap program can produce a shockingly realistic video, where it takes a certain effort to notice that the face was digitally replaced.
Eager to try this software out? Here are the steps:
Step 1. Extract Faces from Both Videos
Create two new folders for the faces. Then open the program and switch to the Extract tab. Select the first video in the Input Dir, then set the new folder as the output directory. The face swap software will detect the face expressions automatically and make screenshots, then place them in the folder you selected. Once finished, repeat the steps with the second video.
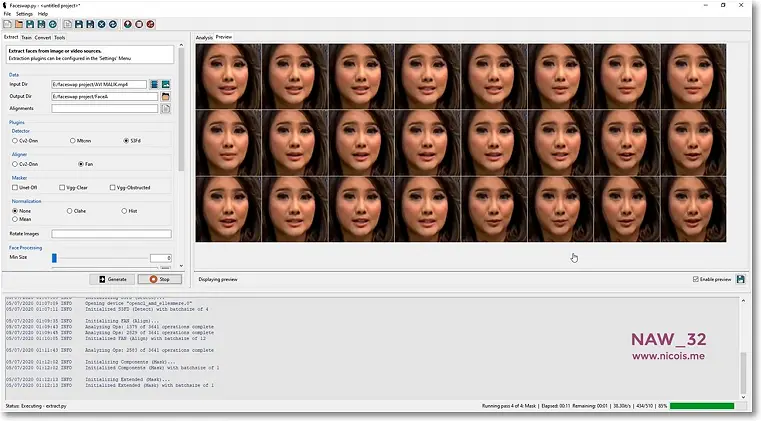
Let the software extract faces from your videos
Step 2. Train the software
When the extraction is complete, you need to spend some time and "train" the program to swap faces correctly in these videos. Switch to the Train tab. Select the folder with the faces from the first video as Input A, and the folder with the second person as Input B. During training, Faceswap will try generating the fake face, so you need to create a directory for that too and set it as Model Dir. For correct processing, you have to set the Timelapse as well. Select the folders with the original faces and create a new one for the Output. This will be the timelapse for the fake video.
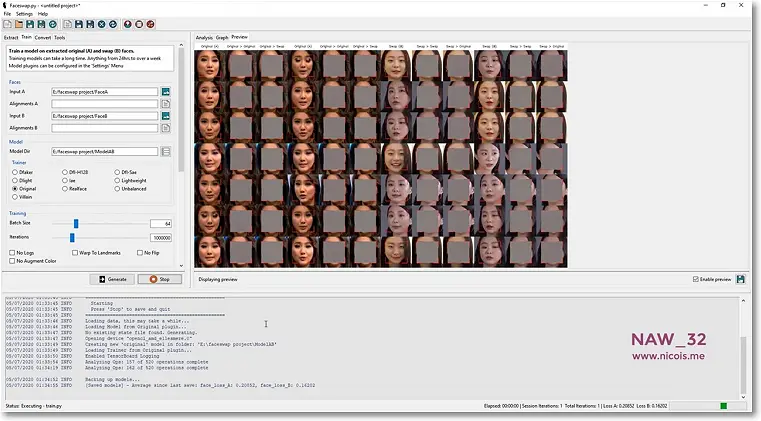
The training process can take up to two days, depending on the PC performance
Step 3. Create the Final Video
Once training is finished, go to the Convert tab. Set the first video as Input Dir. Then find the folder with the fake face created during Step 2 and set it as Model Dir. Now just click Convert and wait for the result.
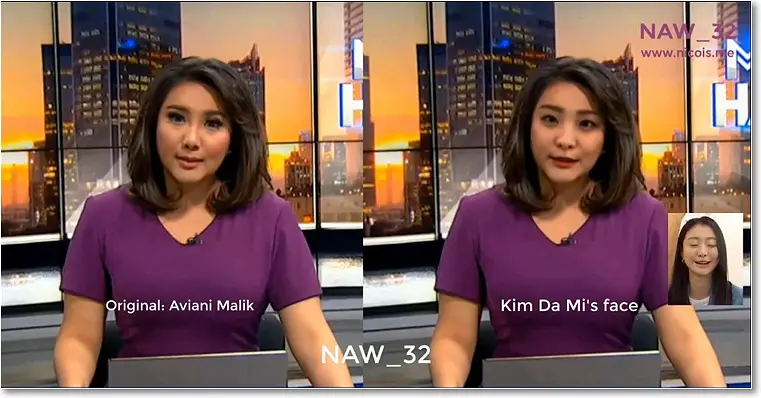
The result can be very realistic
Conclusion
We suggested 6 different ways for doing a face swap on Windows - go ahead and pick the one you like. Want a portable image maker? Stick with Face Swap Online and its web-based design then. Don’t want to put much effort in? Try Auto Face Swap from Microsoft. Need to edit your photos offline and use other features besides face swapping? Then check out PhotoWorks - the all-in-one photo editor. No matter what choice you make, you will switch faces in no time!
Need a face swap software?
Check out PhotoWorks...
