How to Unblur Images: Newbie-Friendly Guide
In modern photography blur can be a stylish artistic effect but more often than not the lack of sharpness in a picture is caused by an operator error or subject movement that couldn’t be controlled. While it’s better to properly focus your camera before taking a shot, this isn’t always possible due to changing photo conditions. If you’ve ended up with smudged pictures, it doesn’t mean you should throw them away or pay a professional to work magic on them — you can do everything yourself!
So, how to unblur images and make them clear again? Luckily, you won’t need any expensive equipment or advanced skills with PhotoWorks by your side. This photo editing software can take care of your blurry shots and restore their quality in a few clicks. Sounds too good to be true? Let’s get things under way and get this program a chance to increase the sharpness of your photos.
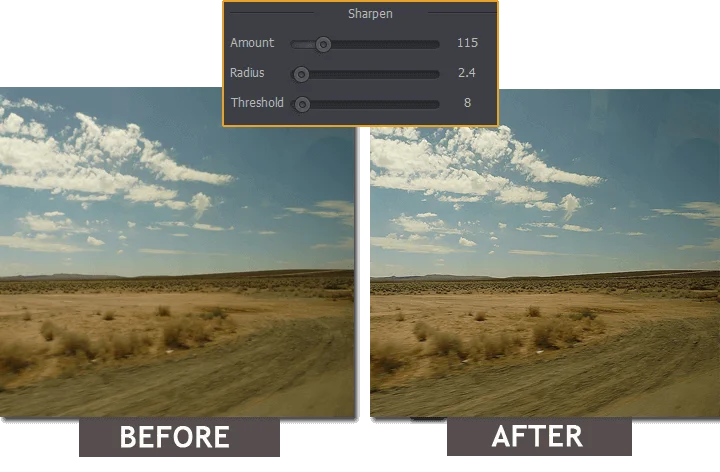
Turn your blurred photo into a clear photo
Step 1. Locate the Sharpness Controls in PhotoWorks
Run the automatic photo editor on your computer and add your photo there. While on the Enhancement tab, click Sharpness on the sidebar to open a new menu.
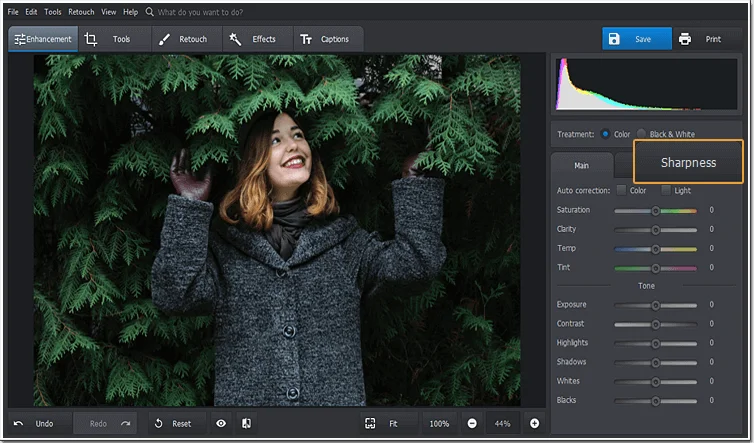
Find the sharpness controls in the program
Step 2. Set the Preview Box on the Subject
Before refining your photo, set the preview box on some particular area to better see all the changes. Click the icon on the right and place the targeting square over a blurry spot.
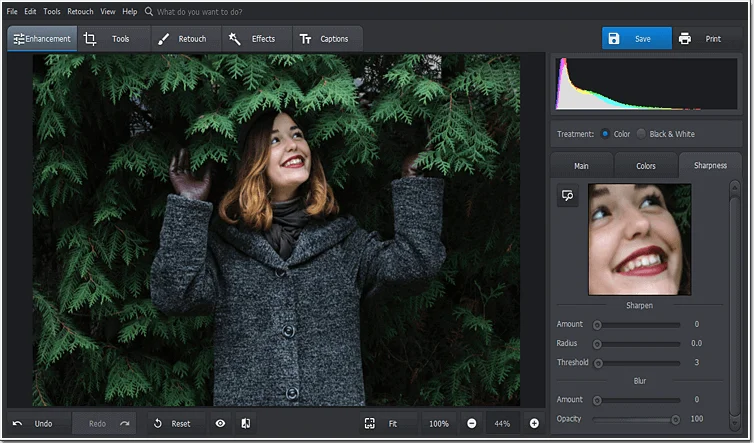
Use the Preview mode to zoom in a particular area of your photo
Step 3. Drag the Slider to Unblur Photos
Now, move the Amount slider to the right to increase the photo sharpness. You’ll instantly see an improvement but don’t drag it too far to the right to avoid digital noise.
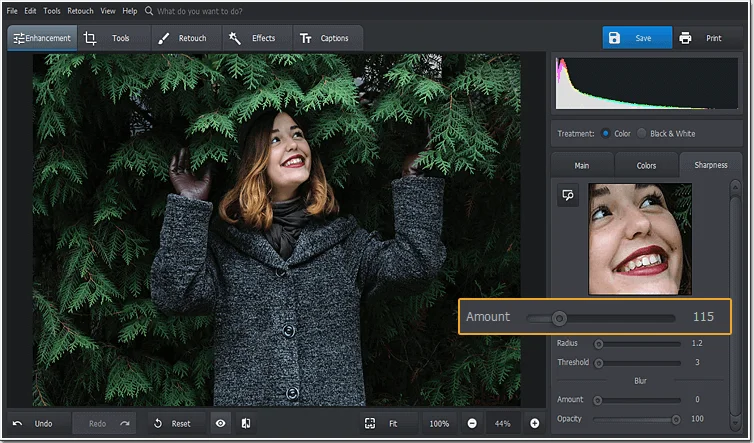
Unblur pics with one slider movement
Step 4. Adjust Additional Sharpness Settings
The Radius setting manages the width of the effect. Choosing the right radius is critical to good unblurring. By adjusting the Threshold slider, you’re determining how different two pixels need to be to apply sharpening. In practical terms, your Threshold adjustments should range from 3 to 10.
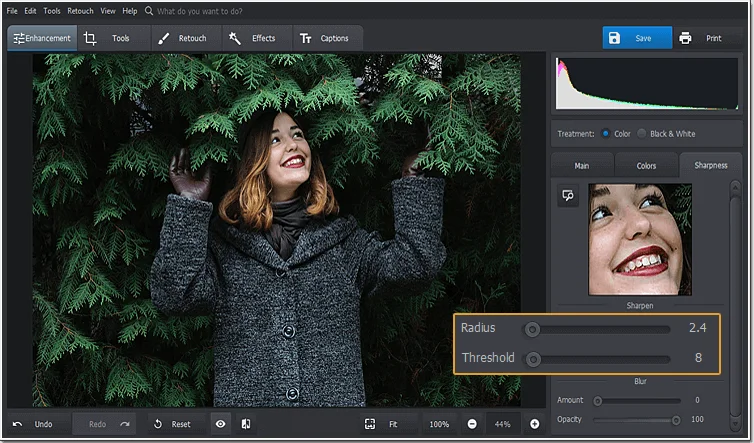
Adjust the Radius and Threshold settings for a better result
Step 5. Save Your Unblurred Photo
After you’ve improved your photo, click the Before/After button to compare the initial image and the resulting one. If you’re satisfied, save your unblurry picture as JPEG, PNG or TIFF.
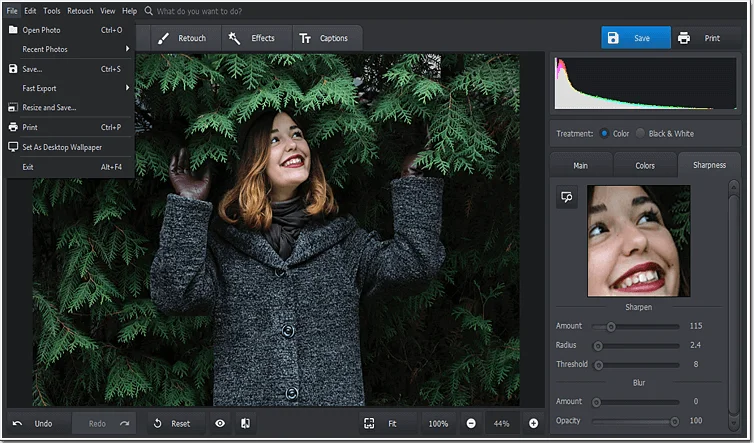
Save your unblurred photo
Now that you know how to unblur a picture on Mac and Windows, are you ready to make your pictures crisp and clear? Then download PhotoWorks for free to get started.
Now cull your haziest pictures and process them in this smart photo editor to finally make out the lost detail.
Another great feature of PhotoWorks is that it can apply certain effects and adjustments not to the whole picture but only to some of its parts. For example, you can blur the edges of a photo for a more stylish look. Want to do pro-level editing and apply other changes without Photoshop? Check out more great options of this powerful image editor!
Turn Color Photos to Black & White
Want to give your latest photos a dignified retro look? The easiest way to achieve this old-fashioned effect is to simply make pictures black and white. The program will offer you plenty of instant filters that can desaturate your image in a single click. If you want to have more control over the effect you apply, adjust manual settings to gradually relieve your photo of bright hues and tinges.
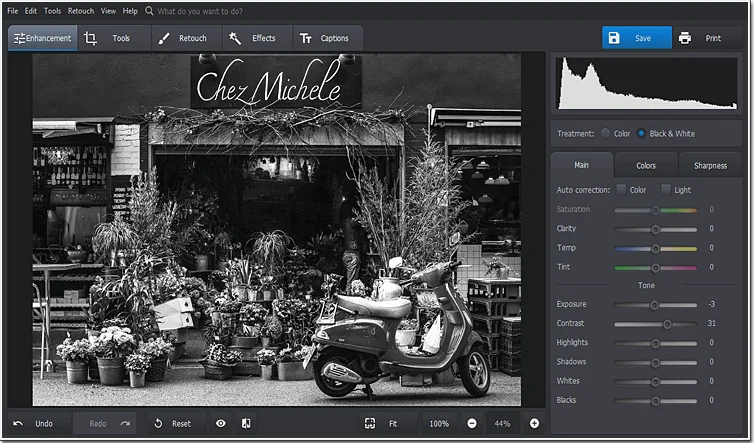
Magically Change Background in Any Photo
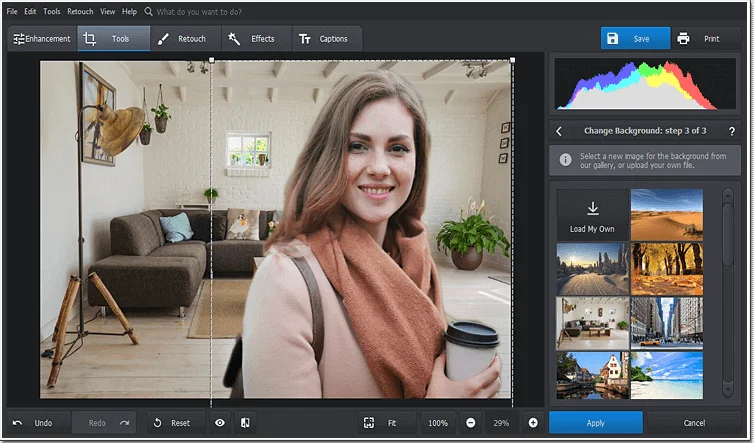
Sometimes a busy background ruins the mood of your photo or simply spoils it with unwanted elements. PhotoWorks is here to replace it with a more appropriate image. Send your photo-self to a tropical beach or to a calm garden with no problems at all. The tool is highly efficient, that’s why you can even use PhotoWorks as face swap software and replace not only the background, but faces on your pictures.
Improve the Overall Color Balance
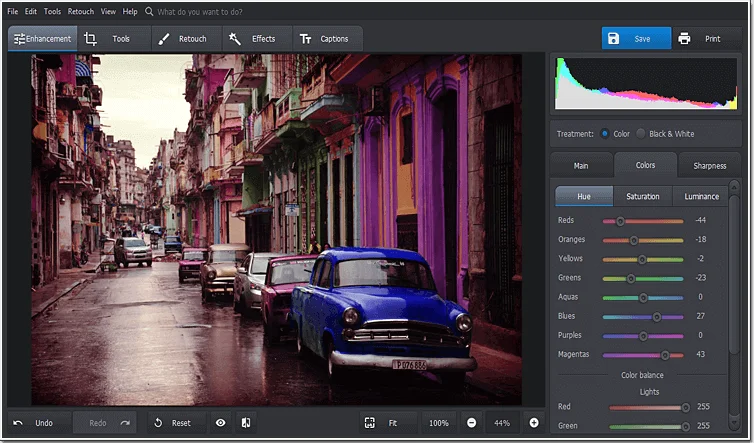
If you couldn’t adjust camera settings at the shooting location and got unnatural or dull hues, you can still color correct pictures in post-production. The software is capable of auto color enhancement — just one click and your picture will be bright and vivid again! An array of other built-in tools will help you control the overall contrast, accentuate one particular color and even apply tone mapping.
Fix Grainy Photos and Restore Clarity
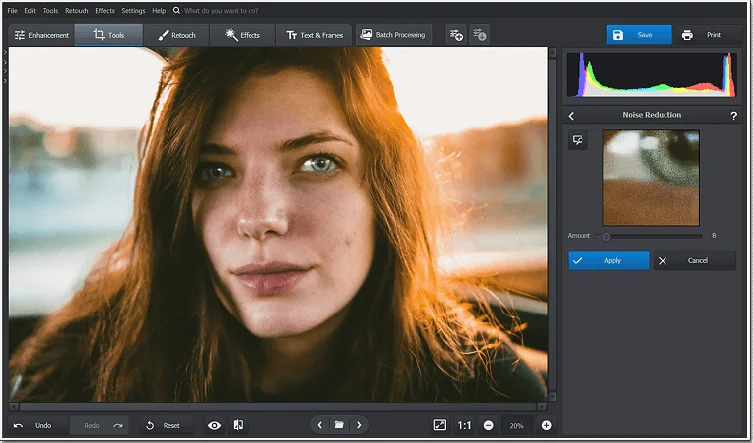
Grainy images often result from shooting in poor low light or using a high ISO setting. To address this, try the Noise Reduction feature. In addition to reducing noise, it can sometimes help to improve the clarity of blurry faces, making it a useful tool for restoring sharpness. In fact, the Noise Reduction function is so effective at this that it could almost be thought of as a "Face Unblur" feature. With it, you can easily fix your grainy pictures and bring out more detail.
PhotoWorks is not only a program for unblurring pictures on Windows and Mac, but an all-in-one solution for all kinds of ruined shots. You can restore its quality in a flash, brighten a dark picture, remove unwanted elements and retouch a portrait like a real pro. If you have a bunch of old photos, you can bring them back to life pretty easily too — make old pictures look new in a few steps. Get started with this photo editor today and give a polished look to all pictures in your collection!
More Ways to Unblur an Image
Surely, PhotoWorks isn’t the only tool for image unblurring. Let’s have a brief look at other ways you can make your fuzzy images clearer. For starters, here’s a free solution for you — GIMP. This is an open-source picture editor that is almost as powerful as Photoshop. But while it’s free, the process of image dehazing in GIMP might require some effort. If you seek a free and easy way to unblur photos, then go with Lunapic, a free web-based editor. The process is exceptionally simple — just upload your photo to the service, then drag a slider and you’ll be set.

Make your picture clear with an online service
If you want to deblur your images on the go, then opt to use convenient mobile apps — there are tons to choose from and none of them require any special skills to operate. But if you want to go the most challenging route, you can always try to unblur your pics with Photoshop. It’s a bit more tedious, but the result is worth it.
Frequently Asked Questions
What is the free app that unblurs photos?
Several free apps can help you unblur images, each offering a variety of features and levels of functionality. We’ve already mentioned GIMP, a free and open-source photo editing software, and Lunapic, a free online photo editor that lets you enhance your images with just a few clicks. One more option is Snapseed, which is available for both Android and iOS devices, with intuitive features for refining images. These apps are perfect for users who need a quick and cost-effective solution without diving into professional software.
How do I unblur an image on my iPhone?
On your iPhone, you can enhance blurry photos using mobile apps that offer easy access to photo improvement tools. Snapseed is one such app, offering a range of filters and sharpness tools to improve blurry photos. Additionally, apps like Adobe Photoshop Express or Remini provide powerful yet simple features for enhancing photo clarity. After uploading your photo, these apps let you fine-tune sharpness, increase detail, and reduce blur. Using a slider or automatic tool, you can gradually refine your image until it appears clearer and more defined, making these apps a great choice for mobile users looking to fix their pictures on the go.
How to unblur images on Android?
To unblur images on Android, you have several app options that are both easy to use and effective. Apps like Adobe Photoshop Express, Remini, or Snapseed offer specific features to refine blurred photos. These apps allow you to apply clarity and sharpness adjustments, making the photo clearer and more defined. In these apps, you can usually adjust sliders that affect sharpness and noise reduction, so you can fine-tune the effect based on your photo’s needs. Whether you’re working with a blurry portrait or a landscape, these Android apps provide simple but powerful tools to fix blurry pictures directly from your device.
How to unblur images online?
If you’re looking for a fast, no-download solution to unblur images, several online tools can help. Websites like Fotor, PineTools, and Lunapic offer free online photo editing services that let you enhance blurry photos with ease. To use these tools, simply upload the photo, select the sharpen feature, and adjust the intensity until you achieve the desired clarity. Some online editors even allow you to tweak additional settings like contrast or brightness, which can further help reduce blur. These platforms are ideal if you need a quick fix and don’t want to install software on your computer.
Unblur pictures online free — is it possible?
Yes, unblurring pictures online for free is very much possible. Many online photo editors offer free tools that help reduce blur and enhance sharpness. Websites like Fotor, PineTools, and Lunapic offer these services without requiring payment or a subscription. The process is simple: upload the blurry picture to the website, select the deblurring tool, and adjust the settings to your liking. While free tools may not offer the same level of control and detail as paid software, they can still significantly improve the clarity of a blurred photo, making them an accessible solution for quick edits.
How can I unblur text images online for free?
If you’re dealing with a blurry text image and need to make the text clearer, consider some online tools. Websites like PineTools and Fotor offer photo editing services that can help enhance the readability of blurry text. These platforms typically allow you to upload your picture, adjust sharpness, and fine-tune the clarity of the text. Although they can’t always fully restore the legibility of heavily blurred text, they offer a good starting point for improving image quality. The best part is, these services are free to use, making them accessible for quick fixes without the need for any software installation.
How to unblur image AI for free?
Using AI-based tools to unblur a photo is a cutting-edge method that is now available for free in some online services. Platforms like Let’s Enhance or DeepAI offer free AI-powered image enhancement tools that can automatically improve blurry photos. By analyzing the photo, these tools apply advanced algorithms to restore sharpness, reduce blur, and enhance overall image quality. While these AI-driven tools can do an impressive job on moderately blurred pictures, their free versions may come with limitations, such as photo size restrictions or lower resolution output. However, they still provide a powerful, no-cost solution for unblurring photos with ease.
So you see — there is no longer any need to squint at your pictures now that you know how to unblur images. Take this knowledge and use it to make all your fuzzy photos as crisp as a winter morning.


