How to Get Rid of Glare in Photos in 5 Easy Ways
In photography, glare is a common issue. Sometimes shiny highlights look like an artistic effect and make your images, especially portraits pop. But in the majority of cases glare is a defect and the subjects seem to be greasy. How to remove glare from pictures like that? Well, there’re a few simple ways you can try. First, we will give you a piece of advice on how you can avoid getting light glare on your photos while shooting. Next, we will dwell on different ways of removing glares during post-production.
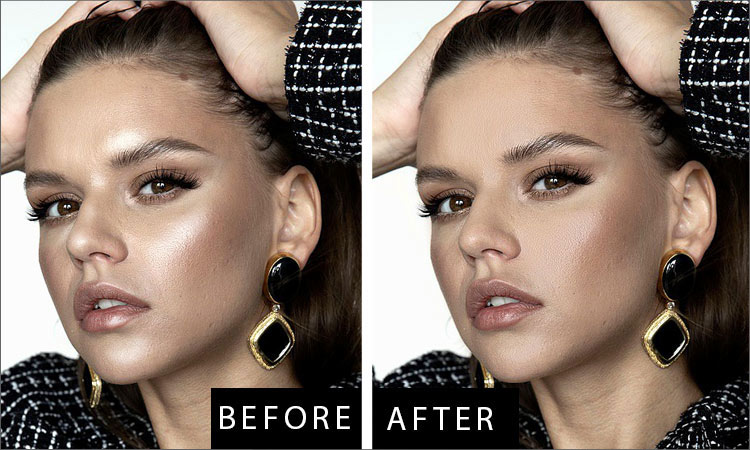
How to Remove Glare From Photos During Photoshoot
The best way to get rid of glare is to avoid it while taking photos. There are several ways to do that, depending on the source of the problem. Is the glare caused by a light reflected through the lens? Or the sun is located behind your model and its light messes up everything? Let's see what you can do to eliminate any glares:
- Change your position. If the light falls directly in your camera lens, take a few steps to the right or left, move the camera up or down to change the angle. You can also try hiding the light source behind an object (building, mountain, etc.).
- Try a polarising filter. It can significantly reduce glare and make colors more saturated. There are different types of filters, so choose the one that suits your location. For example, if you are shooting on water, use a circular polarizer to eliminate any glare on the surface.
- Use a lens hood. Some lenses come with a hood which you can attach for blocking direct sunlight. If you don't have the hood, get creative. Raise your hand or hat to shield your camera from the sun or stand under a roof to avoid the falling light.
- Diffuse the light. Whenever you shoot in harsh sunlight, bring along a diffuser or a large white paper sheet. They will help you soften the light. You can also use a reflector or a fill flash to redirect some light onto your models.
- Choose appropriate time and weather. Sometimes it's better to shoot in the morning or cloudy weather, while the sun is still out. So if you like the location but the direct light spoils it, come there a bit later and try shooting again.
If you can't avoid glares while taking photos, don’t run to get rid of ruined shots. Keep reading - from the guide below, you’ll explore how to fix your photos with sun glare, shiny skin and glare from glasses at little effort.
- Method 1. How to remove sun glare with PhotoWorks
- Method 2. Use AI face editor to remove glare from portrait
- Method 3. Learn professional secrets of glare removal
- Method 4. Apply the anti-glare option in RetouchMe
- Method 5. Eliminate glare with Apple's iPhoto
Method 1. Remove Sun Glare from Photo in a Flash
The sunlight glare in photos often looks unnatural and sometimes even nasty. Let’s learn how to remove sun glare from photos in PhotoWorks. It's a user-friendly photo editor with a vast toolkit. The easiest way possible to correct the reflection in the picture below is to change the overall tone of it.

To remove glare from a photo, follow these steps:
- Run PhotoWorks to get glare out of the picture. Start the program and import the photo you want to edit. You can drag and drop a file from your Windows Explorer or Mac Finder. Alternatively, add an image using the Open Photo button.
- Adjust the tone with a single movement of the slider. In the Enhancement tab, adjust the highlights level. To do that, keep dragging the highlights slider in till you fix the defect. In our example, the perfect highlights degree is -100.
- Save the changes made to your photo. To apply the changes, save the edited image.
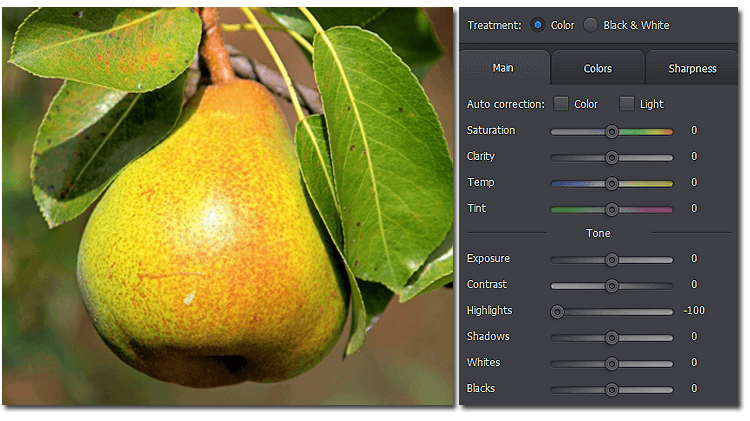
This method is perfectly suitable to get rid of glare in photos with just a couple of highlighted regions. Take a look at the result - removing the glare has made the picture more dimensional and deeper in color.
Method 2. Use Face Editor to Remove Glare from Portrait
Is it possible to eliminate glare from the face with a few mouse clicks and not spend hours on retouching? With PhotoWorks, a versatile portrait editor, you'll do it in no time. Just try Portrait Magic - a smart built-in tool that allows you to get perfect portraits in no time. Let’s enhance this portrait and see the innovative feature in action:
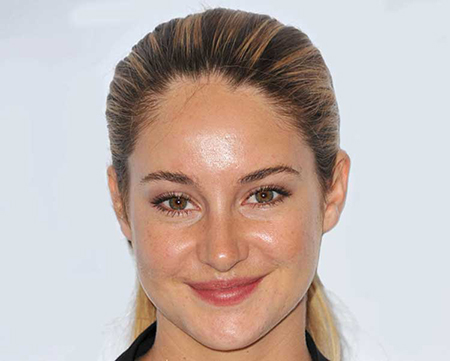

- Start PhotoWorks on your computer. Launch the software and drop in your portrait to enhance.
- Use the Portrait Magic tool to take glare off the picture. Open the Retouch tab and choose the Portrait Magic option. Then, pick Remove face shine from the collection of ready-made presets.
- Minimize the glare level with custom settings. Switch to the Custom Settings tab and in the Skin section, set the Glare level at 100. Increase smoothing a little, 70 will be enough.
- Save the edited portrait shot. Click the blue Apply button and save the edited portrait to your computer.
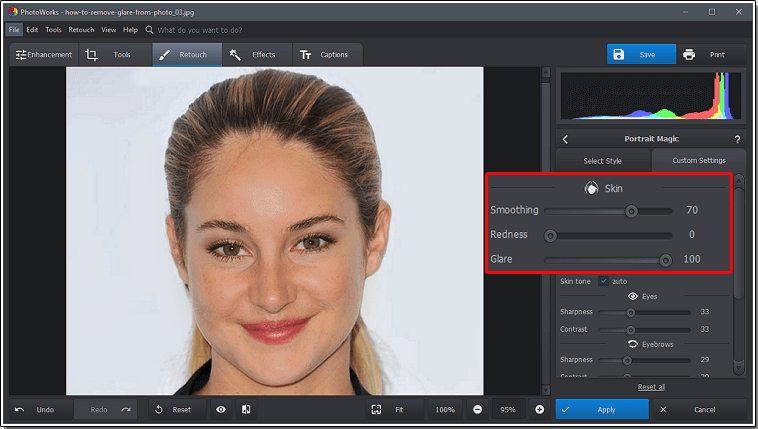
Think some editing is still required for the photo? Then you are one of those perfectionists who like to retouch photos manually till they look magazine-like. In this case, you’ll need a combination of 2 tools - Adjustment Brush and Clone Stamp. We'll talk about them in a bit.
If you feel confident around more complicated photo editors, then you might be interested in how to remove glare from your picture with Photoshop.
Method 3. Use Adjustment Brush & Clone Stamp to Edit Glare Out
Let's continue editing the photo from the previous method. This time, we will take a more detailed approach.
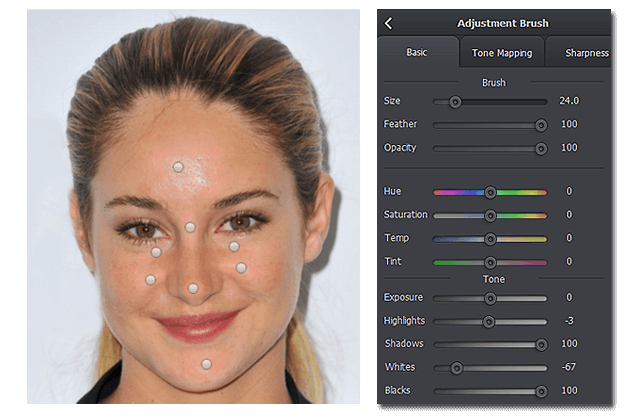
Start PhotoWorks. Move to the Retouch tab and select the Adjustment Brush option. In the Basic settings tab, set the brush size at 24. Paint over the flash glare with your Adjustment Brush. Change the selected region settings: move the highlights slider to -3, choose 100 for shadows and blacks, and -67 for whites. Eliminate the glares on the girl’s nose, her cheeks, chin and the areas under her eyes in the same way.
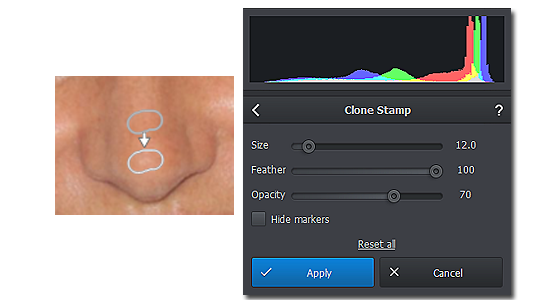
To completely take the glare out of the picture, switch back to the Retouch tab and choose Clone Stamp. Set the tool size at 12 and its opacity at 70. Paint over the nose glare and select the clone source. Choose a similarly graded area so that the face looks natural after editing.
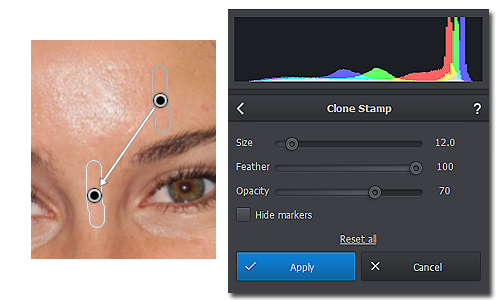
Use the same tool settings for the girl’s nose bridge and clone a such-like region of her forehead.
To get rid of the cheeks glare, replace them by suitable areas from her cheeks and forehead.
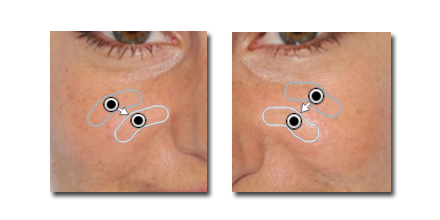
Reduce glare on her chin, philtrum columns and under her eyes in the same way.
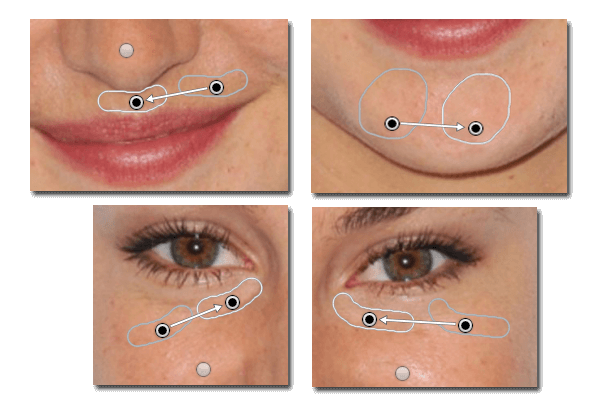
To remove the largest glare from the subject’s forehead, set the stamp size at 30. Correct this defect bit-by-bit; if the ‘patch’ borders get visible, use the same tool to cover them up.

Once again, let’s use the Adjustment Brush to get rid of glare in the photo. Move the size slider to 40, feather and opacity should be 100. With the brush, paint over the forehead area where the glare has been removed. Adjust the tone of the selection: set the exposure level at 2, shadows at 40, whites at -40, and blacks at 100.
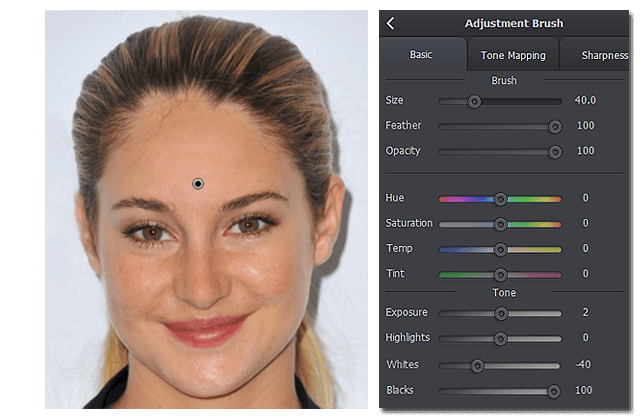
Take a look at the portrait - the result is impressive! To make sure, compare the edited photo with the sourse. Click Save to keep the picture.

Want PhotoWorks to do its magic on one of your pictures? Download the software and start your free trial today!
You have learnt how to remove glare from photo in PhotoWorks - a versatile photo glare removal app with an extensive toolkit for proper image editing. Have other defects in your photos? Need to make them sharper, delete unwanted objects or just apply special effects? Then check out this guide: How to enhance pictures.
Method 4. Apply the anti-glare option in RetouchMe
RetouchMe offers a wide range of photo touch up features, including the anti-glare option to save greasy portrait shots. Let's see how this portrait retouching service works.
- Select the anti-glare option. Launch the Retouch.me app on your smartphone, switch to the Face tab and choose the Anti Glare option.
- Eliminate the glare on your photo. Add the photo from your gallery to the app or make an instant photo via the built-in camera. Mark the shiny area or elements on the photo the designer should focus on.
- Let the app designer fix the photo for you. Click the Send to Designer button and get an improved image from a highly experienced team of Photoshop designers.
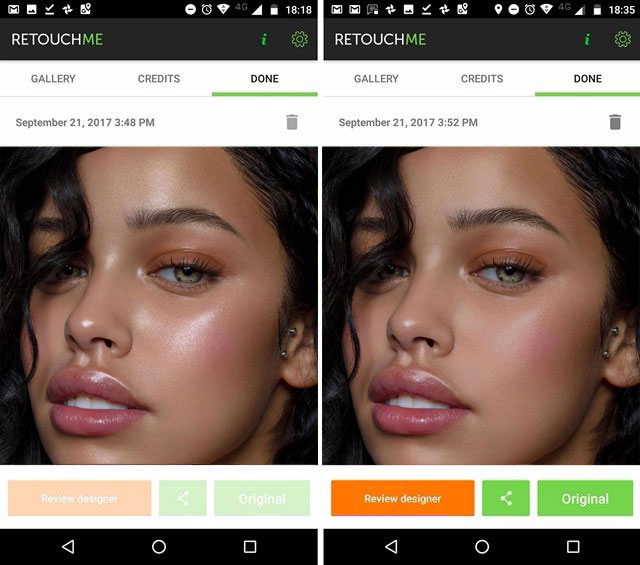
RetouchMe is not the only one portrait retouching mobile application. Want more? Then get acquainted with more apps.
Method 5. Eliminate glare with Apple's iPhoto
Apple's iPhoto is one more digital photo manipulation app that can help you remove glare in your pictures in just a few seconds. Its Retouch tool automatically detects problem zones and reduces the glare level without affecting other areas. Follow the three steps below and fix your photos with minimum efforts.
- Add the chosen image to your iPhoto library. Launch iPhoto and drag the image you want to edit to the program window. Alternatively, go to the File tab in iPhoto and choose Import to Library, then choose the pictures to add.
- Use the Retouch Tool on your photo. Hit the Edit icon in the toolbar at the bottom and click Quick Fixes > Retouch. Set the size of the Retouch tool and move it over the glare in your photo. iPhoto will fix the glare automatically.
- Save the resulting image. When you've finished editing the photo, click the Save icon. iPhoto also saves a copy of the original, so you won't lose the initial image.
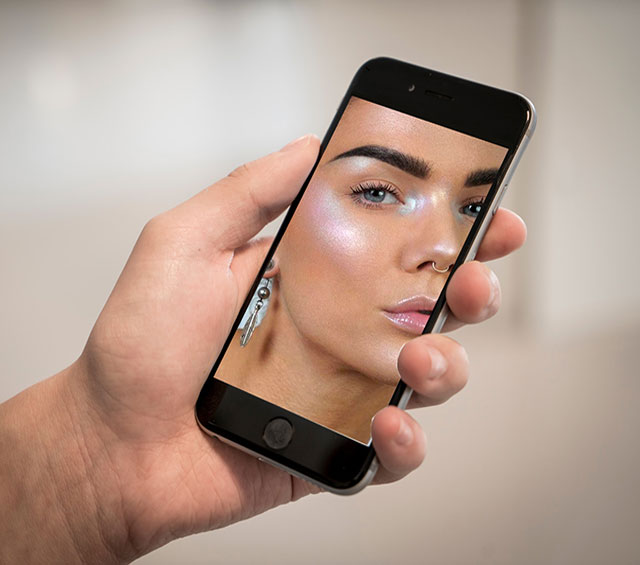
In this post, we’ve shown you five simple techniques for removing glare from all kinds of photos. Of course, it’s up to you to choose the best method depending on the result you want to achieve and device you plan to use for editing. If you’re looking for an easy-to-use program that won’t waste your time, make sure to try PhotoWorks since it offers all the features of powerful image editors packed in a user-friendly interface.

