
12 Expert Fire Photography Tips to Master Today
Fire amazes us. Light in the dark and dancing patterns of the flames make it a unique subject for photographers. But anyone who has ever tried taking pictures of fire knows - it is not as easy as it may seem.
Photographing fire can be tricky as you will have unpredictable lighting conditions while shooting flame. The light of the fire and the dark background can confuse your camera, which may lead to blurry or dark images. In this article, you will discover how to take pictures of fire, along with some examples, and further directions on how to get professional fire shots.
- Part #1. Choose your equipment for fire photography
- Part #2. Learn creative shooting techniques
- Part #3. Master tricks for shooting different types of fire
- Part #4. Edit your photos of fire in PhotoWorks
12 Proven Fire Photography Tips
Below, we have put together 12 proven tips on flame photography which will help you to become a master in this genre.
Part #1: General Tips on the Equipment for Fire Photography
In this section, you are going to find some general tips on camera settings. Don’t hesitate to experiment with shutter speed, aperture, and ISO to get the best possible results.
1. Set Your Camera on a Tripod
The key to a successful fire photo is using a tripod and proper camera settings. For starters, turn off the flash because you don’t need it for this kind of photography. A tripod will come in handy, especially when using a long exposure. This way you can reduce camera shake. Also, if you shoot fire with a slow shutter speed, it’s impossible to hand-hold your camera for a minute or so.
2. Be Creative with Camera Settings
To get the very best shots of the fire you need to experiment with exposure. There are three settings which affect the exposure - they are aperture, shutter speed, and ISO.
Don’t hesitate to set high ISO or low shutter speed, and see the results. We’ll focus on each of these two key settings below. But remember that you’ll have to play with the settings to get amazing fire photography.
3. Experiment with Shutter Speed
Obviously, a slow shutter speed is one of the best options while taking pictures of fire because of the dark background. A slow shutter speed allows enough light into the camera sensor and also provides motion blur.
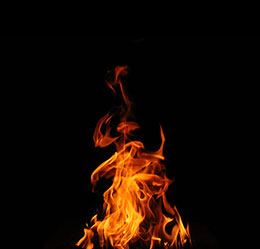
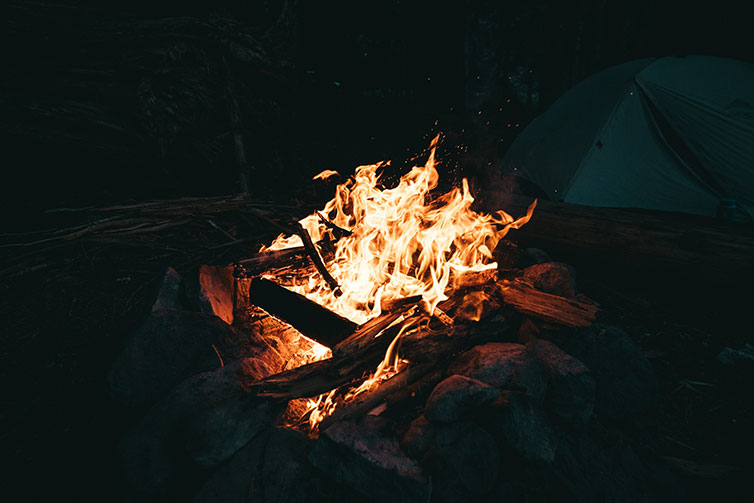
A fast shutter speed will be a perfect option if you want to shoot fire explosions. Here’s a picture of a campfire taken with a fast shutter speed - it shows a lot of details and great warm colors:
Aperture ƒ/2.0 Shutter Speed 1/800s ISO 6400
To get full control over your shutter speed, use Shutter Priority Mode, and let your camera do the rest settings itself. You will get different results every time, depending on how much light you let in.
4. Remember About the ISO
When you shoot fire at night, you may need to increase your ISO to make the image darker. But don’t increase it too much. The thing is that most long exposures produce a significant amount of digital noise. Grain shows up on darker tones, so if you have a dark background on your fire photo, remember about the ISO.
5. Use Remote Shutter with Self-Timer
When you photograph fire in low light conditions, you’ll notice camera shake. A small remote shutter or camera timer (along with a tripod, though) can help you dramatically reduce the camera shake.
Part #2: Setting Up the Shot: Creative Shooting Tricks
The next few tips are connected with choosing your subject for fire photography. We are going to talk about making fire the main subject or a source of light, along with making fire a part of a bigger scene.
6. Make Fire the Main Light Source
Thanks to soft shades and a warm color, the flame is a perfect light source for photography. For example, if your source of light is a campfire, you should rely on a longer shutter speed, higher ISO, and wider aperture.
While using a wider aperture, remember that it gives you a narrow depth of field. Use manual focus to point on the fire or the silhouettes near it to get a sharp picture. Take a look at this image of the fire on a beach.
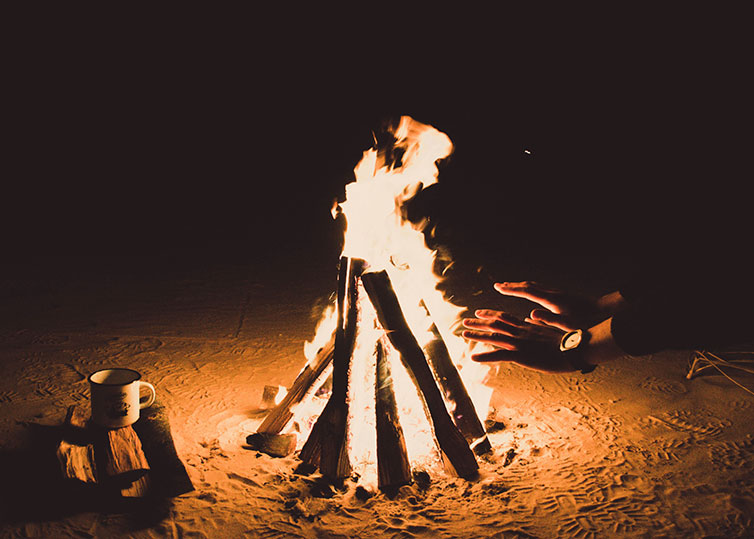
Here, a photographer used high ISO 3200 along with 1/60 shutter speed and wide aperture f4.0.
The hands and a mug on the shot tell a camping story
7. Make Fire the Subject
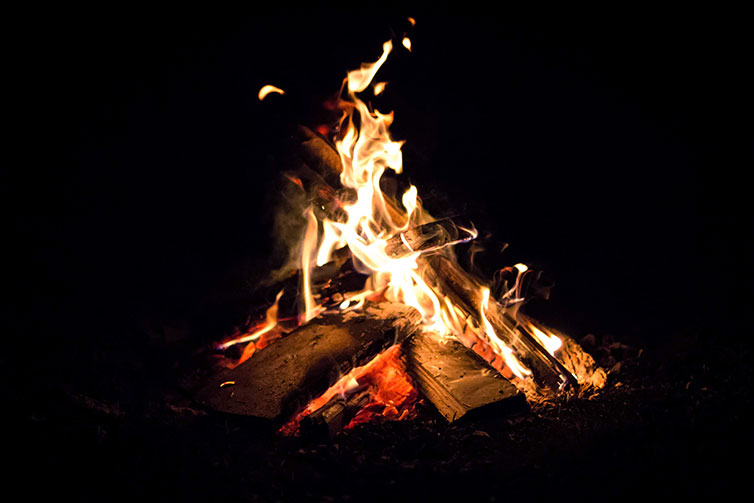
Make the fire your subject and show the flame in all its beauty. To show the details of the flame, make sure to use a fast shutter speed. It will help you to freeze the motion. Your starting point could be 1/320 and more. Go faster, but remember to control the ISO and aperture to avoid making the image too dark. In this case, a wider aperture and higher ISO will be useful.
This photo was taken with a super-fast shutter speed 1/4000s. At the same time, the photographer used a large ISO 1600 and a wide f-stop 5,6.
Photos taken at night are often blurry. Here are a few tips on how to unblur a photo.
8. Use Fire to Create Certain Mood
As it was mentioned, the fire could be the subject of your photo or the main lighting source. Also, the flame can be a part of a bigger scene that helps you to create a certain mood on the picture. You may require some additional source of light, which could be the sun or some artificial light.
ƒ/1.8 Shutter Speed 1/100s ISO 800
This photo was taken with a super-fast shutter speed 1/4000s. At the same time, the photographer used a high ISO 1600 and a wide f-stop 5,6.
Part #3: Shooting Different Kinds of Fire
In this section, you’ll get to know how to take pictures of different kinds of fire, such as candles, bonfires, and fireworks. These types of fire are available for most people - you can shoot candles at home, take pictures of campfire outdoors, and photograph fireworks on national holidays.
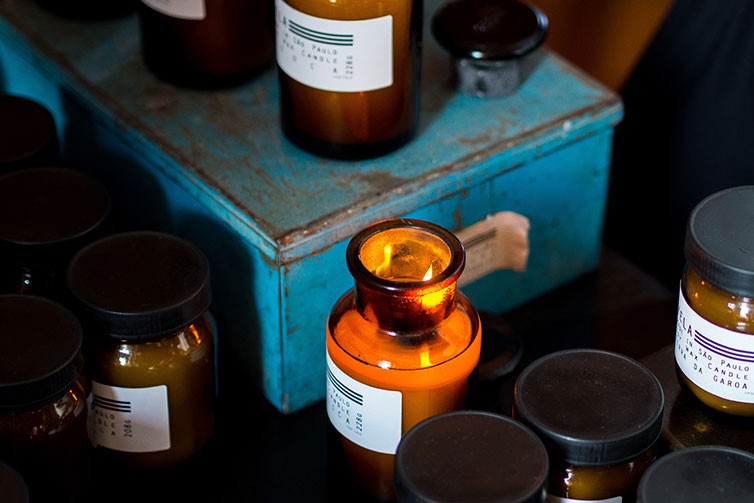
9. How to Shoot Candle Light
Everybody has candles at home, or at least you can buy them anytime you need. So, you can practice candle light photography in the comfort of your home. But in fact, a candle is a difficult object to work with. A candle does not give too much light on its own. But the solution is simple - use more candles.
Since the contrast between the candles and the surroundings may be quite high, you need to pay attention to your exposure settings. If you shoot candles only and they are still, you may consider choosing a not too long shutter speed, for example, 1/80.
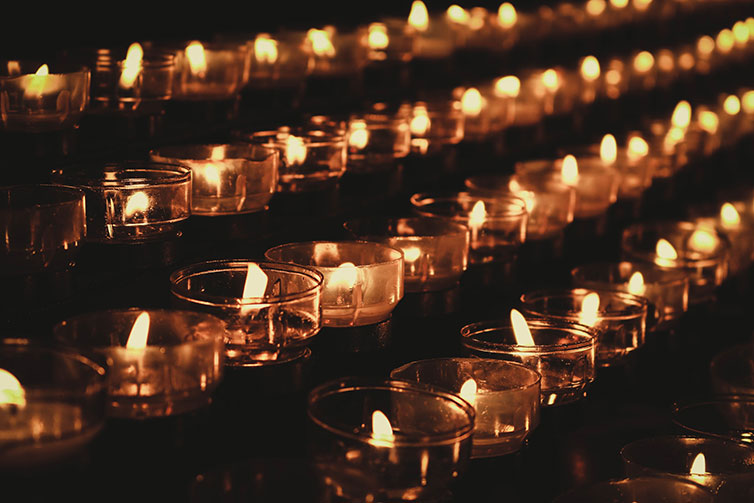
The light of one candle isn't enough for balanced exposure
If you have people within the shot frame, a long shutter speed will cause motion blur, so it’s better to make the shutter speed faster, but increase the ISO and open up the aperture. The same tips can be applied to fireplace photography that can also be practiced at home.
A warm and cozy candlelight is also a perfect option for a portrait photo shoot.
10. How to Shoot Bonfires
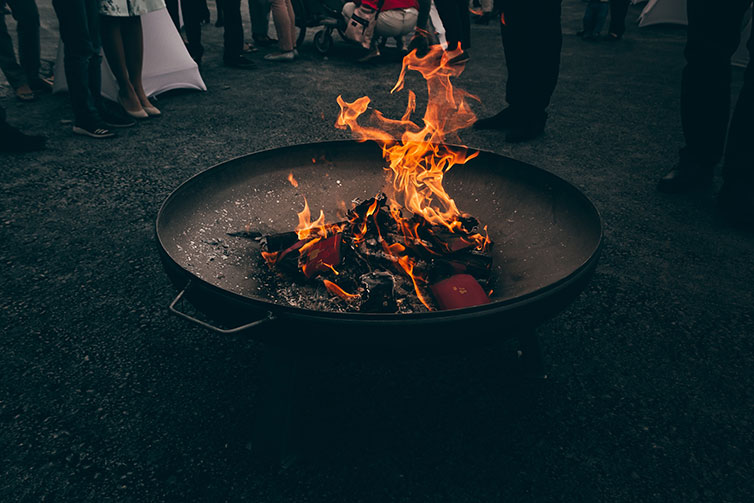
Big flames are somewhat less challenging to shoot than candles thanks to a larger amount of light they produce.
ƒ/4.0 Shutter Speed 1/500s ISO 800
You can make bonfire the main subject of your photo, or shoot silhouettes of people near the flame. Get exciting results with longer exposure. If you choose to focus on the fire itself, use a fast shutter speed and freeze the moment. Increase the ISO to make the image brighter.
11. How to Shoot Fire Shows
Fireworks are unpredictable, and sometimes it is difficult to get the exact shot that you envisioned in your mind. There is a lot of hit-or-miss stuff on fireworks photos. Thus, the best scenario is to shoot at a wider angle and crop the picture afterwards.
When it comes to the shooting process, you will need an area with a clear view of the sky and a tripod. You need to know that fireworks are going to be launched on that day. The 4th of July or some other big holiday will be the ideal occasion.
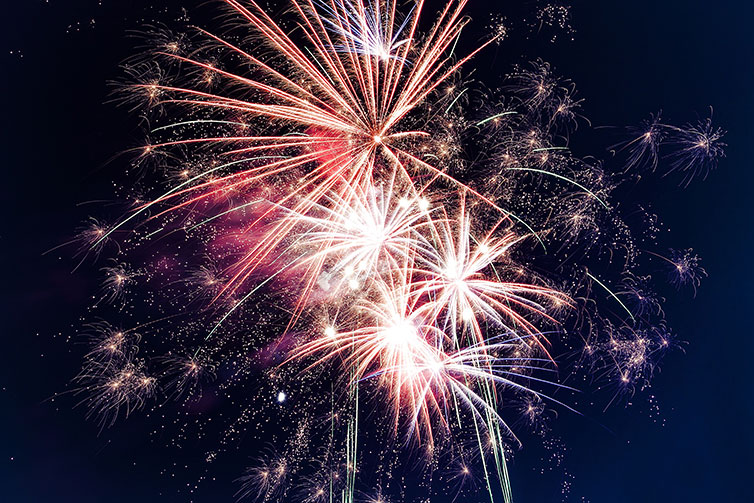
Aperture ƒ/14.0 Shutter Speed 10s ISO 100
Depending on the fireworks volume, you can choose a longer shutter speed from 1 to 5 seconds. But don’t use too long exposures because you may end up with a complete mess of colors and lines. For a longer exposure use a quite low ISO 100-400 and a not too wide aperture, because you still need to leave the background dark.
Remember to switch to manual focus if you don’t want your camera to start searching focus again and lose it.
12. Stay Safe
It does not take a genius to understand that fire is dangerous. You need to make safety your priority while shooting fire. The flames can go out of control and burn your skin, while heat and smoke can damage your equipment. Please remember these small safety tips when working with fire:
- never work too close to the things that can ignite;
- use only well-ventilated rooms for fire photography;
- have an A to Z plan for your fire photo session;
- create an emergency plan if anything goes wrong with the fire.
How to Edit Photos of Fire in PhotoWorks Step-by-Step
So you have learned how to photograph fire, and hopefully made some shots to try the tips above. Now that you have your fire images, it’s time to give them an extra touch with a few simple photo editing techniques. We’ll be using PhotoWorks image enhancer for that.
1. Open Your Photo in PhotoWorks
This is going to be a quick tutorial - with PhotoWorks you don’t need to spend hours to edit a photo. The interface is user-friendly and easy to use. Now, open your image in PhotoWorks.
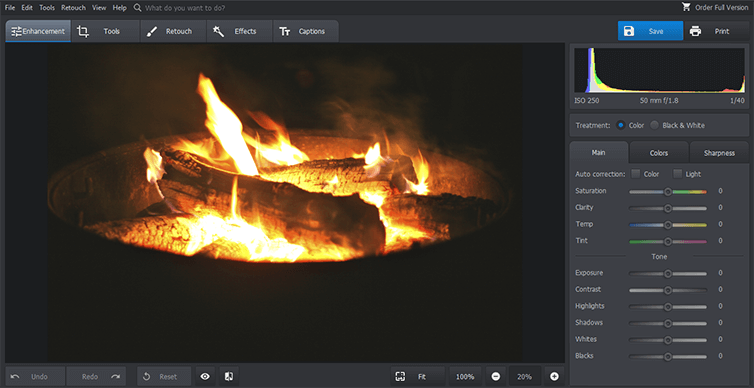
Launch PhotoWorks and add you fire photograph to the program.
2. Quickly Enhance the Exposure
Enhance the exposure of your image quickly with a ‘magic’ button called Light on the right-hand pane. Click it and the automatic photo editor will adjust the exposure, contrast, highlights, shadows, blacks, and whites. The feature works pretty accurately, but from image to image you might need to slightly change the exposure or the contrast to make it perfect.
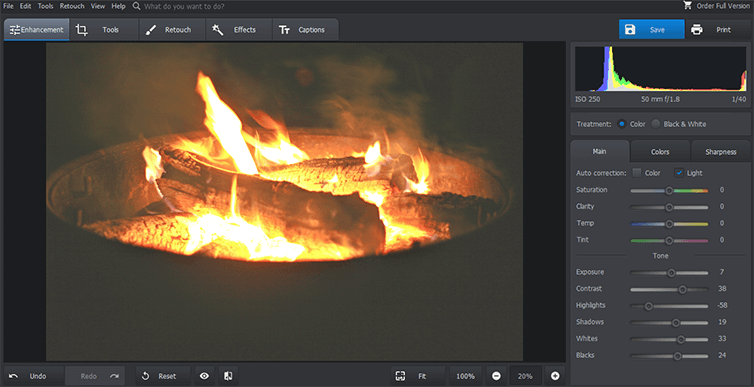
While on the Enhancement tab, adjust the Exposure level.
3. Adjust the Colors
I decided to adjust the colors of fire a little bit. Go to the Colors tab on the right and change the colors the way you like. I made Oranges more orange, and also increased the Yellows. This makes the fire image warmer.
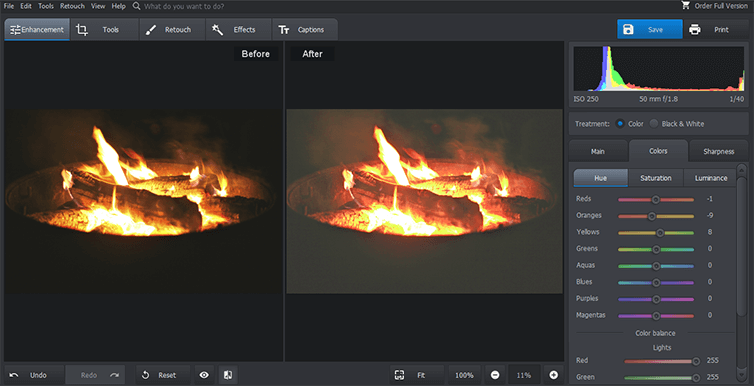
To make your fire photograph 'warmer', you need to increase Oranges and Yellows.
4. Reduce High ISO Noise
The image has some digital noise because it was taken with a high ISO. I would like to reduce the noise and make the image smoother. To fix grainy photos, go to the Tools and choose Noise Reduction.

Move to the Tools tab and pick the Noise Reduction tool.
I moved the slider right to 13 points.

Use Noise Reduction to erase the consequences of a high ISO.
5. Add Some Cool Photo Filter
Then, I decided to add some cool photo effect to the image. PhotoWorks has a lot of beautiful modern filters. I used Blue Tones to add some blue to the darker shades. This way the warm yellow light of the fire looks even better because yellow and blue are complementary colors. Use the Color wheel by Adobe to learn more about complementary colors.
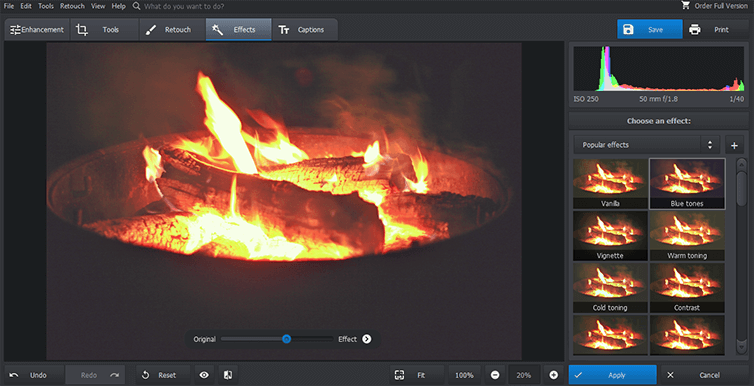
Apply artistic photo filters to accentuate the chosen parts of the image.
PhotoWorks lets you see the Before and After images side by side - just use the button at the bottom. Here is what I got in the end. Do you like the results?
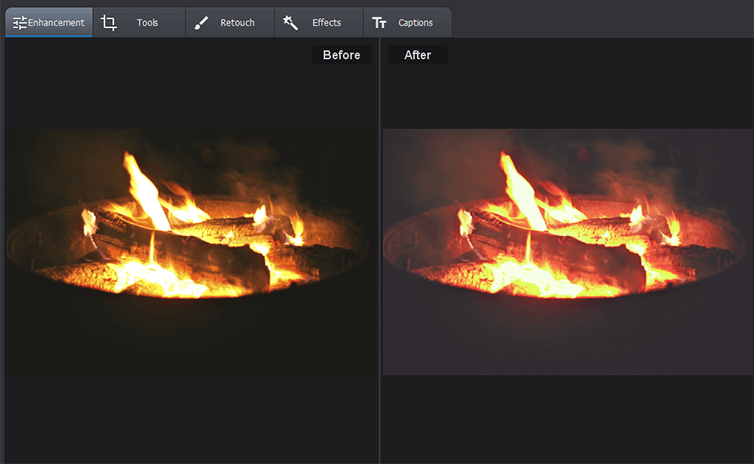
Compare you edited photo with the initial image.
Over to You
Now you know how to shoot fire in various situations, what camera settings to choose, and how to edit fire photographs. It’s time to go out and practice. Remember that practice makes perfect. I hope you’ll get a chance to use some of our ideas for fire photography to hone your skills in this exciting photography field.
