
How to Use Different Camera Angles to Take Better Pictures
A good shot is the desired result for both novice and experienced photographers but even the best camera or extra-sensitive lens do not guarantee you will get an eye candy. Possessing different proficiency levels and kinds of equipment, all photo lovers can still capture the shot of their dream. All they have to do is to choose the best angles to take pictures and follow certain rules of building the photo composition.
Below you will find five useful tips for choosing creative picture angles that are easy to implement into your daily, travel and portrait photography. Keep on reading this post and you will also learn how to save seemingly ruined pictures at the post-processing stage.
How to Add More Impact to Your Shots?
Is there an easy way to make your photographs more creative without a tiresome post-production process? Indeed, there is a solution - try showing the world from your personal perspective. Shoot ordinary objects and scenes from unusual and even bizarre angles. For example, lie down on the ground level or climb to the mountains. These techniques will work both on a professional camera and a simple smartphone. That’s why you should definitely try getting past the ‘regular’ shot and compose a photo with a strong ‘wow’ effect.
1. Take Pictures From Below
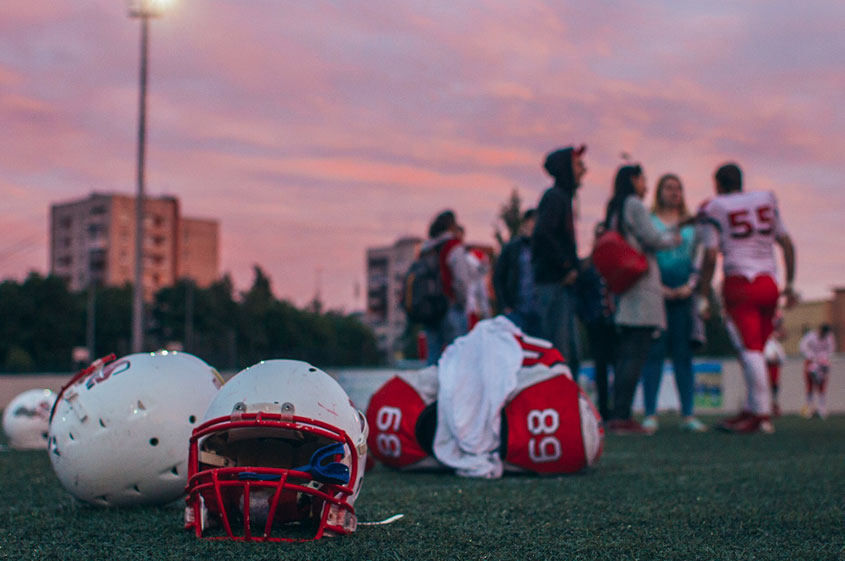
If you're desperate to get a perfect shot from some unusual perspective, do not be afraid to lie down on the ground or squat on your haunches. Taking your photos from a ‘leveled’ position, or a low angle, you will be able to make a perfect close-up and a macro shot of even the smallest animals like a ladybird or dragonfly. Another cool idea is to take a picture of some object lying on the ground and leave the background blurred but filled with action.
2. Shoot Your Photos to the Sky
Want more tips on good angles to take pictures? Here is one more secret - keep your head up. Take a picture of trees or skyscrapers reaching to the sky while standing on the ground - it’s often called a high angle. That way you can create a whirlwind of forms and colors, or showcase the harmony of geometrical lines. Shoot bare trees to get a sinister photo or skyscrapers for a more uplifted effect. However, be careful with the exposure to preserve the natural color of the sky.

3. Play with the Fore- and Background
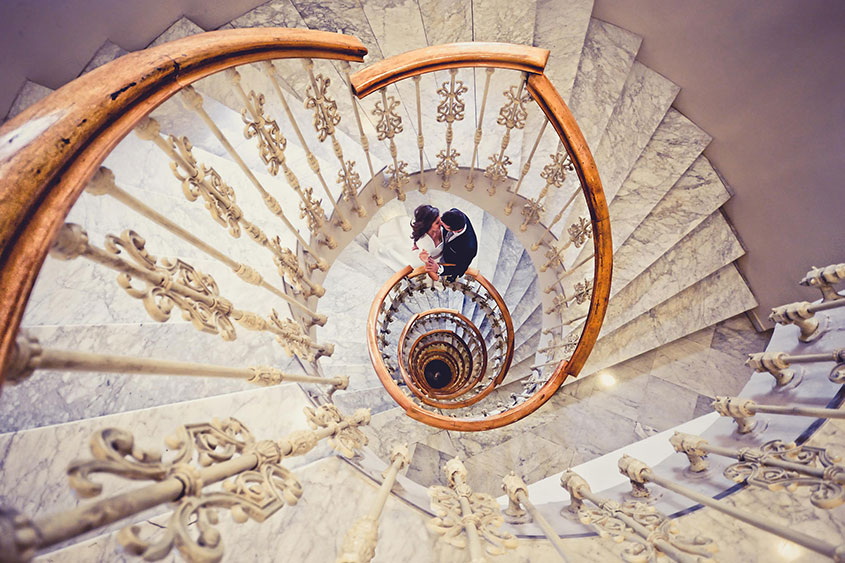
As a rule, photographers place the main subject in the foreground and leave the rest of the scene neglected. Sometimes it helps to focus the full viewer’s attention on the chosen human figure or object but if you want an unusual angle in your photoshoot, try adopting the background into the whole composition. Here, the couple look as if they were accidentally caught by a photographer. You can also shoot two closely standing buildings to create peculiar forms.
4. Position the Subject Off-Center
An off-center angle in photography is a powerful trick to get an interesting shot. If you place your subject closer to one or another side, the background will play a more prominent role in your composition. That way you can create the illusion of space or motivate the viewer to take a look at small and distant details. To achieve this effect, imagine that the photo is covered with a grid layout and position the main subject along intersecting lines closer to the right or left corner.

5. Use Photo Reflection Effects
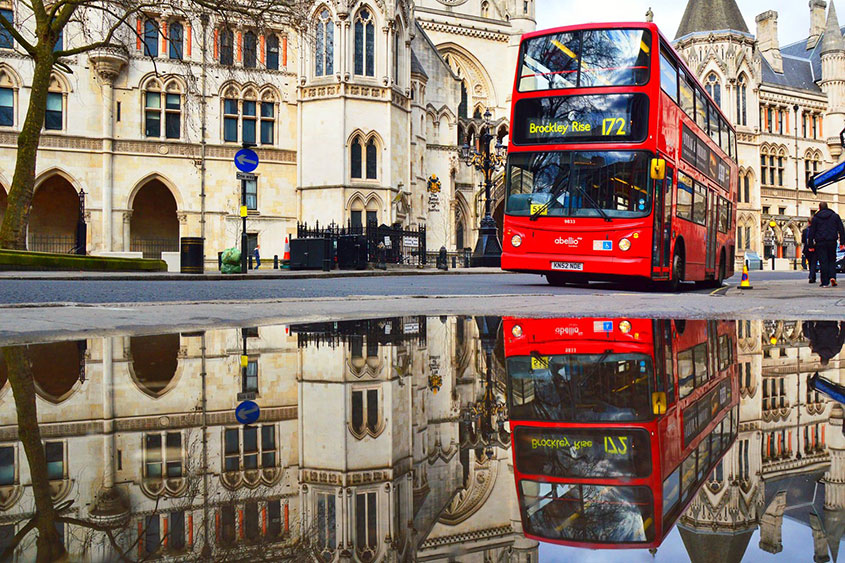
If you take pictures from different angles, for example a bending position, you can also include other objects into the frame. A simple reflection in a lake, a river or even a puddle can add a new dimension to your photos and showcase mundane objects from a rather unusual perspective. Here the bus is taking most of the picture, but the old buildings in the background are better seen in the reflection where the bus is more like a red spot.
How to Change the Angle of a Photo?
Following the tips above, you still cannot be sure that you will get a perfect shot. If something went wrong and the lines in your photo are curved inwards or the horizon is heavily tilted to one side, a photo editor with the perspective correction feature will come to the rescue. Below you will find advice on how to correct lens distortion in PhotoWorks.
Tip #1. Restore a Natural Perspective in the Photo
If you have faced the problem of lens or perspective distortion, you can still save your ruined shot. Click Composition > Geometry and tick the Show Grid box to see the extent of your photo aberration. Then drag the Distortion slider to the left or to the right depending on the type of distortion you have (barrel or pincushion distortion). When the lines of the objects in your photo get back their natural look, compare the result with the initial photo and save the edited image.
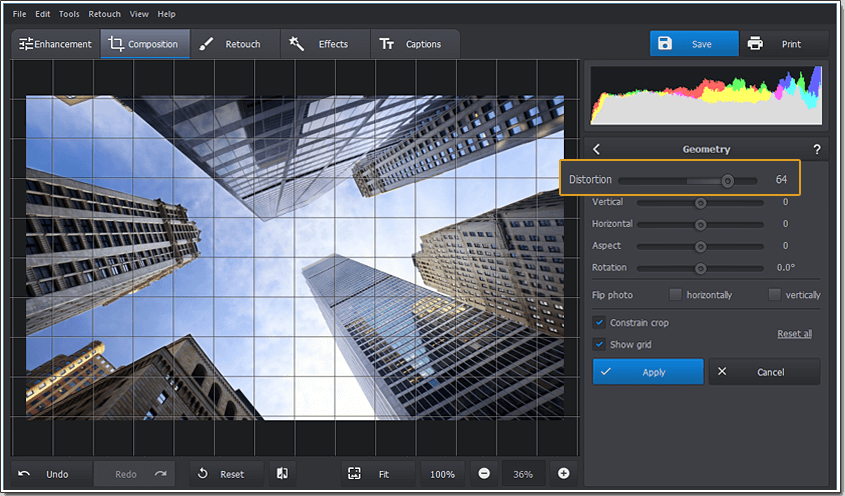
Drag the Distortion slider to bring back the natural look to your photo
Tip #2. Straighten a Wonky Horizon in 3 Clicks
Took an impressive landscape shot but it comes up with a wonky horizon? Straighten a picture using the Geometry tool in PhotoWorks. Tick the Show Grid box to better see curved lines and rotate the image to the left or to the right depending on the slanting of the horizon line. The Constrain crop tool will help you compensate the loss of image parts though rotation. Do not forget to compare the edited shot with the initial photo.
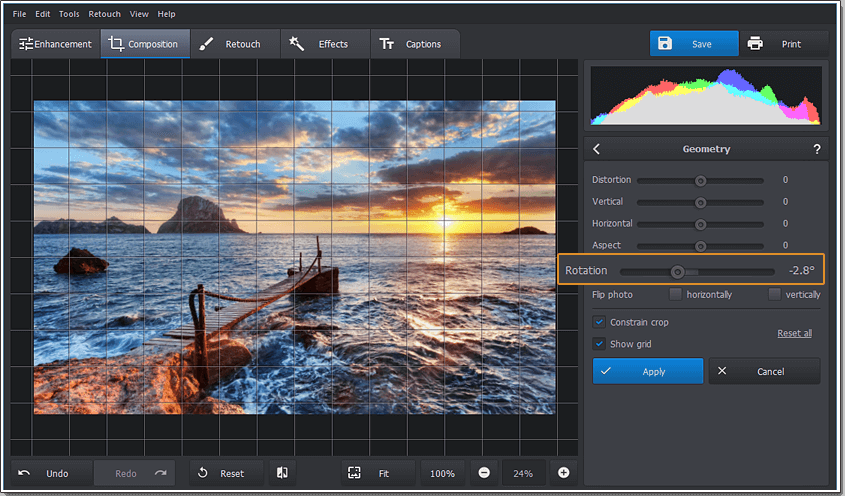
Straighten the tilted horizon line in your photo through rotation
Tip #3. Crop the Photo to Cut Away the Unnecessary
While the Composition tab is active, click on the Crop tool - it lets you improve the composition and get rid of unwanted elements in photos. The program lets you choose a suitable aspect ratio to preserve the initial proportions of your image. Pick the grid overlay that will work best on your photo (for example, Golden Ratio or Rule of Thirds) and position the main subject at the crossing of the grid lines. Be careful not to amputate people's limbs in your photos.
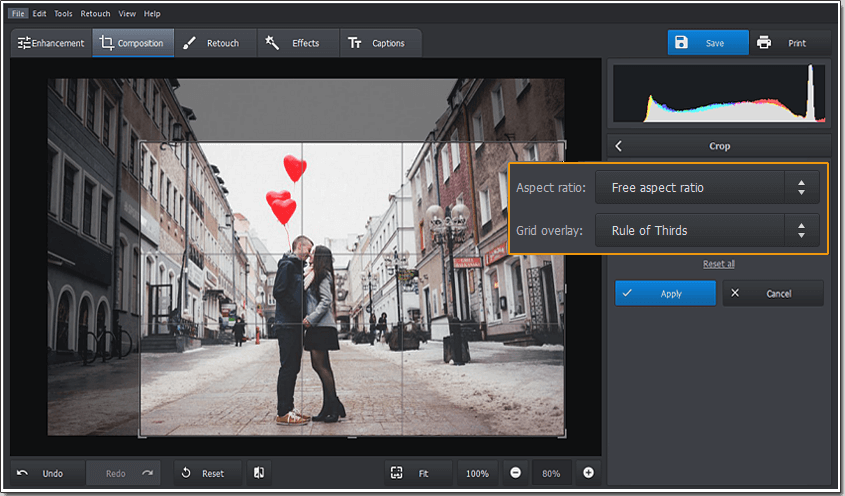
Focus the viewer's attention on the main subject by cropping out the rest
PhotoWorks software gives you plenty of opportunities to save seemingly ruined shots and even make them better through a simple editing process. Restore the natural perspective, get rid of unwanted elements, make black and white photos and adjust the color balance of your pictures in a couple of clicks. If some objects steal the attention from the main subject and you can't erase them, simply make an image background transparent or change it to something more eye-catching. You can also further improve a great shot taken from an unusual camera angle by applying stunning effects or photo filters and finally sign your creative work with text captions to make it truly yours.
