
 Download
 Download
How to Make the Background of a Picture Transparent in 2026
Need to save a picture with a transparent background for your creative blog or online shop? Or your gorgeous photos just turned out mediocre because of a so-so background and it needs to be wiped out now? I agree, erasing a background without damaging the main object may seem challenging at first. Well, listen here, I’ve got a number of different way-outs you can easily try. They are meant for both for new and advanced users and involve various programs like Paint, PowerPoint and Photoshop.
Now here are all the 7 ways for making a background transparent:
- 1. Turn a photo background transparent in PhotoWorks
- 2. Make a transparent background with Paint
- 3. Remove a photo background in PowerPoint
- 4. Create a transparent background in Photoshop
- 5. Erase a photo background in Publisher
- 6. Delete a photograph background with GIMP
- 7. Give your pic a transparent backdrop online
If you are a newbie at image editing, check out the way with PhotoWorks. This automatic photo editor has an intuitive workflow, so you will make the background transparent in just a few strokes of a special brush. The best part is you can easily add background to pictures too. Pick one from the collection or insert your own picture, click the button and your new image is ready!
Way 1. Turn a Photo Background Transparent in PhotoWorks
If you prefer simple user-friendly editors over complex software just like me, then this method is for you. There are many easy-to-use programs that have their own ups and downs, but I suggest picking PhotoWorks. Its toolkit is very extensive and can be compared to top photo editors.
Now here are the steps for making a background transparent on Windows and Mac in PhotoWorks:
Step 1. Pick the 'Change Background' Tool
Open the Tools tab and choose Change Background.
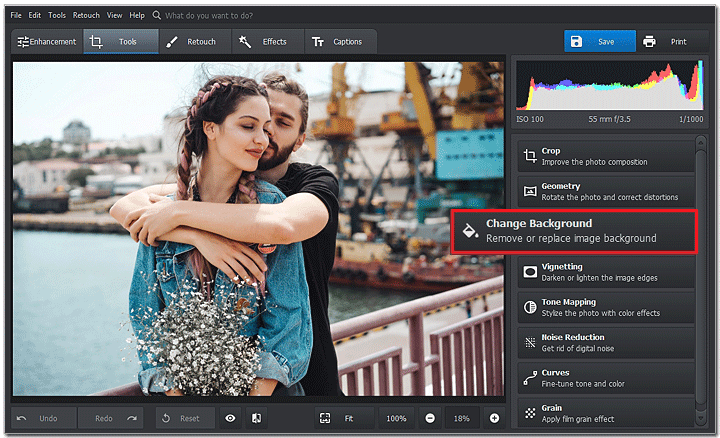
Pick the 'Change Background' tool from the list
Step 2. Mark the Areas You Want to Separate
Select the Object brush and make a few strokes near the object’s edge to separate it from the background. The software will place a green selection. Now point out the background with the other brush and it will be marked with a red color.
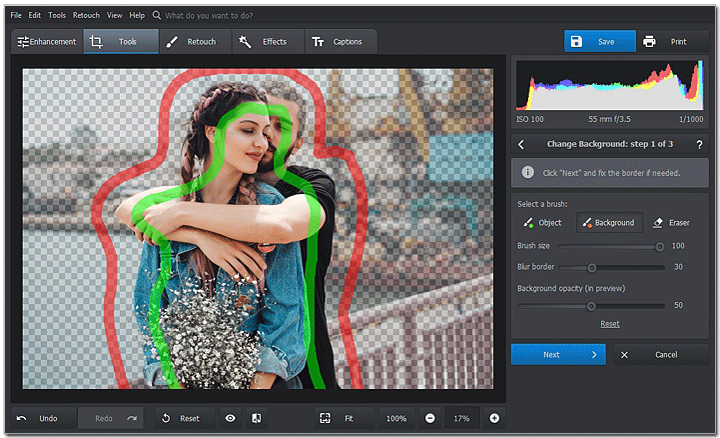
A couple of strokes will be enough to remove the background
Step 3. Tweak the Selection
Once done, the software will convert the background to transparent automatically. Use the same brushes to correct the selection edges if necessary.
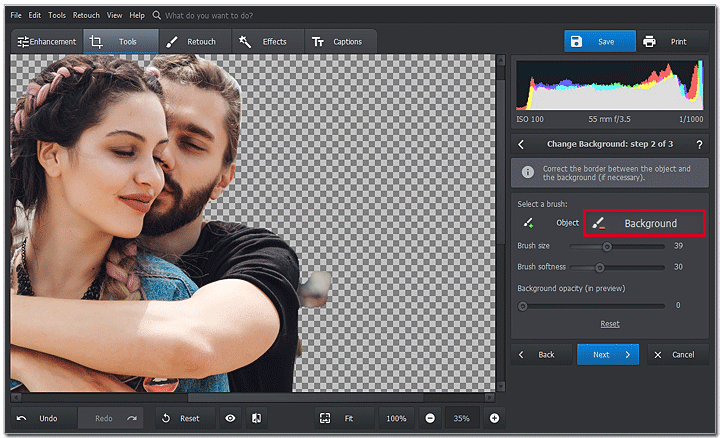
If the object gets mixed with the background, make a few more strokes to fix that
Step 4. Save Your Image with Transparent Background
Click 'Save with transparent background' to keep the new image as a PNG file.
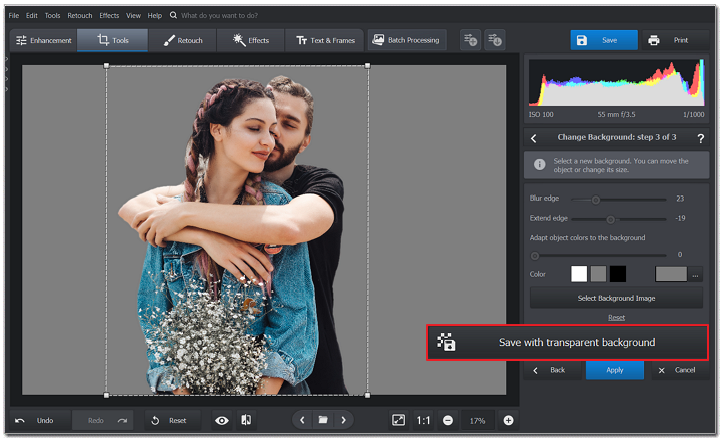
Save your picture as a PNG to add a new background later
Want a more in-depth instruction? Then here's a short video for you - watch it to learn a fast and easy way to make the image background transparent.
Simple as that! No more cumbersome selections, just a few strokes and everything’s done. I bet you want to try it out with your own images? Use the link below to download:
With PhotoWorks, you will be able to not only replace and remove the backgrounds, but also retouch your images, enhance photo quality, fix perspective and lens distortions and apply one-click effects. No need to search for complicated guides on how correct colors, how to deblur a picture or how to fix a tilted horizon - all the tools are at your fingertips.
Way 2. Make Transparent Background with Paint
You may be not experienced in photo editing but you heard about MS Paint for sure. This extremely simple image editor is built into all Windows systems, and it has been a lifesaver for many users. You will be surprised, but you can edit the background or even make it transparent with this program as well. If your computer is running Windows 7 or higher, then you should already have Paint.
Here are the steps for this program:
Step 1. Choose 'Transparent Selection'
Click Select and put a tick for Transparent Selection. Now pick Free-form selection from the list.
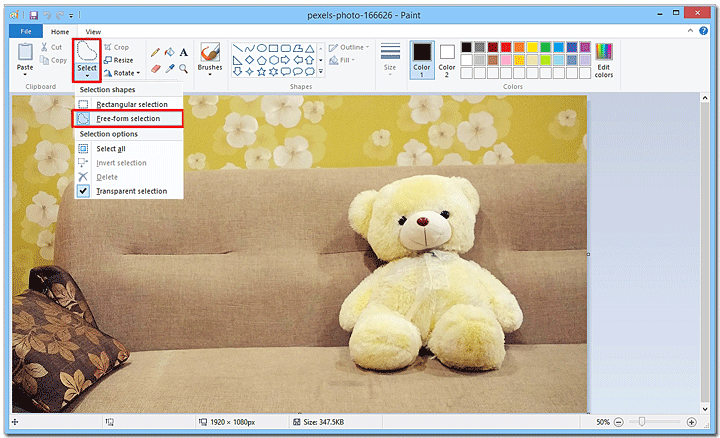
Since you will be doing a manual selection, pick something with simple lines
Step 2. Select the Object
Trace the object with the Free-form selection.
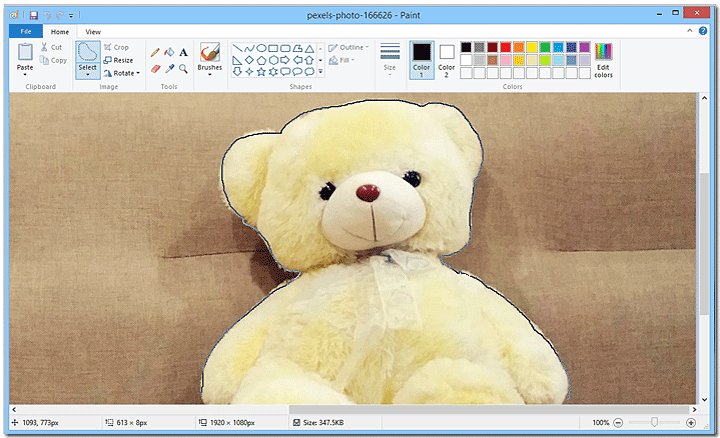
Try making the selection in one step, otherwise you’ll have to start all over again
Step 3. Give Your Image a Transparent Background
Click Cut in the top left corner or just press CTRL+X on your keyboard to cut out the selected area. Now open a different JPG picture or a transparent canvas and paste your object there.
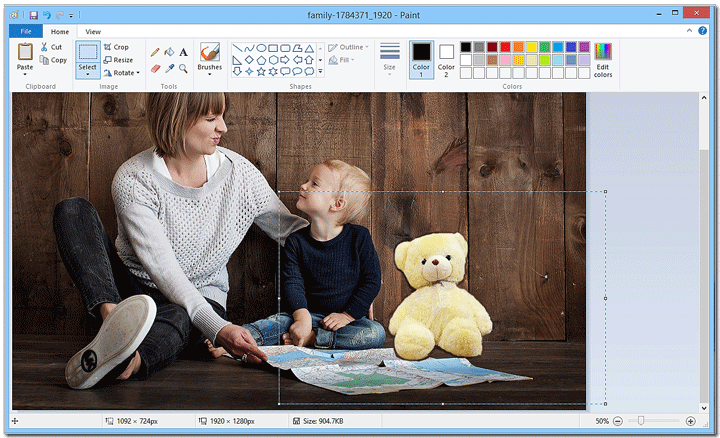
We placed the object to the new, more suitable background
In Microsoft Paint, it all depends on your precision, because you won’t be able to adjust anything in the process. The software will crop exactly by the line you made, so if your hand is not steady, better to take the method with the paint-over selection.
Have a RAW pic that you want to give a transparent background, but need to turn it into a more convenient format first? Learn how to convert RAW photos to JPEG files with no effort at all.
Way 3. Remove a Photo Background in PowerPoint
If you often use PowerPoint for making presentations, then this way is for you. PowerPoint is a part of Microsoft Office package and lets you not only make slideshows, but also perform basic edits for the pics and other content you use in them.
Need to turn a background transparent for an image slide in PowerPoint? Then follow these steps:
Step 1. Choose 'Remove Background'
Click your image, then go to the Picture Format tab and select Remove Background. PowerPoint will separate the object from the background automatically.
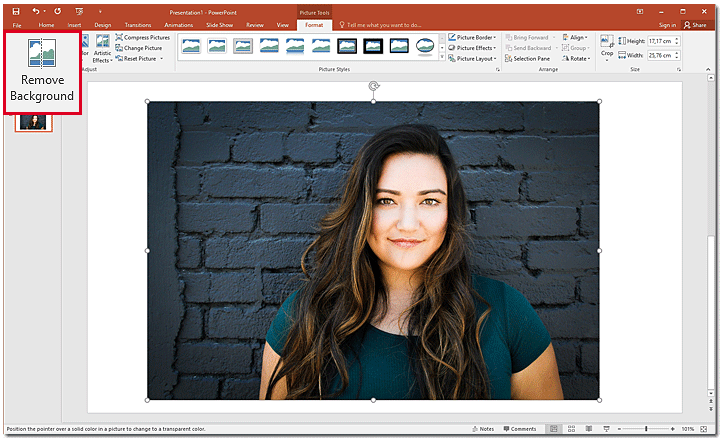
PowerPoint is smart enough to determine the background automatically
Step 2. Correct the Automatic Replacement
Everything marked in violet color will be removed, so tweak the selection a bit if necessary. Hover your cursor over the edited area: if you see a plus, then you can add this part to the selection with a click, and if you see a minus - you can delete it.
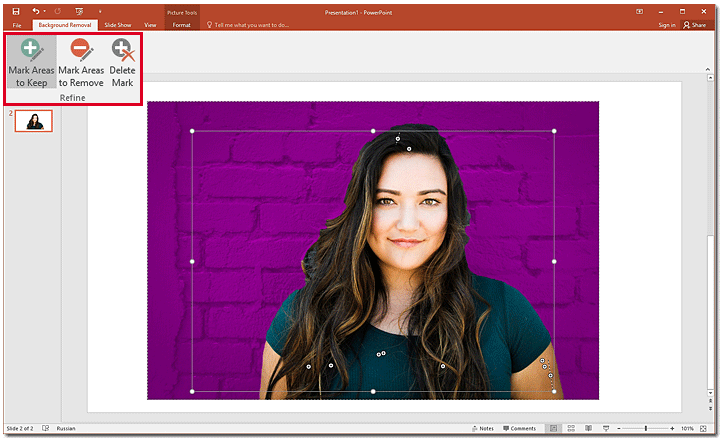
The violet color lets you see all the lines and define the selection
Step 3. Save Your Image as a PNG File
When done, click outside of the image to apply the changes, then save your image as a PNG file to preserve transparency.
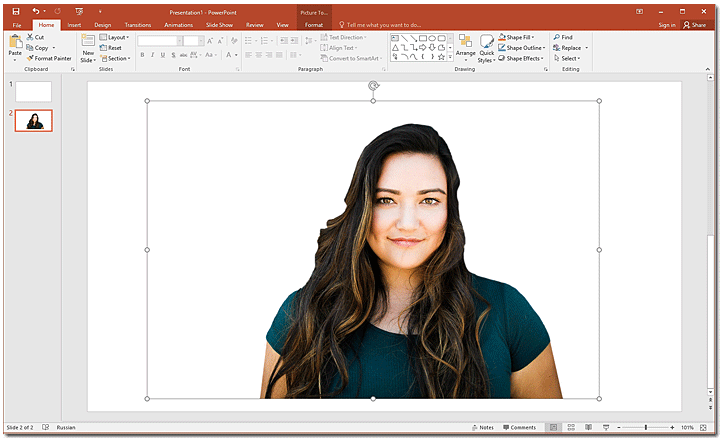
Don’t forget to save your image as a PNG file to keep transparency
Keep in mind that this way will work only if you have Office 2010 or later.
This is a nice working method if you need an image with a transparent background for one of your presentations. However, if the picture is required for other purposes and you want to use the software that’s meant to edit images in the first place, then I suggest skipping this method.
Way 4. Create Transparent Background in Photoshop
Photoshop is one of the most popular image editors, so it’s not a surprise that this software is on our list. Photoshop is suitable for a variety of tasks: from simple crop-here-insert-there to complex photo retouching. If you have some design in your mind, 99% it can be made with this program.
If you have an Adobe subscription, then here are the steps for making the background transparent on Mac and Windows in Photoshop:
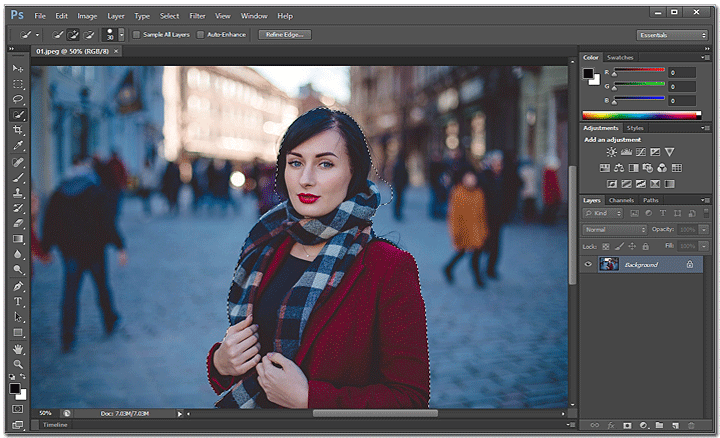
Step 1. Pick 'Quick Selection' from the Toolbar
Choose Quick Selection and set its size.
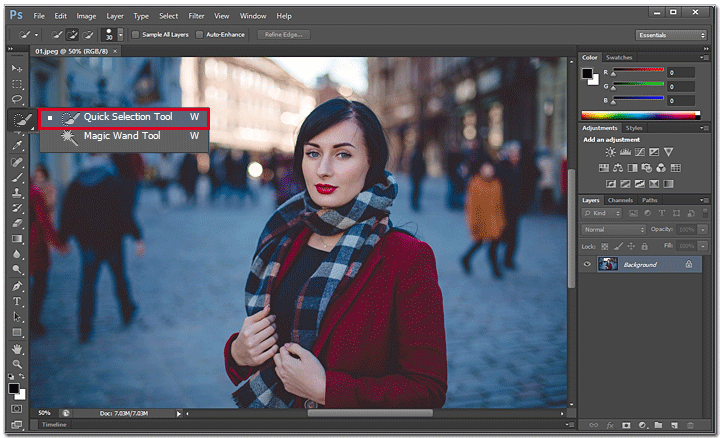
Our object has clearly visible lines, so we will use Quick Selection
Step 2. Select the Object You Want to Keep
Click the area you want to save. Photoshop will place a selection automatically without touching the background. Continue clicking to cover up the whole area.
This method is similar to the one where you place strokes to mark the areas
Step 3. Tweak the Selection Edges
Automatic selection can fail sometimes, so switch to ‘Subtract from selection’ and correct the edges. Better to do this with a smaller brush.

Use a smaller brush to select small or less visible details
Step 4. Make a Photo Background Transparent
We need to inverse the selection: right-click it and choose Select Inverse. Your background will be selected now instead of the object. Then just press Delete on your keyboard to erase it.
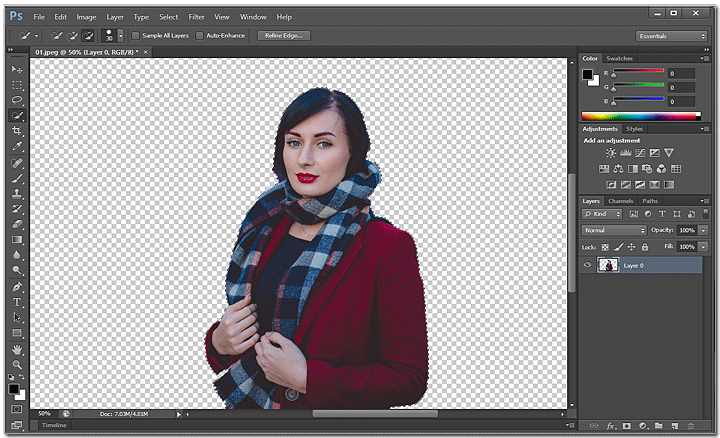
Remove the background just by pressing the Delete button
The process of making a background transparent in Photoshop is rather simple, especially when you’re creating a logo or some similar design with visible edges. But once you have your image where the lines between the object and surroundings are not that obvious, you will have to use manual selection with the lasso. Otherwise the automatic tool will most likely fail to determine the edges and will select large, unneeded areas.
If you are trying to remove the logo from a picture, because you lost the original image, then better check out this guide on how to get watermarks off pictures. It suggests other, more simple methods, than just erasing the whole background.
Way 5. Erase a Photo Background in Publisher
If you use Microsoft Publisher from the Office package to do different designs for calendars, posters, greeting cards and so on, then here is the way for you. It often happens that you want to make a transparent background for one of your designs to add something extra later. You don’t have to turn to Photoshop here: you can remove the background right in Publisher.
Here are the steps:
Step 1. Import Your Image
Pick a layout and add your photo.

Stretch your photo if you don’t need the white template frames
Step 2. Open 'Picture Tools'
Click Picture Tools and choose Recolor.
Find Recolor in Picture Tools
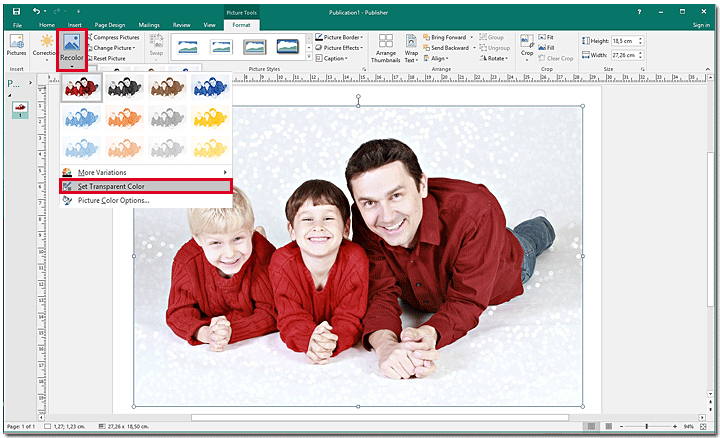
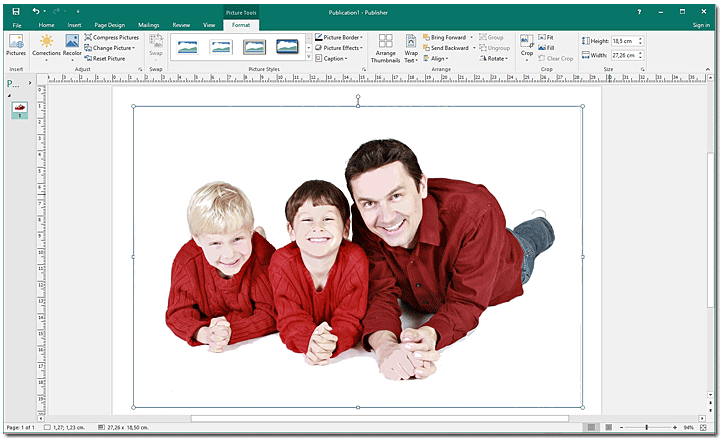
Step 3. Turn the Background Transparent
Select Set Transparent Color and click the color area you want to erase. The software will replace this area with a transparent one.
Try to be precise with the click or the program will pick a new area after the second click
This way is only suitable for pictures with a plain background. Otherwise you will get white spots all over the image.
This method of making photo background transparent in Publisher is rather easy and lets you erase the background just by making a click. But if you want to tweak the selection edges or change the transparency level, I’m afraid you’ll have to try some other way.
Way 6. Make a Transparent Background in GIMP
Want a powerful and multifunctional photo editor but prefer to save your money? Meet GIMP, a program similar to Photoshop that you can get for free. When it comes to making a transparent background, the editor can easily do that even with photos that have complicated backdrops. Check out our quick tutorial to learn more about how to work with this editor:
- Import your image. Go to File > Open as Layer. This way, you isolate the photo that you are importing, and it is more convenient to edit it.
- Select the background you want to make transparent. Use the Fuzzy Selection tool on the left toolbar, click the background, and the tool will recognize it based on color similarity.
- Turn the photo background transparent. Go to Layer > Transparency > Add Alpha Channel to add a transparent layer to your project. Press Delete on your keyboard to remove the selected background.
- Save your edited picture. Click File > Export As and select PNG so that your photo remains transparent. Hit Export and you will be done.
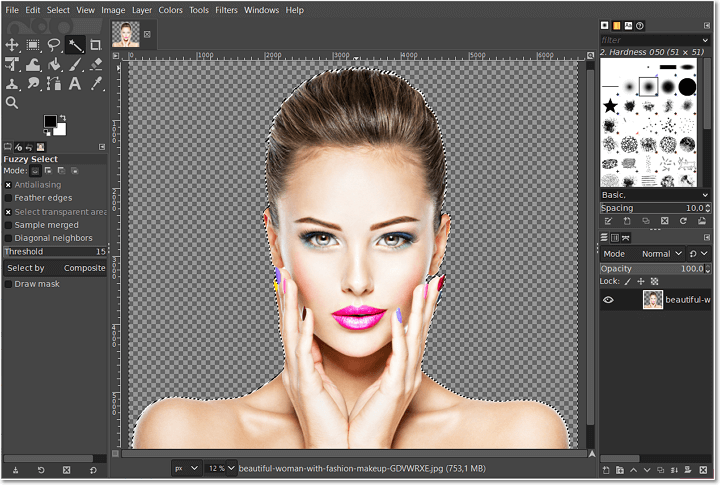
Use GIMP to make the background of your pic transparent
GIMP offers a handy way to erase any type of background. However, the editor isn’t intuitive, and it would be difficult for you to figure it out without a tutorial. The same goes for the program’s other features. So in case you prefer easier interfaces and aren’t planning to switch to professional programs, GIMP might get you frustrated. But if you are a professional or studying to become one, this free photo editor would become a great Photoshop alternative for you. Check out a detailed GIMP tutorial to learn some more tips on this way!
Want to enhance several images but don’t have much time? Learn how to edit multiple photos at once and polish up a whole batch of pictures in mere minutes.
Way 7. Turn a Photo Background Transparent Online
If you prefer online editors to desktop ones and have a stable connection at home or wherever you edit, try remove.bg. It is a photo processor that erases the background from your photo automatically the moment you import it. That makes it the easiest way of making the background of a photo transparent. Let’s dive into the tutorial so you can get a better feel of the editor:
- Open your picture in the editor. Just drag and drop it from your folder into the startup screen. The program will remove its backdrop automatically.
- Remove leftover pieces. Go to Edit > Erase/Restore. Adjust the size of the Erase brush and wipe out the remaining parts of the background. Switch to the Restore brush if some important parts of your pic were accidentally removed.
- Export your final picture to your computer. Hit the Download button. There you go!
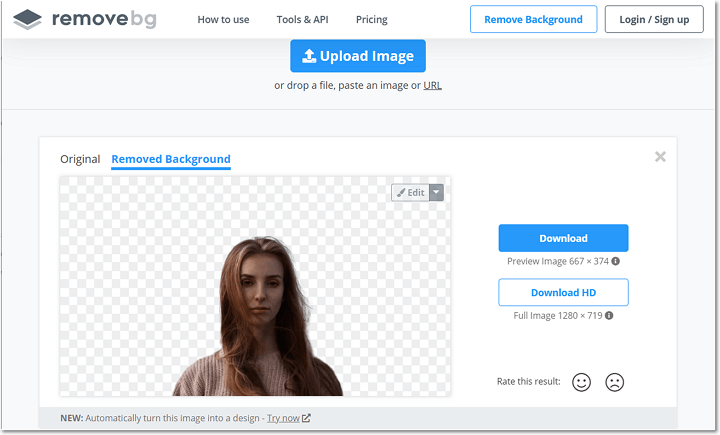
Turn the background of your image transparent online
It takes no effort to get a transparent backdrop on a photo with contrasting colors or an isolated background in this online service. But while editing photos with a complicated background, remove.bg often makes mistakes. So you will regularly have to erase some parts of the background manually. The same will happen if you work on a photo where both the objects and the backdrop have similar colors.
In this detailed 2026 list of 7 simple methods for making a background transparent, you will surely find your go-to editor. Then, all you have to do is follow our steps and make a convenient pic you can overlay on any background you want.
