
 Download
 Download
How to Color Correct a Photo with No Effort
An expensive camera with numerous settings isn’t a universal formula for success. If you’re unfamiliar with such terms as ISO or shutter speed and all thumbs with dozens of buttons and dials, there’s a high probability your shots will need some adjustments in post-production. But it’s not a big problem for you anymore! In this article, we'll share color correction basics and a handful of ways to get it done on any level of photo editing skills.
We’ll show you how to color correct photos using a web-based program, mobile apps, and computer photo editors for Mac and Windows including PhotoWorks. It’s a powerful program that is suitable for newbies and pros alike - you’ll find a range of tools from one-click adjustments to advanced 3D LUTs. So you won’t regret trying it first. Now it’s time to get down to business and become a color correction guru.
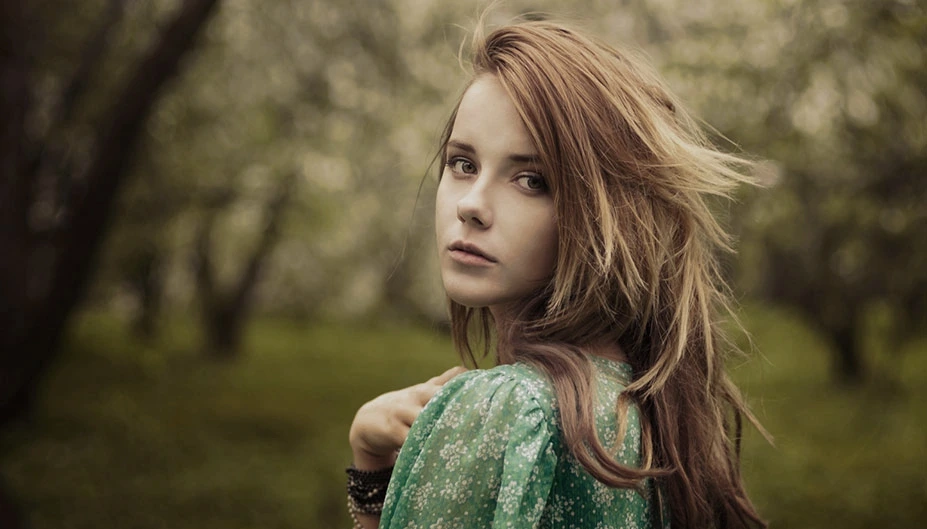
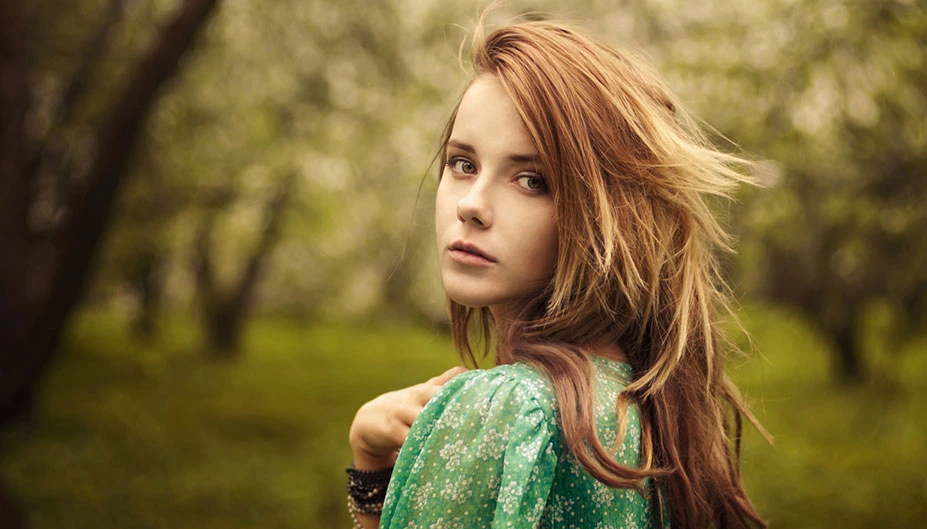
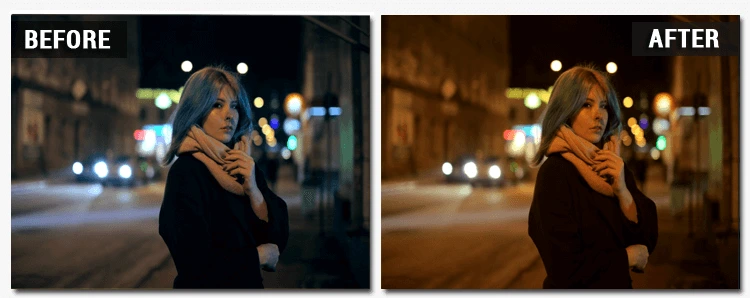
The color corrected photo looks much more natural!
How to Color Correct Photos with Ease
There are 4 ways you can try in PhotoWorks - you can either let the program edit the picture automatically, or do it manually by moving the sliders. It’s also possible to fix colors using the Tone Curve or 3D LUTs. One way or another, you should try the tips in practice right away, so download the installation file and install PhotoWorks on your computer.
The software is already downloaded and launched? Then what are we waiting for? Let’s discover the easiest photo color correction methods right now.
Way 1. Automatic Color & Light Correction
Your whole photo looks too dark? Or maybe its color balance needs some improvement? Now you can tweak color and lighting settings in a single mouse click, and you don’t have to be an expert in image editing for that. PhotoWorks software is equipped with a smart enhancement module that will automatically saturate dull colors and bring back light to your picture.

While on the Enhancement tab, check the Color box to add vividness to the colors in your photo. To compare the initial picture with its edited version, hold the View Source button, or hit Before / After to see both images at once.
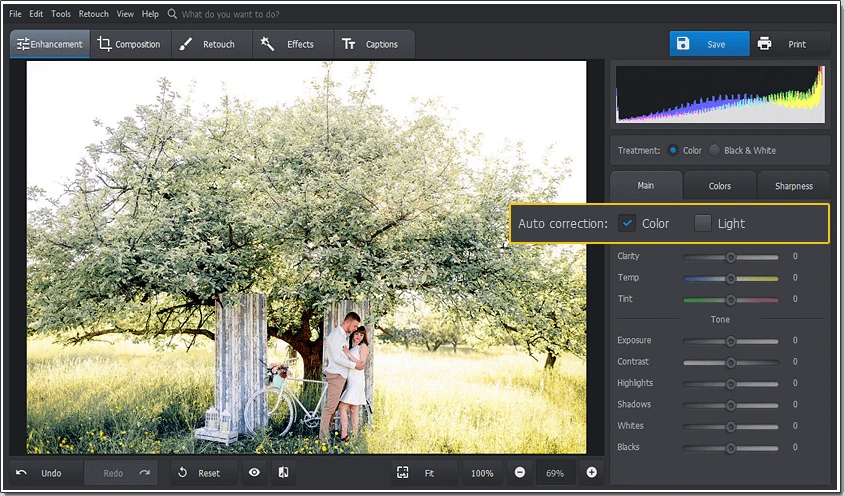
Revive the dull colors of your photos in just one click
If your photo suffers from lighting problems, click Auto Correction > Light. The smart module will adjust exposure, contrast, highlights and shadows. Take a look at the histogram at upper right. This chart will show you if your picture is bright enough. The even distribution of colors across the histogram means that your photo is OK now.
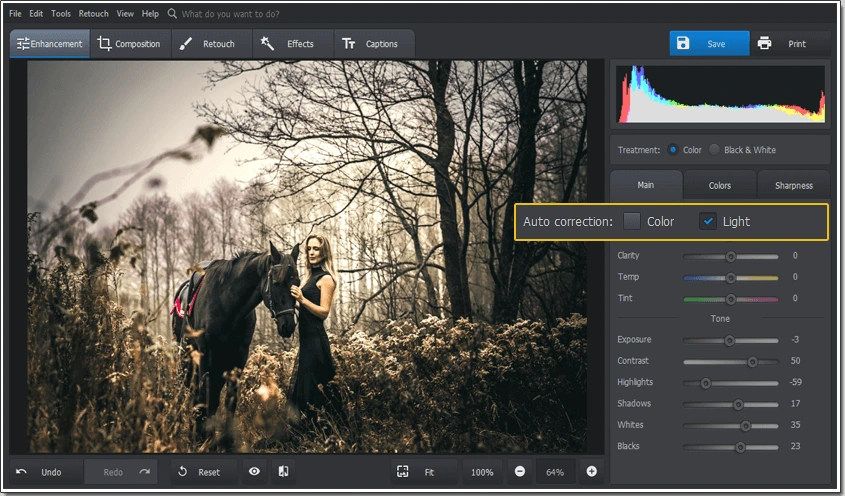
‘Switch on the light’ of your pictures with PhotoWorks
Keep in mind that auto enhancement works great on evenly dark or dull photos, i.e. this tool solves ‘global’ color problems. Automatic changes affect the whole image so it will fix the ruined parts. At the same time, light spots can become overexposed and well-saturated parts can turn too radiant. To touch up separate areas of your photo, try color correcting photos manually.
Way 2. Subtle Editing Through Color Sliders
How to edit colors in a picture that experiences local tonal problems? Manual color adjustment is a perfect solution if you need to bring out particular hues of your photo without changing the other tinges. That way you can brighten or darken the chosen parts, and even change the tonal mood of your photograph switching between cold and warm color ranges.
Move to the Colors tab and drag the Lights and Darks sliders right or left to balance the tones of your photo. In this case, you’ll be working with three basic colors - Red, Green and Blue. For example, if you move the Red slider on the Lights panel, you’ll make the whole image reddish. Dragging the Red slider on the Darks panel, you replace the existing red color with cyan hues. The technique is the same for the Green and Blue sliders.
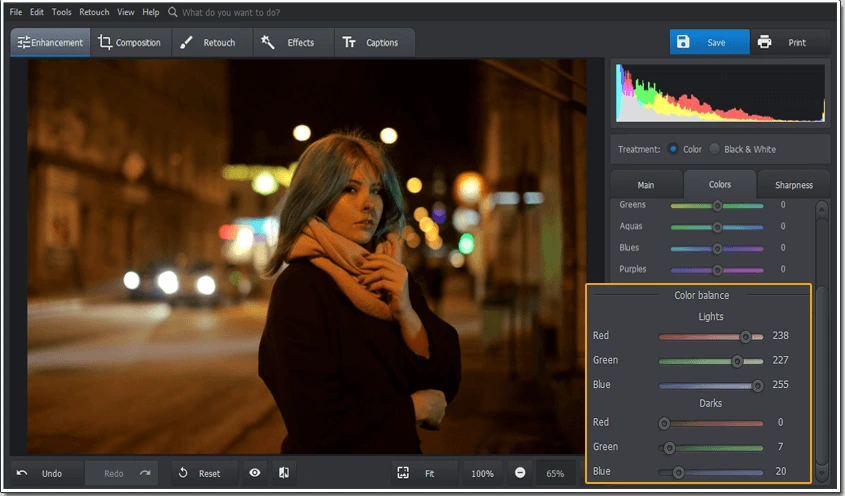
Adjust the color balance of your photo manually
Way 3. Pro-Level Image Color Correction with Tone Curve
Looking for a more subtle way to adjust the color balance of your photo or improve its poor exposure? Begin with Tone Curve like professional photographers do! Similar to manual color correction, this tool gives you full control over the lightness and darkness of various picture parts. Thanks to Tone Curves, you can fine-tune ranges of the chosen tones and achieve beautiful split toning.
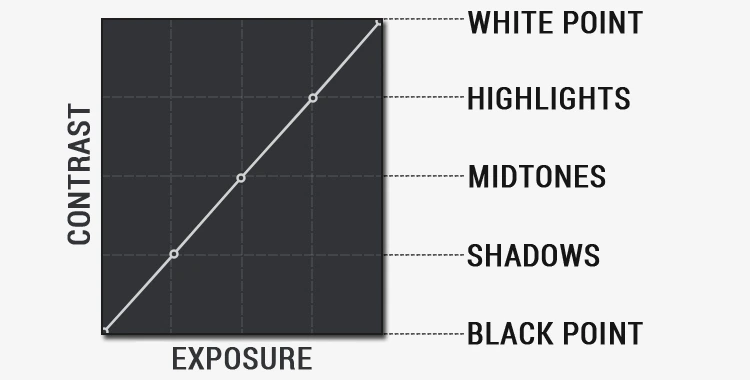
The Curves panel is represented by a gray graph with a diagonal line starting in one corner and ending in the other. The X axis controls the contrast of your photo, while the Y axis is used to adjust its exposure. The White Point is positioned in the right-most end. Then come Highlights. The middle of the line is marked by Midtones. Shadows are placed lower, and the Black Point can be found at the left-most end. As you move down the axis the tones in your picture get darker and brighter as you move higher.

Each pixel in your picture is formed by the combination of red, green and blue, so the RGB channel lets you edit all the colors at once. When you switch to a particular color channel, you pick that color and its secondary color. For example, when you select the blue channel, you’re working with blue and yellow. As you add points and move the curve above the initial diagonal line, it brings out the primary color in that tonal region. Any part of the curve that goes below this line adds the secondary color.
Let’s try using Tone Curve to improve the tones of the picture below.
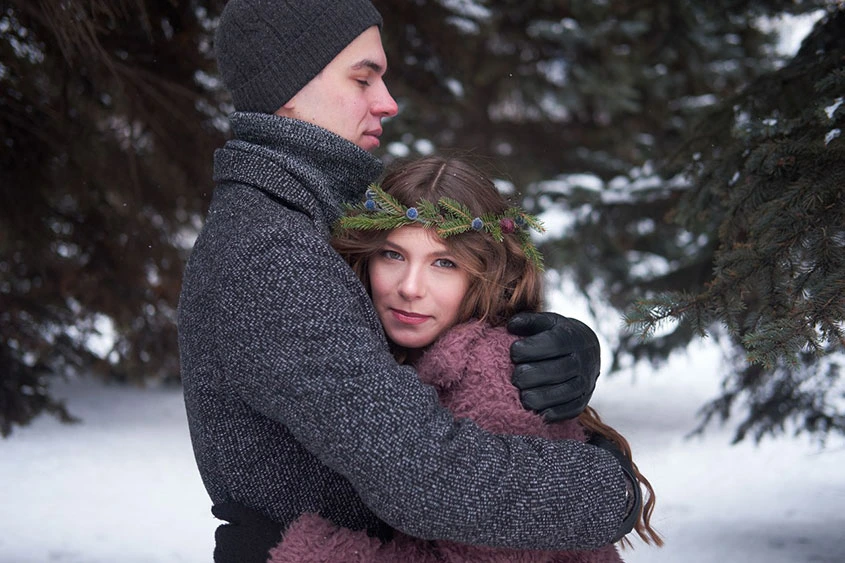
Replace reddish tones with colder ones using photo color correction software
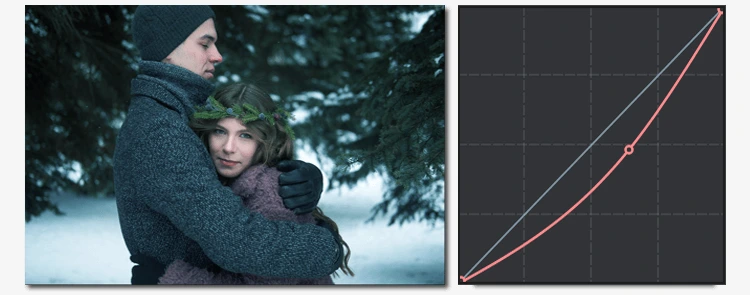
Type in Curves in the search bar and the program will open the tool for you. This shot looks too reddish for winter photography. Switch to the Red channel and drag the curve downwards until the tones of the photo become colder because the program accentuates the cyan hue, opposite to the red color.
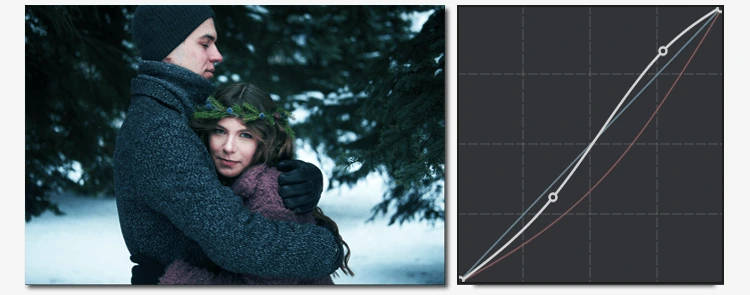
Color correction with curves gives you a chance not only to adjust any given tinges but also increase the overall contrast of your image. This adjustment may be of some use if you want to conceal undesired details and create deeper shadows around the central subject. Switch back to the RGB channel and create a slight ‘S’ curve to accentuate both dark and light areas. However, move Tone Curve carefully otherwise your color corrected photos will look rather grotesque.
Straight-out-of-a-camera pictures often look less impressive than you expect them to be. However, you can easily resurface some lost details, reduce the noise level and restore natural colors if you take your shots in RAW. This uncompressed file format preserves a lot of data received right from the camera sensor and leaves ‘breathing space’ to post-production improvements. With PhotoWorks software, you can edit RAW images in the highest quality with a dozen of ready-made presets.
Tone Curve is a universal tool that lets you create your own artistic filters. Working with the Red, Green and Blue channels in turns, you can apply the tone mapping effect to any of your photos. For an immediate eye-catching result, pick the preset you like, and give your pictures a new polished look in a single click.
If you want to see how to color correct photos on Mac or Windows by yourself, watch this tutorial that demonstrates the editing ways we described above.

Is everything clear with these three practical methods? Then let's move on to the next way to tweak tones in an image - 3D LUTs.
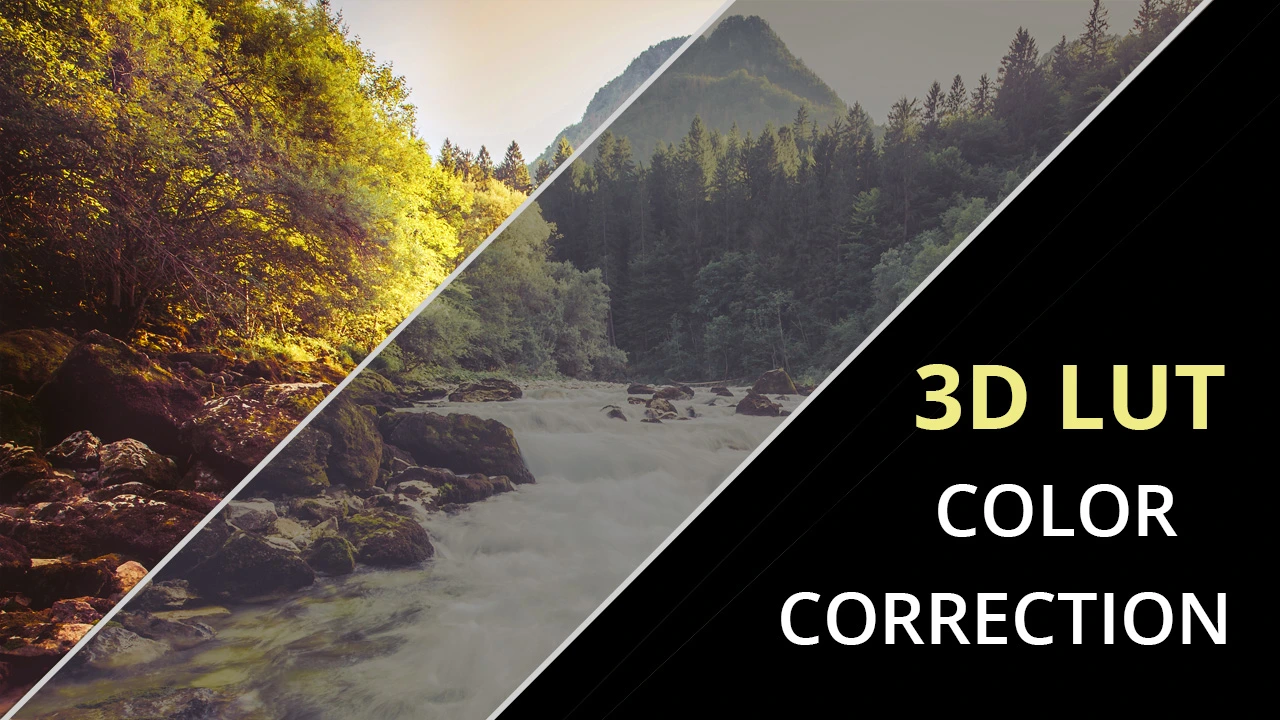
Way 4. One-Click Image Color Correction with 3D LUTs
Before learning how to use 3D LUTs, let’s find out what it is all about. 3D LUT color correction lets you make more natural-looking photos - it’s based on a table where all colors are numbered which makes tone matching much easier. But you can either create them on your own in a special program, or add ready-to-use 3D LUTs. This is how to apply them on a picture.
Use 3D LUTs to fine-tune an image in a moment
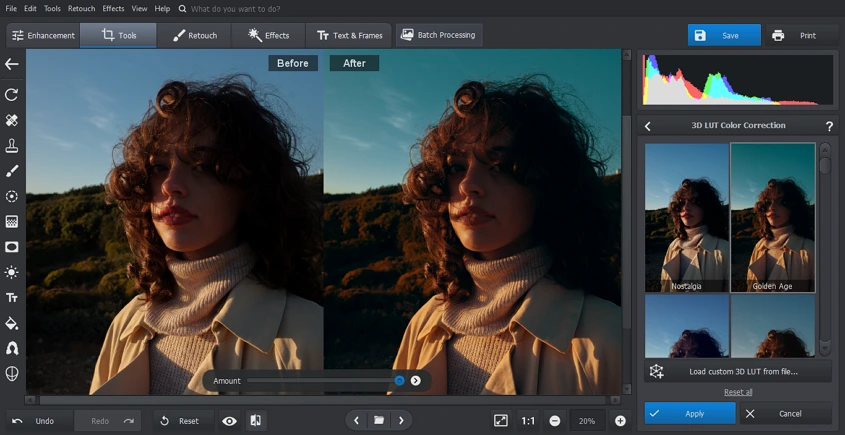
First, go to the Tools tab and select 3D LUT Color Correction. There you’ll see a collection of built-in LUTs. For example, it offers film-like LUTs such as Fuji Superior 200, Fuji Pro 400, Kodak 5205, and Kodak Elite Color 200. For a dreamy effect, try Sunset, Summer day, or Warm tones. When you choose a suitable option, adjust the amount, and click Apply. PhotoWorks also lets you upload other 3D LUT files from your computer - just hit the button below the collection and select the necessary file.
To see more examples of 3D LUT color correction in photography, make sure to watch this video tutorial.
As you can see, this method is very simple but still professional. Follow the steps from the video and check it yourself.
PhotoWorks is here to make sure your final photo looks great and conveys the right feeling. The feature-rich program will let you bring in more light, take shadows out of pictures, get rid of unwanted objects, remove glare from a photo or improve poor composition in a single click. The same goes to more complex things, like old photo restoration. If you need to restore old photos, simply launch PhotoWorks and enjoy the easy and fun process of image editing!
Other Ways to Color Correct Photos
Already have another program installed on your computer? Or you don’t have access to your PC or Mac at the moment and want to use a smartphone for color correcting? Then go for these alternative programs - desktop, mobile, and online photo editors. Which suits you better? Let's find it out now. One of the most common problems today is full storage in our devices, and here’s where online programs come in handy. They let you quickly edit your pictures without having to download anything on your computer or mobile phone. All you need to do is upload the file, adjust such settings as Temperature and Hue, and then export the new photo.
Wondering how to color correct a picture on the go? Consider downloading Afterlight on your iOS device. This app will let you color correct images with Advanced Curves and Selective HSL, but you can also apply filters, gradients, color shift, and so on. To fine-tune photos, Android users can try Photo Lab - sign in, import a picture, and use one of ready-made color effects.
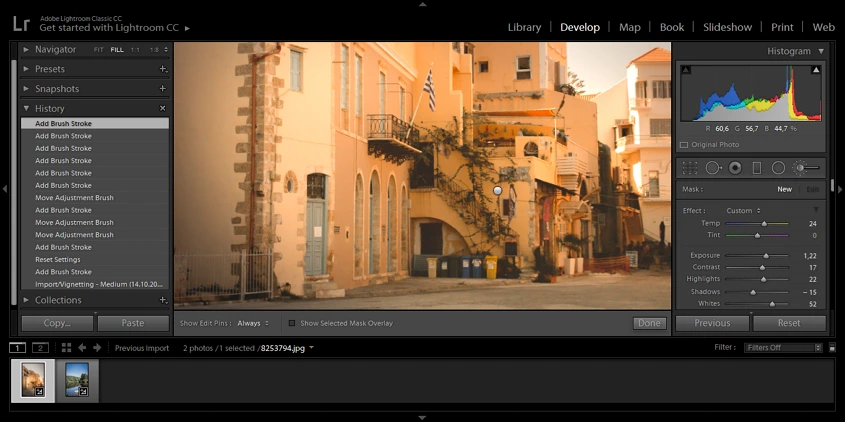
Install Lightroom to fix colors in a picture
In case you’re ready to install a program on your computer, you can try Photoshop. It’s a default choice for photography students, seasoned photographers, and even regular users who want to tweak their pictures for social media. What made it so popular though? Photoshop supports almost all the file formats commonly used in the industry, maintains the high quality of images, and offers a huge set of tools. If you choose this program, you’re going to color correct pictures in the Levels dialog box.
But some users prefer Lightroom to Photoshop - it is more beginner-friendly but still gives good-looking results. In this software, you can adjust the tones using a bunch of tools: Tone Curve, sliders in the HSL panel, Brush, and others. The costly subscription of Adobe products might be a problem though - you can replace them with GIMP, free photo color correction software that offers similar functionality and interface. To fix colors, you’ll need the Color Curve - pick Red, Green, and Blue in the dropdown list and move the dots to adjust the curve.
Color Correcting Photos: Key Takeaways
Colors are a powerful tool for evoking certain emotions of a viewer, so it’s also a key element of a good photograph. For the right perception of your images, you can fix colors with almost any gadget at hand - use mobile photo editors, computer programs, or browser-based services. Whatever software you pick, you’ll be able to create stunning pictures with any of the methods described in this post. But if you want to do it quickly and easily, then be sure to try PhotoWorks. Now you know how to color correct a photo on your own, so it’s time to choose a program and finally change the color palette of your pictures.
