4 Great Ways to Whiten Teeth in Photo
Ever googled how to whiten teeth in photos, only to drown in the avalanche of software and apps that could do that? Let us help you and narrow down your choices to only four options. For starters, there’s a couple of popular programs, such as Photoshop and Lightroom. You can also consider user-friendly software like PhotoWorks where you can achieve the desired whiteness in just a slider flick. Another option is using a convenient mobile app named Sweet Selfie.
Let’s have a detailed look at four different ways to make your smile shine in pictures:
- Way #1. Make your teeth sparkly with Photoshop
- Way #2. Get a cover worthy makeover with PhotoWorks
- Way #3. Do digital teeth whitening with Lightroom
- Way #4. Perfect your smile with a mobile app
Way 1: How to Whiten Teeth in Photoshop
We know that Photoshop can work magic when it comes to graphic design. But what about photo retouching? Can Photoshop turn a flawed smile into a shining one? Let’s have a look at one of the ways to whiten your teeth on Mac and Windows in Photoshop.
Step 1. Run Photoshop and Add Your Picture
Start the software. Open the image you want to work on and zoom in the teeth to better see the problem area.
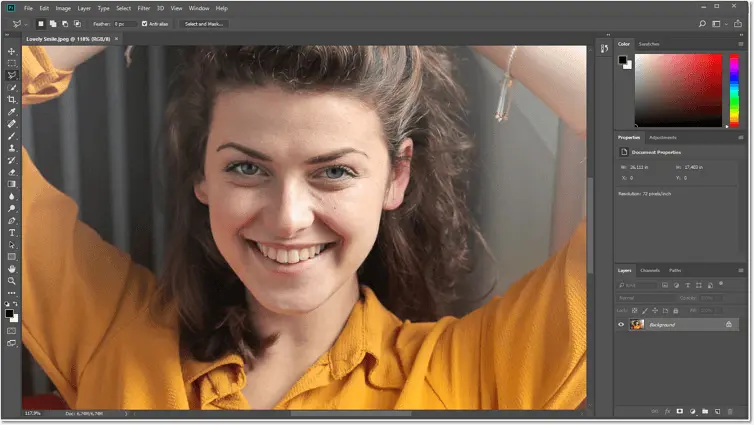
Run the program and add your picture to work on
Step 2. Select the Teeth Area
Pick the Lasso tool from the toolbar and draw around the teeth to select the area you will be working on.
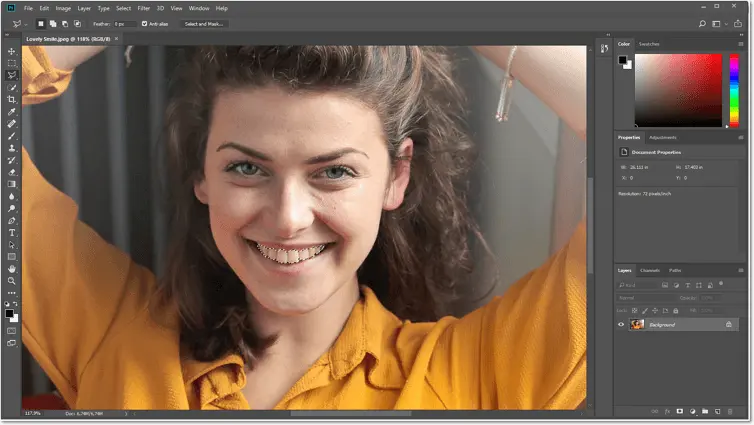
Use the Lasso tool and draw a selection outline
Step 3. Create a New Adjustment Layer
Add a new layer by clicking the New Fill or Adjustment Layer icon on the Layers panel. Choose Hue/Saturation from the menu.
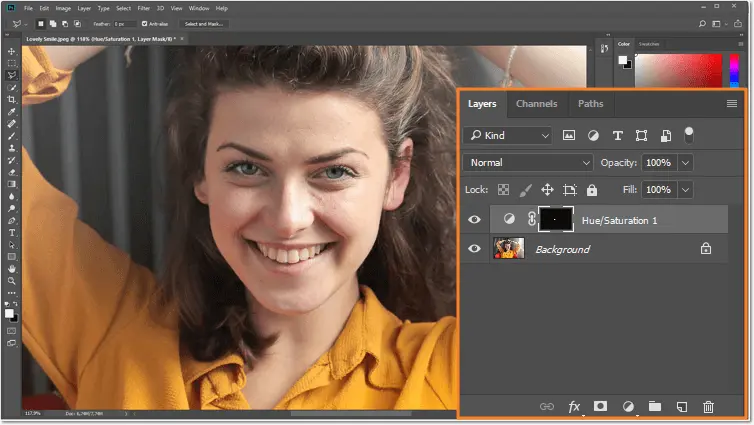
Add a new Hue/Saturation Adjustment Layer
Step 4. Lower the Saturation of the Layer
Now drag the Saturation slider to negative values. Watch as the teeth become whiter right before your eyes.
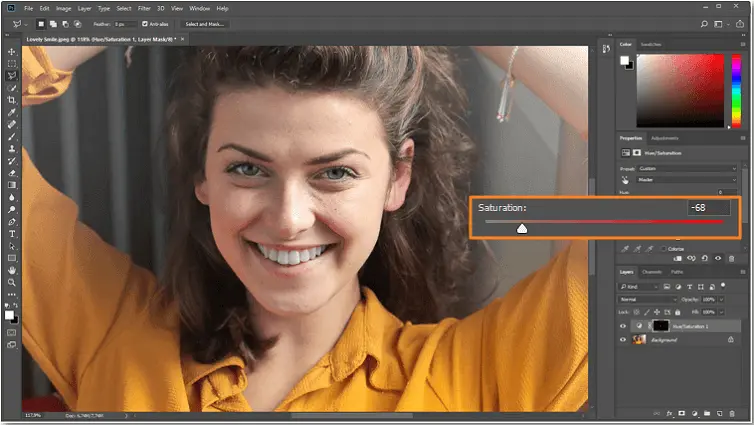
Lower the saturation of the chosen layer
Step 5. Adjust Lightness for a Natural Look
Now the teeth have a grayish tint that does not look healthy. Fix it by slightly dragging the Lightness slider to positive values.
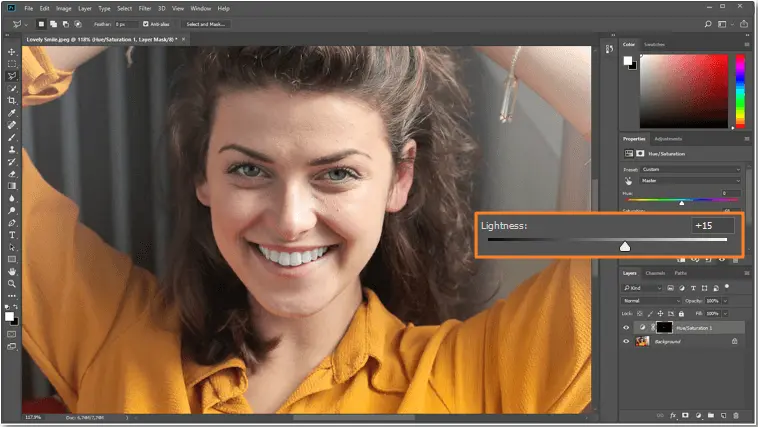
Drag the Lightness slider to achieve a natural look
Do you need a more in-depth description of the process? Go here to learn how to make teeth whiter in Photoshop.
Well, that was quite an exercise. Photoshop is a mighty tool in capable hands, but you probably doubt that you can master it even with those instructions. Let’s see how to whiten teeth in pictures in the next software that might be refreshingly simple.
Way 2: How to Whiten Teeth in PhotoWorks with One Slider Move
Compared to Photoshop, PhotoWorks is a relative newcomer but is quickly gaining praise and recognition. Have a look at its nifty way of whitening your teeth in photos on Windows and Mac in just a click - one of the many impressive features of the software. Let us walk you through the process.
Step 1. Install and Run PhotoWorks
Download the software and install it following the wizard instructions.
Step 2. Move to the Retouch Tab
Pick the picture that needs some teeth whitening, then switch to the Retouch tab in the upper toolbar.

Choose your picture and move to the Retouch tab
Step 3. Make Your Teeth White Instantly
Choose the Portrait Magic option, scroll down to find the Whiten teeth preset and apply it. Voila, you have a Hollywood smile!
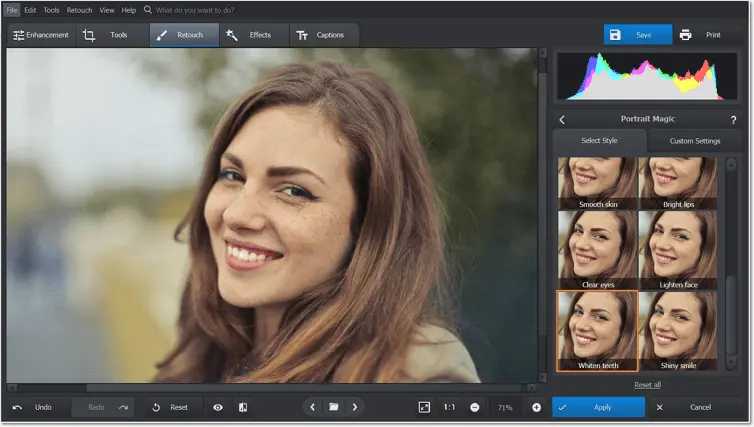
Choose Portrait Magic, then pick the Whiten teeth preset
Want to go even further? How about experimenting with the color of your eyes? Blue, green or even violet? Try different variants with an easy eyes color editor.
Achieving this effect by essentially clicking just one button is quite impressive, isn’t it? In case you want to go for a more dramatic change, switch to the Custom Settings, scroll down to find the corresponding slider, then move it around.
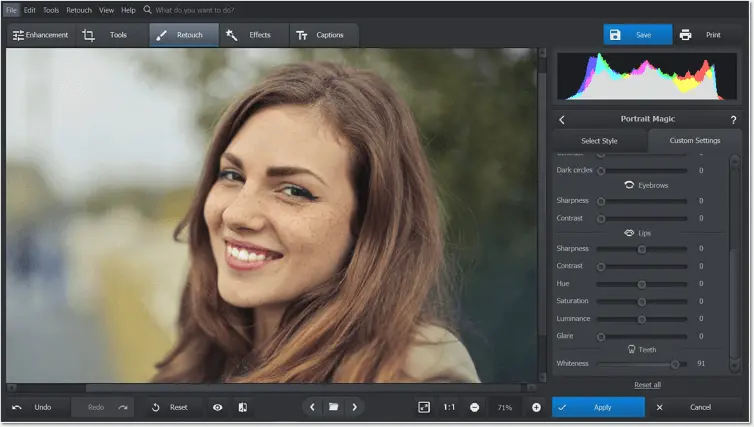
Go for manual adjustments for a starker effect
If PhotoWorks got you intrigued, give the software a closer look. Once you’ve learned how to brighten your teeth, find out how to improve your skin tone, remove the nasty oily glare from your photo, change your hair, eyes, or lips color. If your portrait was spoiled by a photobomber, check out our tutorial on how to remove a person from a photo. PhotoWorks has plenty of other convenient tools to perfect your pictures: automatic color correction powered by AI, easy background replacement, a convenient crop tool, a red-eye picture editor, and much more!
Way 3: How to Whiten Teeth in Lightroom
Lightroom is yet another Adobe’s giant that provides its user with a vast amount of tools. Let’s see if whitening one’s teeth is a tough nut to crack for this software. Here are the steps.
Step 1. Run Lightroom and Add Your Image
Start the software, then open the picture you are going to work on. For a more precise effect, the application zooms in the teeth.
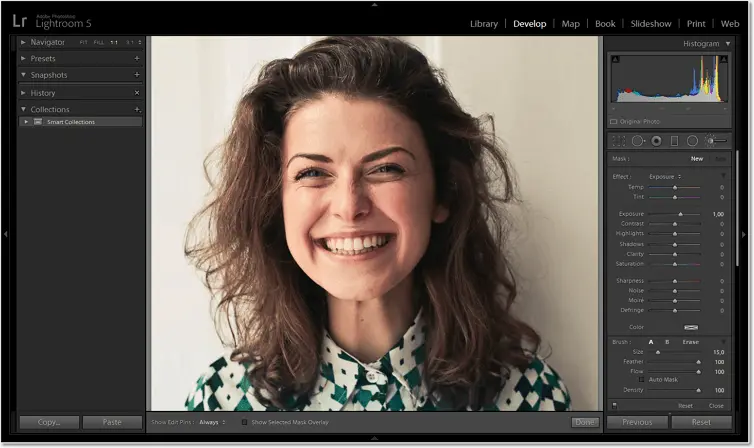
Run the software and pick your picture
Step 2. Pick the Adjustment Brush
Select the Adjustment Brush in the Toolbar or use the K hotkey. Set suitable parameters for the tool - size, feather, etc.
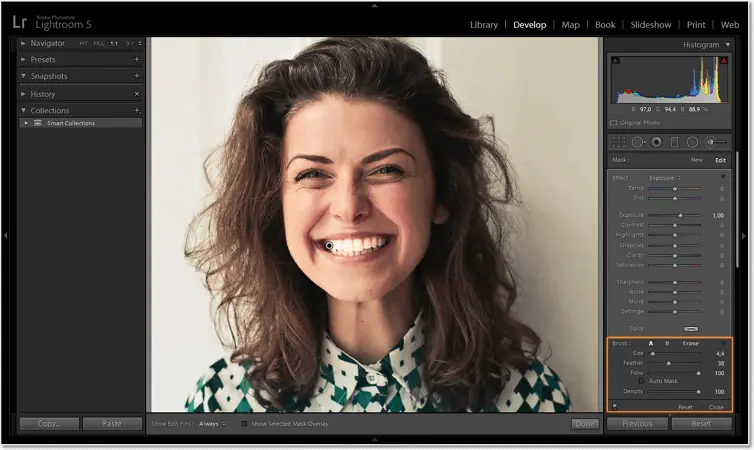
Pick the Adjustment Brush and set its parameters
Step 3. Play Around with the Settings
To whiten the teeth, make proper adjustments. Try setting Exposure at +0.40, Clarity at +5, Highlights at +5, and Saturation at -50.
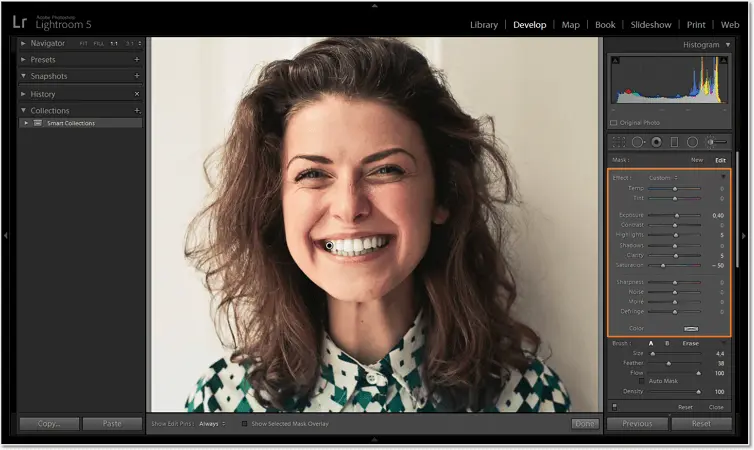
Adjust Exposure, Clarity, Highlights, and Saturation
Need a photo editor to make the face thinner? Resculpt your facial features with PhotoWorks in a few clicks!
Step 4. Apply the Changes and Enjoy
Now brush over the teeth. Try to be careful and don’t go over the edges. And in a blink you’ll have white teeth like a star.
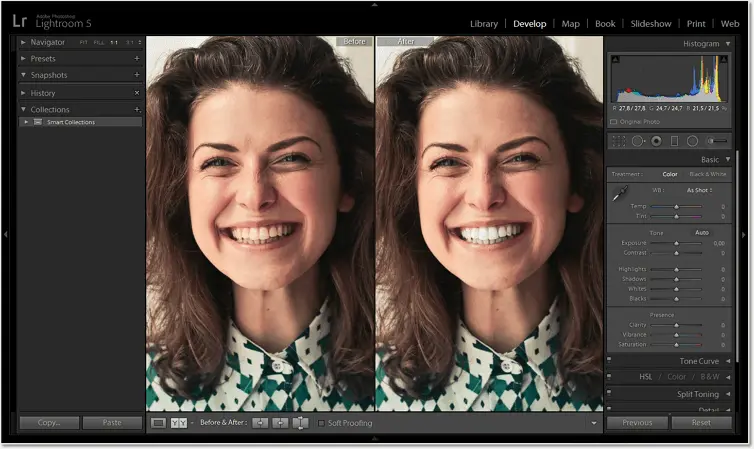
Use the Adjustment Brush on the teeth to make them sparkle
Would you like to read a more detailed instruction or learn a different method? Go here to learn more Lightroom tricks.
Granted, Lightroom requires some time and tenacity to master, but it proves to be worthy of its reputation as an efficient photo editor. Apart from teeth whitening, the software offers many more tactics to improve your photos, too numerous to mention.
Way 4: How to Make Teeth White in a Mobile App
Prefer to do everything with your cell phone these days? Then let’s learn how to make your teeth whiter in pictures using your phone, since there is an abundance of apps that do it swiftly and easily. Now we’ll have a look at a little app called Sweet Selfie. Here’s what we’ll do.
Step 1. Install the App
Download and run the application. You can either take a selfie right now, or choose another picture of yourself to work with.
Step 2. Switch to the Edit Tab
Hit the Edit icon, then choose the Whitening option. In case the app cannot detect your face in the picture, try manual adjustment.
Step 3. Whiten the Teeth
Drag the slider to the point where you like the result. Be sure to post your shiny new smile on your social media account!

Whiten your teeth with a mobile app
If the effect is still underwhelming or you just plain did not enjoy the app’s interface, try any other free software with similar functions from a vast number of apps to whiten teeth.
Well, you see that your cell phone could be used not only to surf the net and watch cat videos. It actually is capable of being a surprisingly effective tool when it comes to making your teeth look whiter in pictures.
Frequently Asked Questions
- What software do I need to whiten teeth in photos?
- Is it possible to whiten teeth in photos using a smartphone?
- Are there any free tools available for teeth whitening in photos?
- How can I whiten teeth in a photo without making them look unnatural?
- What are the basic steps to whiten teeth in a photo using PhotoWorks?
- How long does it take to whiten teeth in a photo using PhotoWorks?
- Are there any automatic tools for teeth whitening in PhotoWorks?
You can edit pictures with Photoshop or Lightroom. But they require experience and skills. To whiten a person’s teeth with ease, try automatic programs like PhotoWorks.
There are lots of mobile apps with this feature, such as Sweet Selfie.
PhotoWorks can help you make your teeth look whiter. Start a free trial and perfect your portraits in a couple of clicks.
Use a program with an adjustable whitening effect. By dragging a slider, you can set the right intensity and achieve natural-looking whiteness.
First, apply the teeth whitening filter on your picture. Second, move the slider to change the amount of the effect. Finally, save the new image.
Creating a Hollywood smile with PhotoWorks takes less than a minute.
This software automatically detects the needed area. Just apply the preset, and your picture is ready to go.
Summary
If you are quite self-conscious about the way your teeth look in pictures, you no longer need to worry about your smile. Now you know a handful of ways to make it shine. Some are tricky and some are amazingly easy to use. If you want to add whiteness in a few clicks, retouch your photos with PhotoWorks. Accentuate your beauty with this intuitive software and share your stunning selfies with the world!
Whiten your teeth in a photo for a cool makeover!
Try a digital dentist - teeth whitening photo editor

