
15 Tips for Night Photography to Deal With Limited Lighting
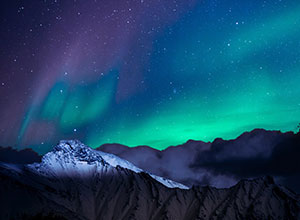
Have you ever found yourself in front of a breathtaking landscape or a mesmerizing cityscape, and you thought to yourself: I want a really good photograph of this? What about that amazing skyline, or that sky full of stars? Have you tried taking those night shots, but you weren’t quite happy with how they came out?
Night photography is a wonderful genre many have experimented with, once they have learned the right way to do it. By combining creativity and technique, you can capture those city lights and those starry nights like a true professional!
There are many great tutorials on the techniques and tricks you can use to turn your ideas into reality, and in this article, we will summarize them all into the only guide you will ever need! Whether you know your stuff or you are just getting into the field, our expert night photography tips will teach you how to take night photos and help you get the most out of the nighttime and the night scenes with your own camera! If you came here to find a way to save your dark shots, you won’t be disappointed as we’ll also teach you a number of effective techniques on brightening obscure photos in post-production.
- What hardware to bring to the location
- A complete guide to camera settings
- Effective post-production techniques
Tips for Nighttime Photography
Below, you will find 15 of our nighttime photography tips to help you achieve top results with any camera in your possession!
1. Scout Your Location, Study the Light
It all starts with an idea! Picking an urban or a natural scene and trying different camera angles is an important first step in night photography. While we are bound to spend most of our time concentrating on the technical details of the photo itself, scouting our location and familiarizing with the surroundings and the available lighting coming from the sky and what’s underneath it as well, will certainly provide grounds for it.
Go to the site in advance and calculate the time you will need for setting up the equipment. Study the way light works at different hours and how it will impact your image.
Consider all the peculiarities of your shooting location
If you choose to shoot late at night instead of the golden hour(s), it is good to know the moon’s phases, something that many don’t think about. A full moon brightens up the sky and the landscape much more than a new moon, for instance, a fact which can help with using the right camera settings while shooting.
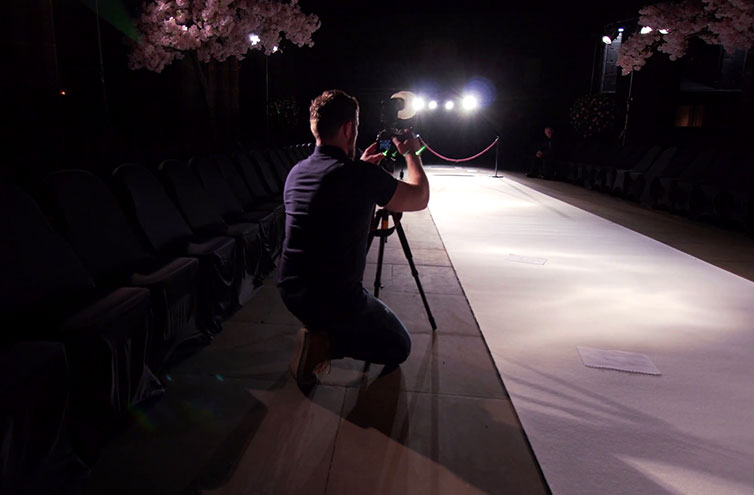
2. Use a Tripod
Now, let us focus on the hardware. Because this is a shooting at night or in dim conditions, taking a photograph will require long exposures - which means your camera needs all the stability it can get in order to capture more light.
This is where a tripod comes in handy: depending on your camera and budget, you can get one that fits you best. While you can also simply shoot from an available surface at your location (for example, a bench or a rock), a bubble level can help set the tripod straight.
Use a tripod to keep your camera steady during long exposures
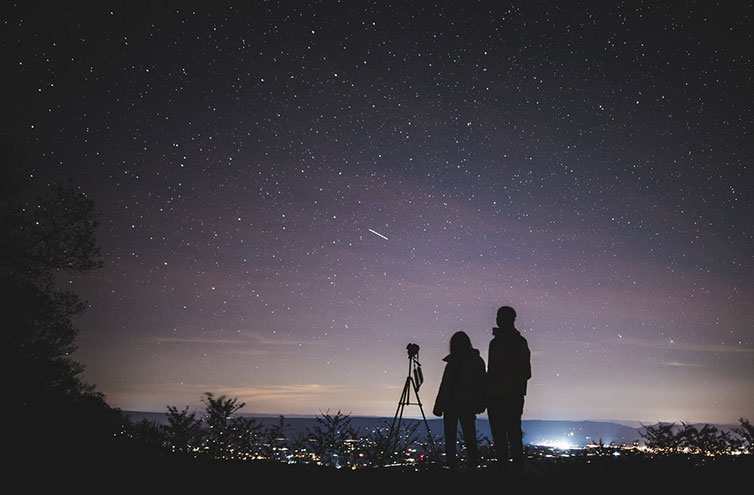
3. Use a Remote Shutter or a Self-Timer
Staying on the topic of stability while shooting, for optimal results, it is recommended that you use a remote shutter. Even if your camera is placed on a tripod, your finger can cause tremble while pressing and releasing the shutter button. If you are planning on shooting at night more regularly, investing in a remote trigger is a good idea.
An alternative to this would be to use your camera’s self-timer function.
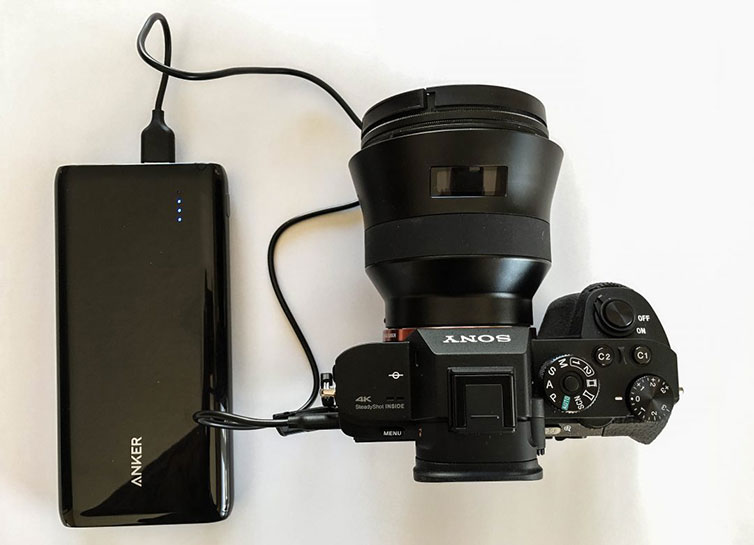
4. Bring Backup Power
Night photography can take a while, and making long exposures for hours at a time can require a lot of your camera’s energy. When the battery hits low levels out there, make sure you have a replacement, or bring backup power or other electronic gear you might need.
To preserve energy, you can also use the viewfinder instead of the Live View, and keep your LCD screen turned off.
Night photography always requires a couple of spare batteries
5. Use a Lens Hood
While it is certainly not mandatory, a lens hood helps minimize flares from light entering at angles outside your frame. It can also help reduce moisture build-up.
6. Shoot in RAW
Now onto the camera settings. While JPEG is the most common image file format, RAW is a setting that allows the camera to record more detail and a higher range of available colors. And if you decide to edit RAW photos, you get much more flexibility in the digital editing process afterward.
Because these are heavy files, make sure you have a memory card with enough space for them.
Making your first steps as a photographer? Starting something new is always challenging, this is why you need a little guidance. Learn how to become a photographer to fulfill your lifelong dream.
7. Shoot in Aperture Priority Mode
Perhaps you’ve heard the saying that everyone can be a photographer in Auto. The beauty of photography, and in this case of shooting at night, is that every choice is your own, and you are the one deciding what your image will look like.
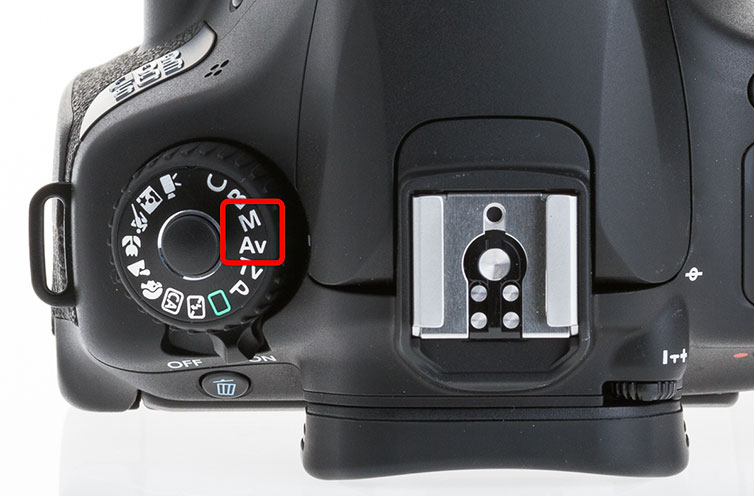
Aperture priority mode is simple to use and still allows a lot of creative choice
The two main modes for any photographer, or someone wanting to become one, are Aperture Priority (AP) and Manual. If the manual sounds too complicated, you can simply use the AP, which lets you control everything except the shutter speed, which is selected automatically. This mode is perfect for photographing still, static objects such as cityscapes and landscapes, and it is the safest way to take nighttime photos.
8. Manual Focus
One of the most important tips for night photography is the focus and the fact that it should be set manually. While auto-focus might seem easier, the manual one remains more reliable when it comes to producing sharper pictures.
Even the latest DSLR cameras have a hard time doing this part of the job at night, so why not help your camera know what to focus on, especially in the dark or in low light conditions?
Live View also proved to be a great tool for focusing manually and adjusting the shot.
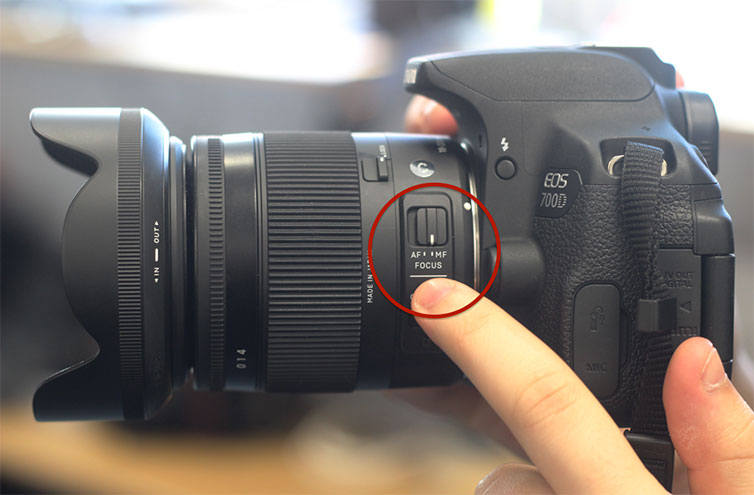
You can try to pre-focus on a particular spot in AF, then lock your focus in MF
9. Set White Balance Manually
Speaking of color, it is important to choose the right white balance for your shot. Depending on your scene, your shot can intake a lot of different types of night lights (street lights, neon lights etc.), and this will impact the colors in your photo.
Setting White Balance means setting a specific Kelvin temperature; for night photography, it is better to have a slightly colder White Balance, at around 3200K. Perhaps start there and adjust according to the circumstances.
Your night shot was ruined by auto white balance settings? Good news is you can save it by manually adjusting the photo temperature and color balance. Here’s a how-to tutorial.
10. Lower Your ISO
In night photography, increasing ISO and thus make your images brighter might seem like a logical thing to do; yet, it is recommended that you keep your ISO settings low. True, a higher ISO highlights more details and allows a shorter shutter speed, but it also deteriorates your photo’s quality by adding noise, something you will want to avoid.
A grainy texture is a side effect of high ISO that doesn’t make your photo look any better. Need to restore its smooth and clear surface? Learn more about digital denoising.
11. Choose a Lens, and then Aperture
The type of your camera lens determines the range of your aperture, market with the f-stops - the wider your lens can open up, the lower the f-stop number is.
The key is to set the aperture to the lowest possible; it can be f/5.6, f/2.8 or even f/1.4 with some cameras. This way, more light will be let in.
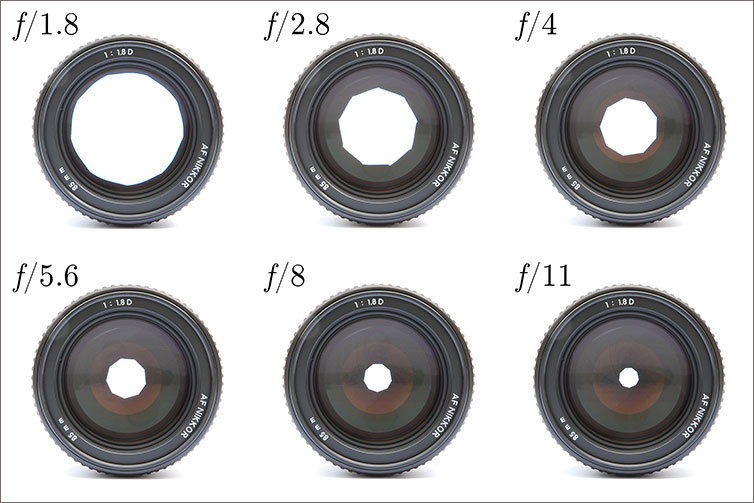
Aperture is a hole within a lens through which light gets into your camera
12. Experiment with Shutter Speed!
As you can see, doing night photography means a lot of experimenting, which makes it all the more exciting!
Here we are talking about the depth of field, which depends on your own choice of shutter speed and aperture. If you have long shutter openings, you will let more light in, but you also risk getting a blur. Reducing opening time would stop the blur, but it would require more light, meaning larger aperture. By working in manual mode, you can choose the values of both settings.
Get creative! Finding the balance between the shutter speed and aperture, but also ISO and White Balance, will result in a perfect photograph in the end.
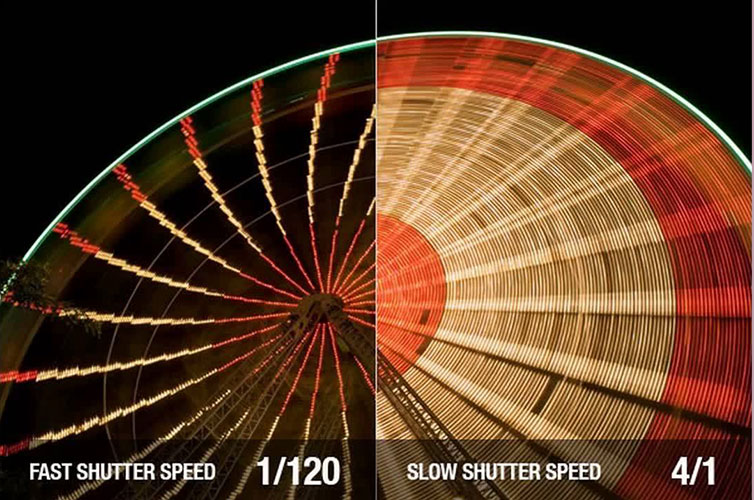
Shutter speed is used for changing brightness and creating dramatic effects
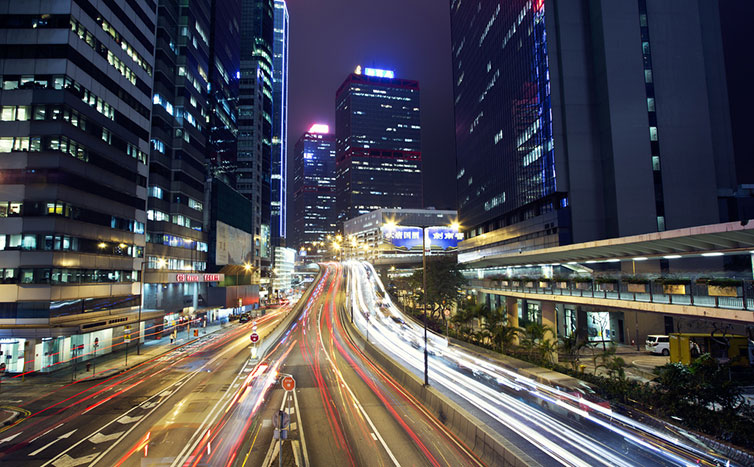
13. Bulb Mode and Photographing Light Trails
In night photography of cities, we often see those cool light trails left by cars on highways and roads.
This is achieved through an easy play with the aforementioned shutter speed - once you’ve found your road with lots of cars passing, shot your scene at shutter speeds between 10 and 20 seconds. Like with everything with shooting at night, the best result will depend on your situation, so don’t hesitate to try different times out!
Keep in might though that the longest shutter speed for most cameras is some 30 seconds. When you require more time than that, you can use the Bulb Mode. This setting allows you to keep the shutter open as long as you press the camera button. This, of course, means working in Manual mode and selecting a larger f-stop for a better light compensation.
Bulb mode is used for long exposures at night to achieve shutter speeds longer than 30 seconds
14. Do Bracket Exposures
Night photography means many different contrasts too. If you are photographing a cityscape for example, some parts of the city will not be illuminated, while others will shine with many lights.
In order to get the most out of each part in a single image, what you can do is take a series of shots at different exposures. This can be done using either Aperture Priority of Speed Priority, found in your camera’s settings, where you use the Exposure Compensation button (one with +/- symbol) to adjust brightness and shadows.
You can also use bracketed pictures to create HDR, or High Dynamic Range, which means combining several images in an editing software.

Take two pictures: one slightly under-exposed and the second one slightly over-exposed
15. To Flash or Not To Flash
The general advice is to not use flash in night photography unless you are taking someone’s portrait pictures. In low-light conditions, the flashlight is used to illuminate both the subject and the background, so if you are shooting something, or someone, against a landscape or a cityscape at night, the slow-sync flash method would be your best option.
What do people usually shoot at night? Stars...and fire! So here are some professional fire photography tips for you.
Editing Your Night Shots with PhotoWorks
All of the work we have done so far served the purpose of giving the very best results when shooting at nighttime - but with post-processing, people get even more perfect pictures. In the next segment, you can find tips on how to improve the looks of your images - and with PhotoWorks, this is an easy and fun adventure!
1. Exposure Settings
We have already mentioned the importance of exposure, but if the camera doesn’t provide us with a satisfying visual, we can always correct it in PhotoWorks.
Once you have opened your night shot in PhotoWorks:
- On the right-hand side menu, under the Main tab and under Tone section, find the Exposure bar.
- If your photograph is too dark, move the cursor to the right and watch the brightness change.
- You can also obtain more details from the dark or bright areas in your picture, by changing the Highlights and Shadows values.
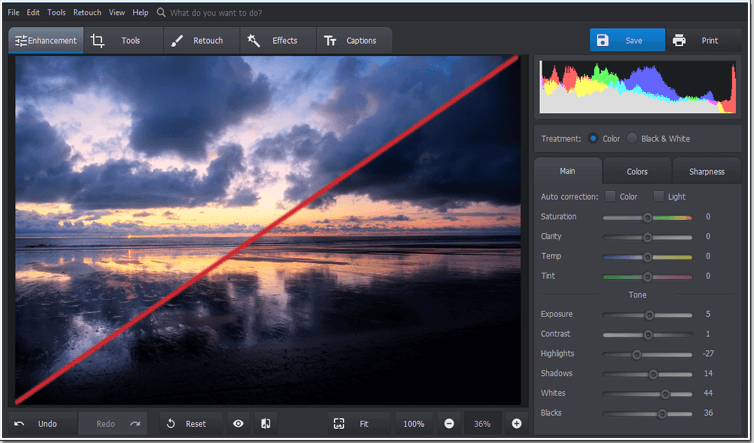
Adjust the Exposure, Highlights and Shadows settings to brighten an evenly dark photo
2. Noise Reduction
Is your picture too grainy? With PhotoWorks, you can easily remove grain from photos. To do so:
- Click on the Tools tab in the menu on the top-left.
- Select Noise Reduction on the right-hand side menu.
- The square image will show a zoomed-in detail of your image to show the amount of grain in your image.
- Move the Amount slider under the square image to reduce the noise. We recommend a range between 10 and 20 points, in order to obtain a natural look.
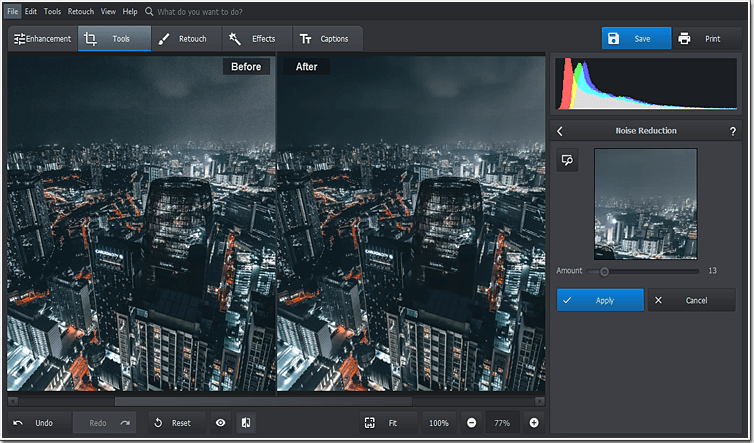
Use the Noise Reduction tool to get rid of a grainy texture
3. Tone Curve
Adjusting or accentuating the color of the night sky is a tricky task when you have many other objects and elements in the picture that need to preserve their natural hues as well. How to color correct photos like a pro? This is where PhotoWorks’ Tone Curve comes in:
- Select Curves under Tools tab; you can also use the Search tab at the top and type curves to find it.
- The straight line on the graph in the sidebar shows the balance between contrast and lightness, as well as of white and dark points of your image. By moving the curve with your mouse in all directions, you can follow the changes it makes on the live preview of your photo.
- You can also use the already existing presets under the Presets menu; here, you can increase or decrease contrast and brightness, and play with the color tones.
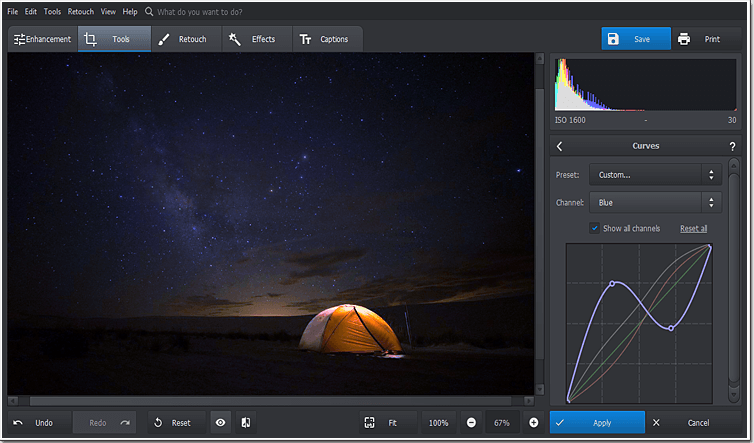
Change or accentuate a particular tone on your night photograph by adjusting the curve
4. Temperature
Unnatural colors are a common problem of night photography when auto white balance makes all the tones look rather yellowish. PhotoWorks has a dedicated Temperature slider, designed for those who are just starting out with photo editing softwares. It can be found under the Enhancement tab and under the Main section in the menu on the right. There, you can simply move the slider to find values between cold and warm temperatures, and see how your image changes accordingly in the preview.
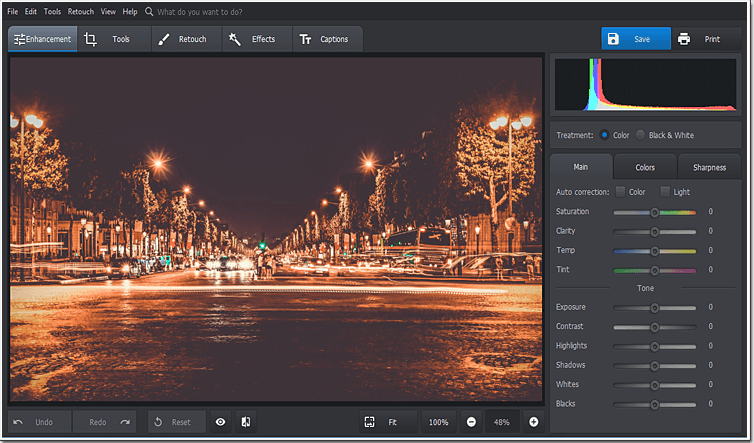
Auto white balance “cuts both ways” and can ruin the color balance of your night shot
For those who wish to determine their photo’s mood more in-depth, there is the possibility to change the color’s hue, saturation and luminance.These can be found in the main ‘Enhancement’ menu; the sliders are dedicated to the hues of the spectrum (Reds, Aquas, Magentas etc.) as well as the three main colors: Red, Green and Blue.
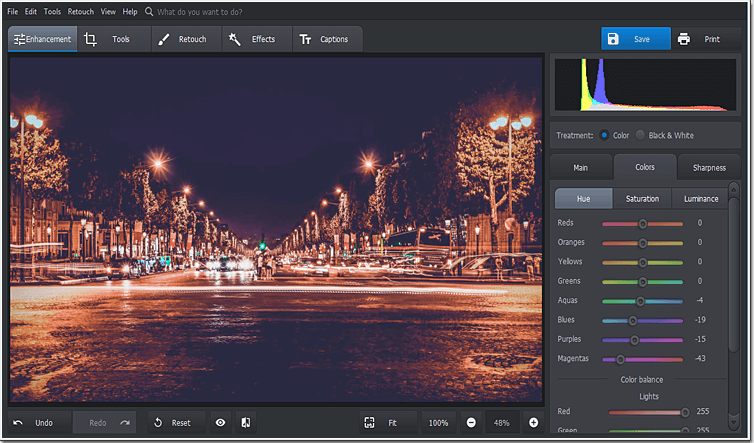
Replace yellowish hues of a night picture with more natural ones by changing hue, saturation and luminance
By introducing different values, you can once again see the effects directly on your image, and choose what’s best!
Have fun experimenting!
