
 Download
 Download
How to Properly Crop a Picture: Basic Cropping Rules
Even when you think that you have perfectly balanced the photo composition, your picture can come up too crowded or make the wrong impression. Luckily, this problem is easy to fix with the Crop tool available in most photo editors. But how to use it? And how much to cut? Read this guide on cropping in photography till the end and find out how to tell a story with your photos, immediately fascinate the viewer and generally upgrade your photographer skills!
Why Do You Need Photo Cropping Techniques?
- Improve and balance the photo composition
- Send the right message with your photo
- Tell the story left behind the shot
- Focus on small details rather than a whole scene
- Present a common object in an unusual way
Below you’ll find some guidelines shared by professional photographers on how to change the atmosphere of your shot, redirect the viewer’s attention and add some plot to a still image using basic crop tips.
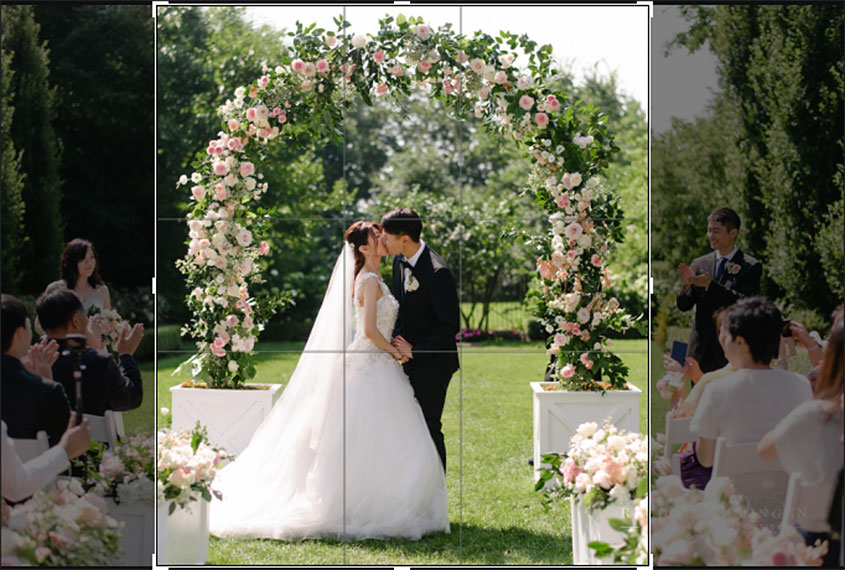
1. Lead the Viewer’s Eyes to the Subject
Sometimes there are too many objects depicted in your shot and you need to cut some of them out. While cropping group photos, it can be difficult to decide what figures to cut away from a broad and busy scene. If you want to focus on the main subject (here, the marrying couple), do not hesitate to crop out distracting and undesired elements from the edges of the frame. Your viewer should know where to look at first and pay this object most attention.
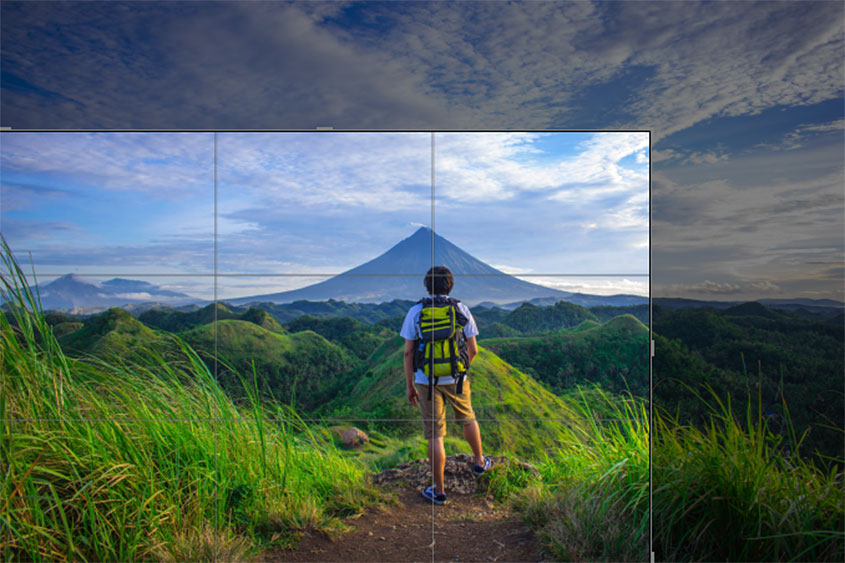
2. Leave Some Space in the Photo Center
To leave some ‘breathing space’ in the photo center, place the main subject on one side of the picture. For example, the man and the mountain are positioned closer to the right and the used crop type is quite tight, but the empty space in the center and on the left creates the illusion of vastness and depth. This type of cropping does not require a radical change in the photo composition and you will not have to cut away small but remarkable details.
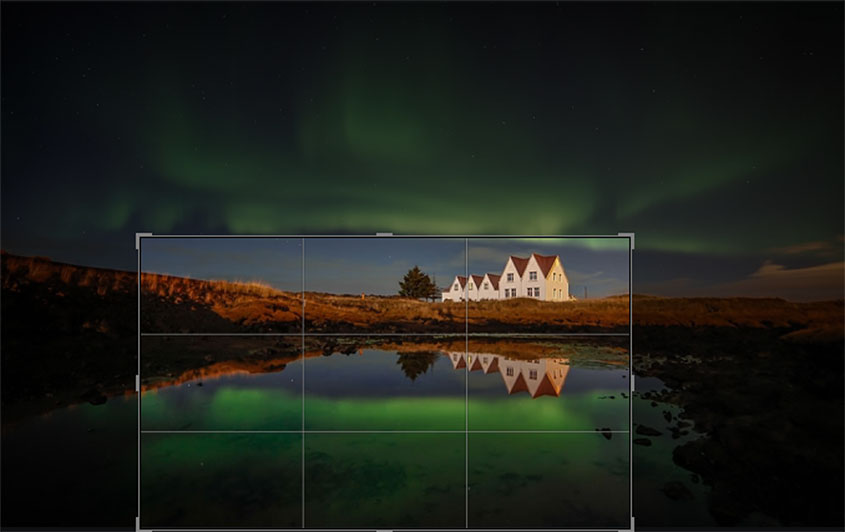
3. Show an Unusual Perspective
Play with different perspectives and express your vision by putting into focus unusual things. It can be a tree branch in the foreground that slightly enframes the main subject, or some other object or phenomenon that is seen only in the reflection. Here the northern lights are fully visible not in the sky but in the water reflection, which gives the shot an unusual look.
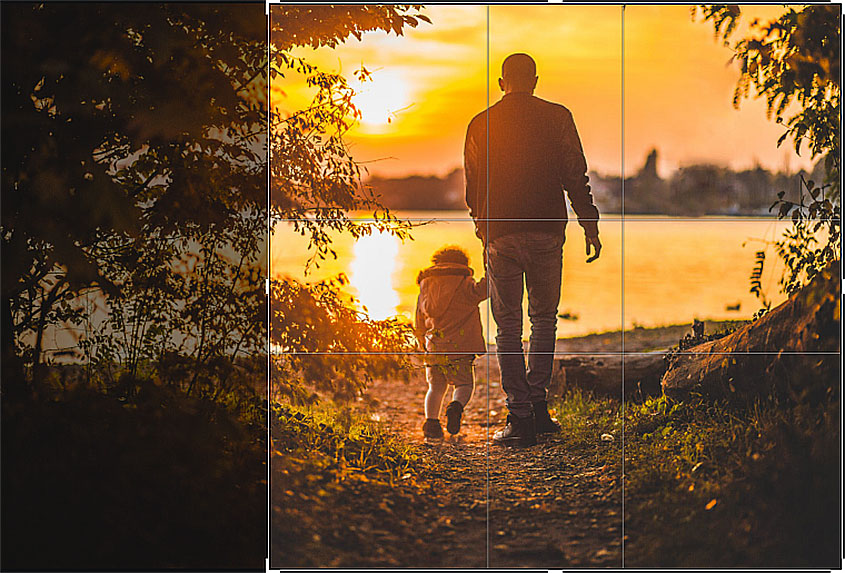
4. Create a Frame-Like Effect
How to crop a picture to achieve a frame-like effect? You need to find a suitable shot with buildings or trees occupying its both sides. Make sure there is an interesting object in the center of your photo because framing works only when there is something to frame. Here a tight crop of tree branches adds more drama to the shot as it leads the viewer’s eyes to the man and his child. What is more, the water and horizon line in the distance create a rather immersive effect.
5. Change the Photo Orientation
Sometimes a simple change of the photo orientation can make a world of difference. The most common situation is when you want to transform a horizontal image into a vertical one. This cropping technique works fine on pictures with main subjects grouped in one place. Change the photo orientation if only it adds more impact to the shot and simplifies its perception by the viewer. This reorientation can also lead the eyes to the picture highlight.
Choosing a proper grid overlay makes all the difference. The thing is, you should always place your photo subject at intersecting hot-spots over the picture frame but it is you who determine the way these lines intersect.
5 Essential Cropping Techniques
Are you ready to give your pictures a new look? But where to crop photos to make them look better? PhotoWorks is a program to crop photos you will certainly like! Launch it on your computer, move to the Composition tab and choose the Crop tool to add a grid overlay to your images. After you have taken a closer look at the shot and thoroughly analyzed its composition, pick a suitable crop preset to space out all the subjects over the frame and give more order to the scene. Below you will find the most popular crop types available in PhotoWorks.
Crop Type #1: Rule of Thirds
If you are looking for a classic crop type, you should definitely use the Rule of Thirds. Switch on a nine-square grid overlay so that there are three rows and columns crossing the picture from the right to the left, and from the top to the bottom. Your task is to align key photo elements at the intersection of these lines. To add some visual interest to the existing composition, resize the grid until your main subject is perfectly off-centered.
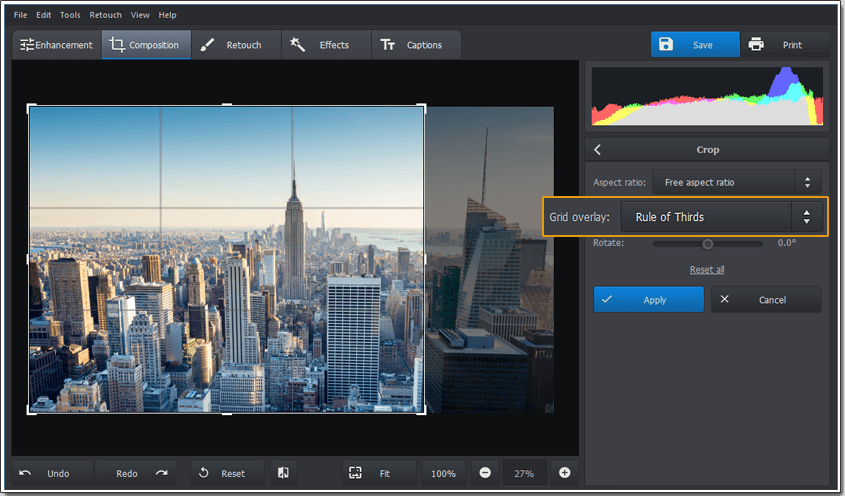
Do not smack the main photo subject right into the center
Crop Type #2: Golden Ratio
The Golden Ratio also known as ‘the perfect number’ is often confused with the Rule of Thirds. Once again you place the subject at the intersection of lines, and this grid helps create a well-balanced and harmonized composition preferred by the human eye. We would recommend using this crop type for portrait photos with a vivid and lively background. That way you will ensure the viewer’s interest from the very start and circuitously guide the audience around your shot. If you want more information on how to crop an image depicting human figures and where to 'cut' legs in photos, check out our guide on portrait cropping rules.
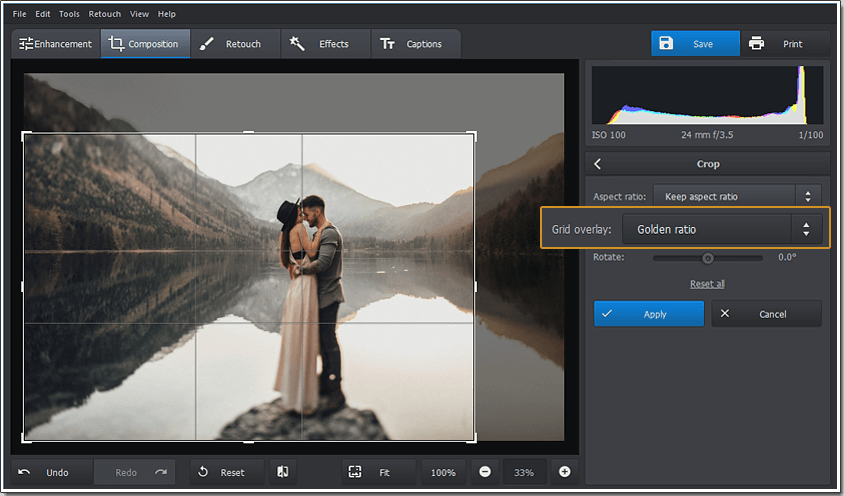
Create a strong composition by repositioning the main photo subject
Crop Type #3: Golden Spiral
The Golden Spiral is a more interesting crop type that is represented by a tight coil starting in one corner of your photo and ending up off-centre. Try placing your photo subjects in such a way that the spiral line passes through them and naturally leads the viewer’s eyes around the image. Unlike straight lines, this curved grid overlay draws an unparalleled attention to the tight coil of the spiral where you have positioned your point of interest. It is like you have an invisible sign showing where to look.
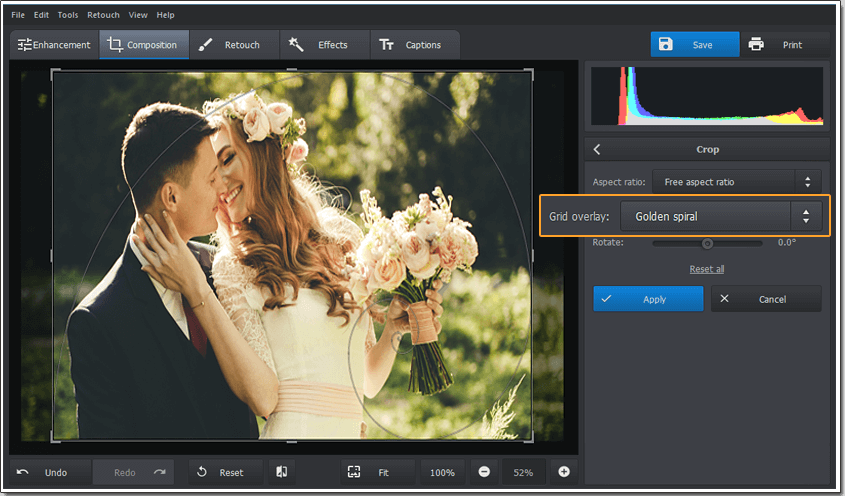
Add some action to your photos with the Golden Spiral
Crop Type #4: Diagonal
When you look at some picture you naturally move your eyes from the left to the right so diagonal lines recreate these movements. Take the full advantage of the Diagonal crop to build a realistic yet engaging composition. Starting at the bottom left and moving to the top right, these lines subtly draw the viewer’s eyes through the chosen photo and create the effect of a deep perspective. However, too many diagonal lines leading in different directions can make the overall image chaotic and confusing.
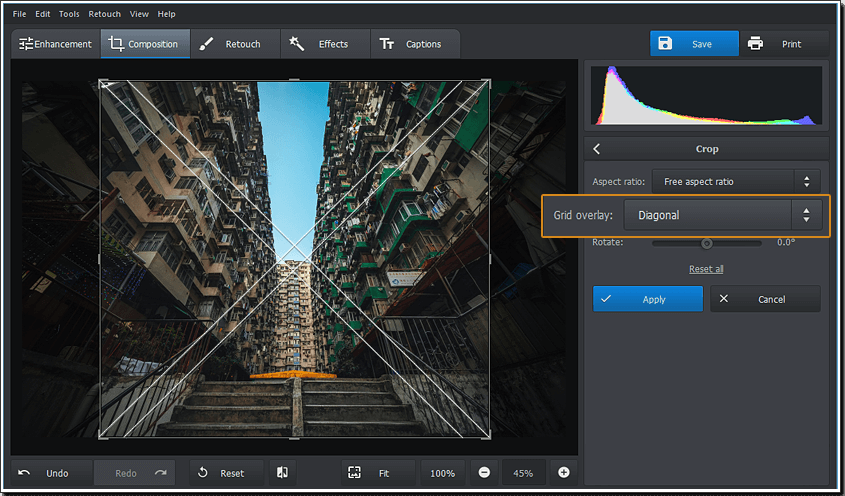
Add a sense of motion and energy to your image with the Diagonal crop
Crop Type #5: Triangle
The Triangle crop is close to the Diagonal but it offers another way to highlight the most important elements of your picture. In this type of crop, the main subject is positioned within one of the triangles, which completely changes the focal point of the image. This cropping technique is best-suited for photos telling some story or depicting some action.
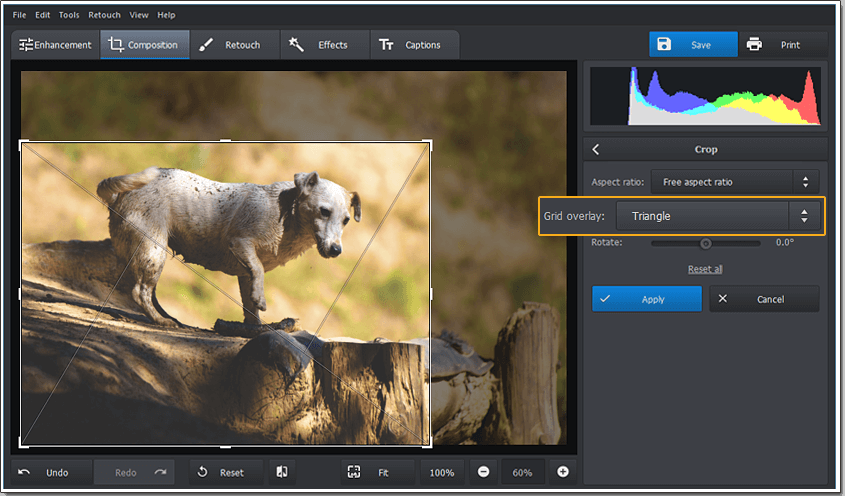
Create a dynamic composition by placing the main subject into one of triangles
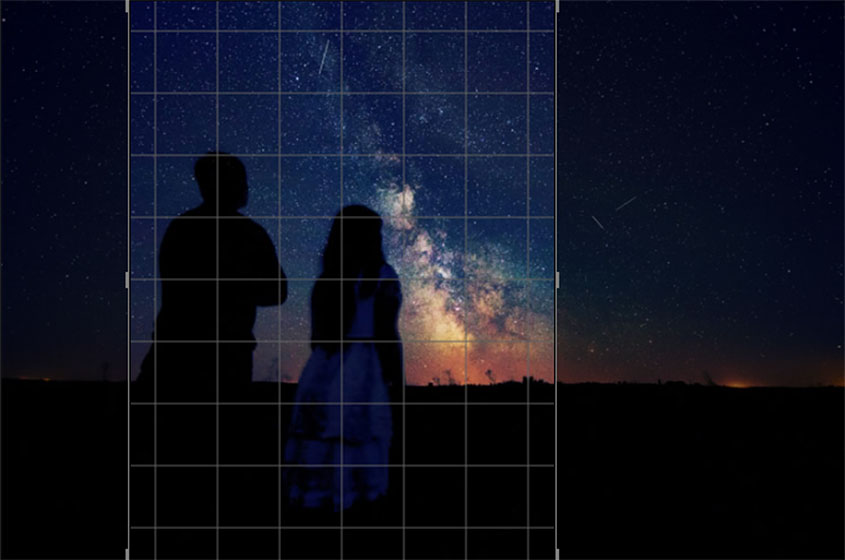
When it comes to cropping, night photos are rather tricky to deal with. Most of the objects are hidden in the shadows, and you should be very careful not to crop something important, like lights or people. How to take a shot correctly and capture all the necessary things? Check out some top tips for night photography.
So where to crop pictures to create a more dynamic composition or show common things from an unusual perspective? Try on standard crops and different aspect ratios to achieve the best result. If necessary, cut out large parts of your photos to turn average images into real masterpieces and make a lasting impression on your viewers. To start experimenting with your shots, just download the free trial of photo editor for Windows 7 (it also works fine on Mac and later Windows versions).
Seeking other ways to improve your pictures? Need to know how to unblur photos or brighten too dark images? On our website, you'll find expert guides on dealing with all common photography issues. PhotoWorks is also good at retouching portrait shots - there's every tool you might need to give your portraits a polished look. Conceal skin blemishes, smoothen wrinkles, reduce skin redness, change hair color in picture, get rid of face glare, change eye color in photos and make other changes to your digital self.
