How to Crop Headshots Like a Pro
Took a marvellous headshot but your in-camera cropping has failed to meet your expectations? This topic is a big deal and worth special attention because the way you crop your images has a colossal impact on how your viewers will see and perceive them. If you know crop guidelines for portrait photography and have a proper photo cropping tool, you’ll make your headshots admirable. Feel enthusiastic to find out how to get a good crop and avoid a bad one? Continue reading and you’ll learn where to crop your portraits correctly.
Reasons to Crop a Photograph
Before diving into the secrets of correct cropping, let’s see what wonders the right portrait cropping can do:
- Accentuate the main subject
- Remove distracting details or undesired elements
- Improve the global composition
- Zoom in to show the subject’s emotions
- Change the image orientation or aspect ratio
From the examples below, you’ll see how to achieve the effects listed above:
Accentuate the Main Subject
Turn any full-size photo into an individual portrait by cropping it. It’s an amazing way to direct the viewers’ eyes to a certain object especially if it blends into the background or mingles with a group of people.

Remove Distracting Details
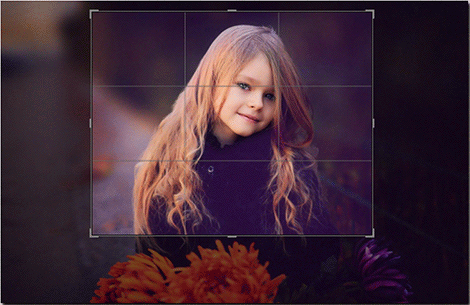
Sometimes an apparently well-taken photo can seem overcrowded with the large or bright details that grab the total viewers’ attention distracting it from the model. The cropping tool is a perfect solution to sort this problem out. By using it, you’ll make the model the main part of a photo composition in an instant.
Improve the Global Composition
Like any other editing option, the cropping tool is meant to make a photo better. Find your portraits spoiled because there’s no harmony in composition? Don’t rush off to delete them - maybe cropping will help you correct the shots. Just crop the image if it looks inartistic or you want to move the object in order to make the whole scene more vivid, appealing and comprehensible.
Zoom In to Show the Subject’s Eyes
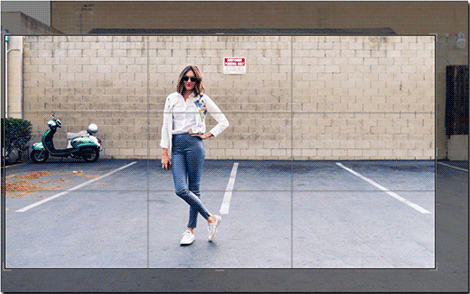
The largest and the most significant emotional impact of a portrait is in the models’ eyes and their facial expression. Make it closer, show the drama, speak to the viewers! The audience will feel the whole story deeply and appreciate it. For an amazing effect, a face should be perfect, so fix the issues if there are any - remove red eyes from pictures, sharpen them for a more clear gaze and get rid of skin blemishes.
Change Orientation or Aspect Ratio
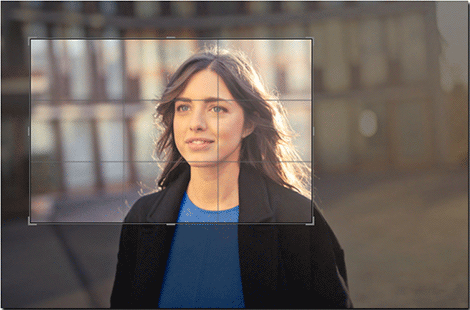
You won’t find a better way than cropping to change a landscape orientation to the portrait one. Besides that, most photo editing programs will allow you to choose your portraits’ aspect ratio. Thus, you’ll make your images more emphatic or prepare them for printing.

Cropping is an easy yet very powerful editing option. Carefully planned, it can make your photos fantastic. At the same time, if you have no idea how to crop a headshot, you will totally ruin its composition and visual impression. So, here are 3 crucial portrait cropping rules for you:
Rule #1. Crop in the Middle of Limbs, Don’t Crop Off Joints
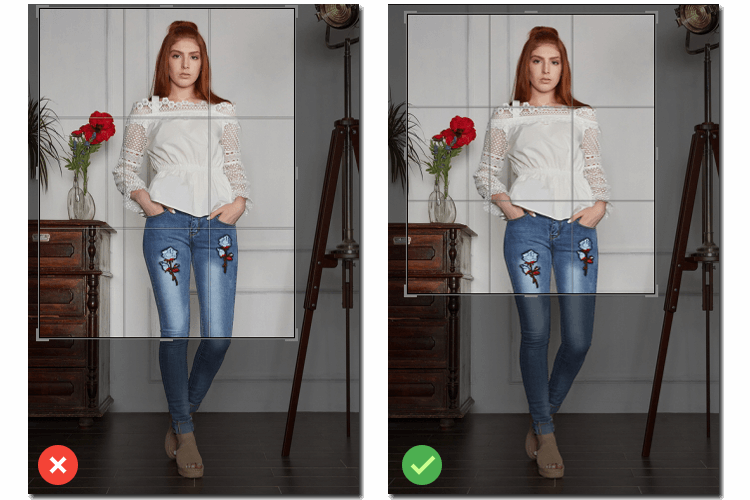
Cropping feet, knees, elbows, wrists and other joints will not only shorten the model’s body parts, but will add an awkward look to the portrait. Don’t ‘amputate’ the joints, instead, try flattering and elongating the subject’s body. In the examples below, you can see the difference.
Rule #2. Don’t Overcrowd the Crop
When there is not enough space above the model’s head, the viewer will see the subject cramped in the frame, that’s not a very good feeling. Cropping headshots through the chin looks like a mistake, not pleasing for the eyes. So leave some room for the head and chin to provide the audience with a comfortable contemplation and perception of your work.
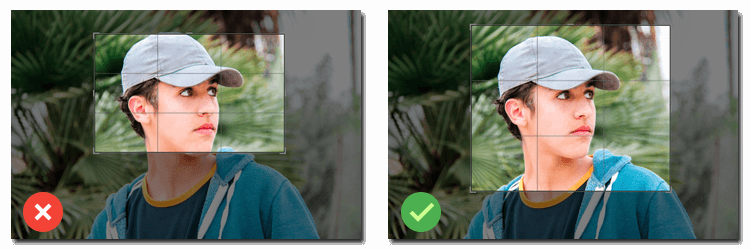
Rule #3. Lead the Model’s Eyes
If the subject is looking in one direction, leave some space for their sight, don’t crop the image right in front of their eyes because it will make the scene kind of claustrophobic. Let the model look and move forward - this is just correct and pleasant to see, ain’t it?
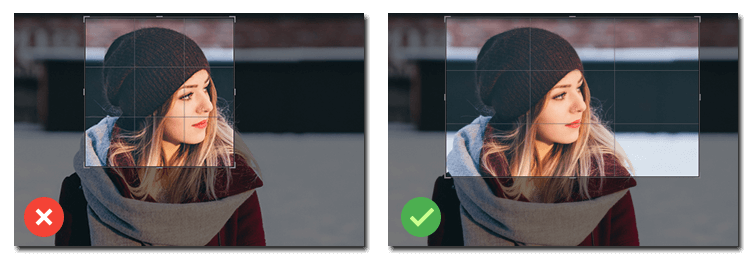
You'll avoid the need of cropping a photo if you set up the shot properly. Not sure how to do that? Check out professional advice on good angles to take pictures.
How to Crop Portraits in PhotoWorks
Now that you’ve studied the basic rules of headshots cropping, it’s high time to take some action! Following the portrait photography cropping guide, you’ll manage to crop your images as easily as possible with automatic photo enhancer. To get started, open your photo in the program, move to the Composition tab and select the Crop option on the sidebar.
Step 1. Choose the Cropping Tool
There is a built-in collection of cropping grid overlays in PhotoWorks. With them, you will crop your portrait photos in less than a minute. Just click the overlay you want to use and the program will apply the grid to your photo.
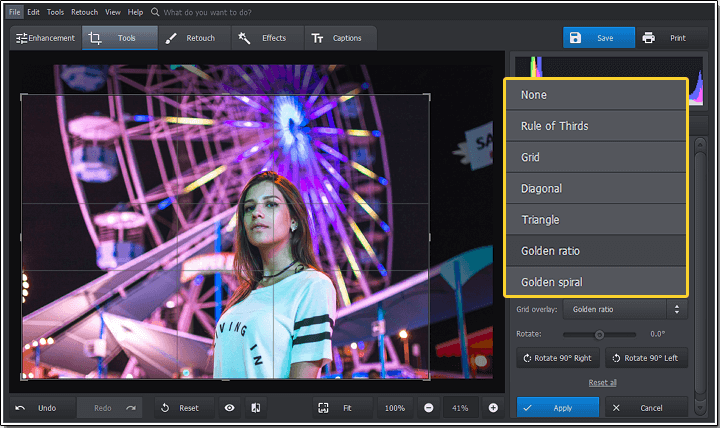
Let’s pick the Golden Ratio overlay to crop this picture
Use the Golden Ratio
The golden ratio is a traditional and one of the most used grids to crop portraits. By using the golden ratio, you can place the model close to the image center - it’s the best way to create a flawless photo composition that will always attract the viewers.
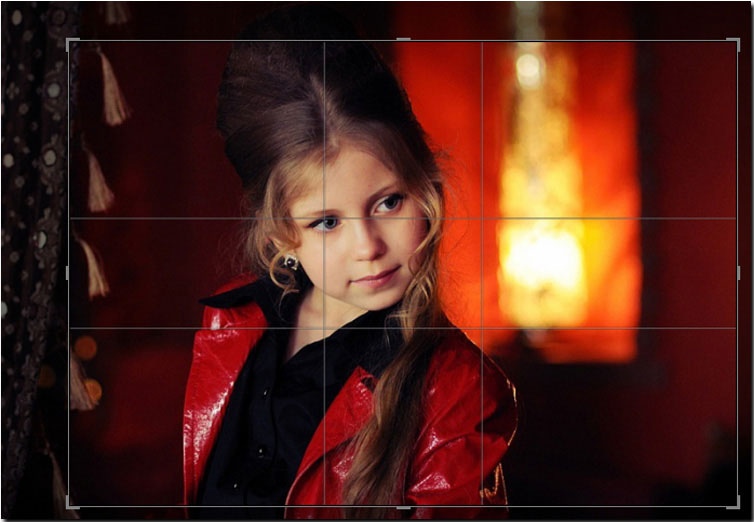
Apply the Rule of Thirds
To make a photo absolutely striking, try the rule of thirds. The subject’s eyes naturally attract the viewers’ attention, so place them at one of the four intersections. This way you’ll provide some breathing space and show the environment within the scene. Odd as it may seem, you will focus on the model by moving them a little off-center.
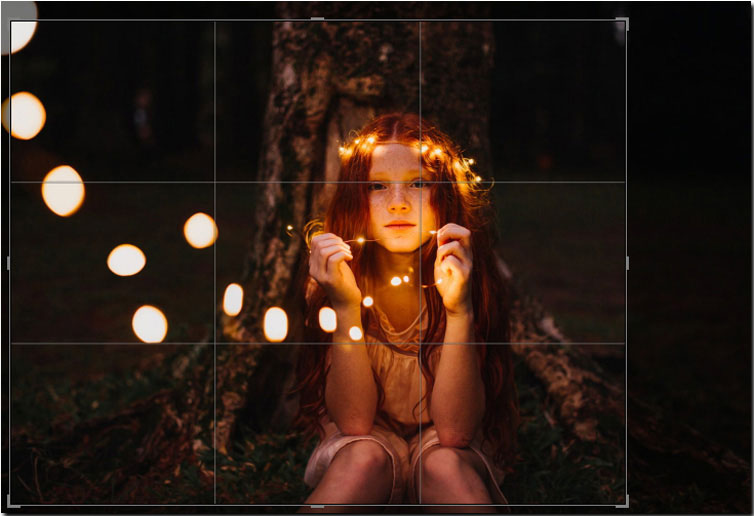
Follow the Golden Spiral
This grid overlay will help you create a divine composition. Through the golden spiral, the viewers eyes will follow up all the important but small compositional details to the focal point - for example, the model’s face or an object in their arms.

Make Use of Diagonal
The lines of a diagonal grid overlay lead the viewers’ eyes through the portrait making it deeper and create perspective. Also, diagonals can make images more dynamic by adding a sense of action.

Step 2. Adjust the Grid
Once you’ve selected the cropping grid, you can keep the headshot dimensions or pick one of the ready-made presets offered by the software: Square (1:1), HD (16:9), iPhone (3:2), iPad (4:3) or Photo (5:4). The chosen proportions will be applied to your portrait automatically. Drag the grid in order to move it around.
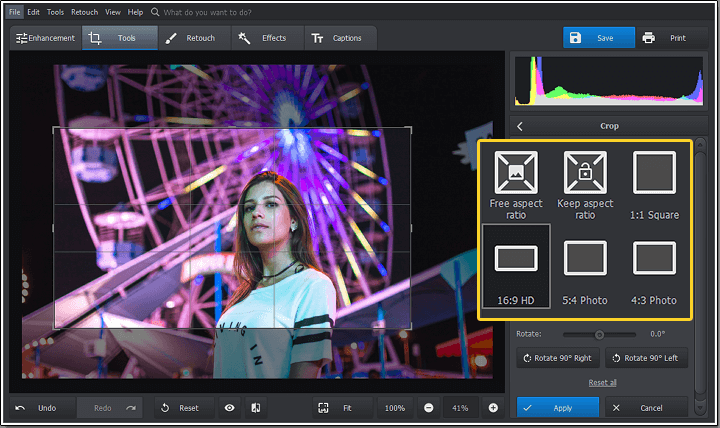
Select a suitable aspect ratio for your photo
Also, you can resize the grid manually. To adjust it, drag the sizing handles in or out as shown in the example below.
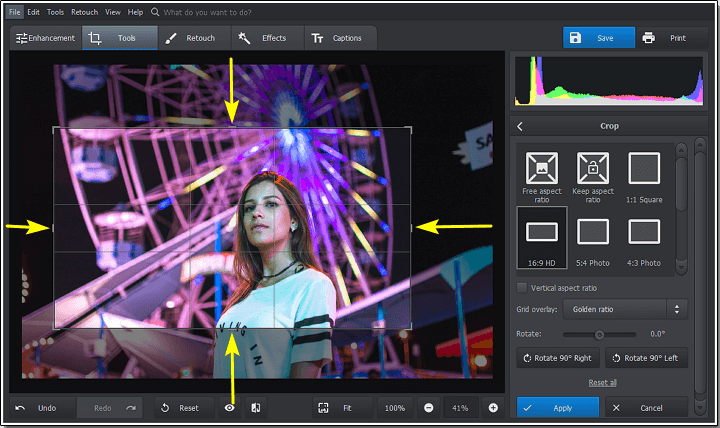
Move the control handles in or out if you want to resize the cropping grid
Step 3. Crop and Save the Portrait
To see the result, click Apply. You can take a step back or forward by clicking the Undo and Redo buttons, or click Reset to cancel all the changes. If you want to correct your crop, just select the Crop tool again and continue editing. To keep the cropped portrait, click the Save button.
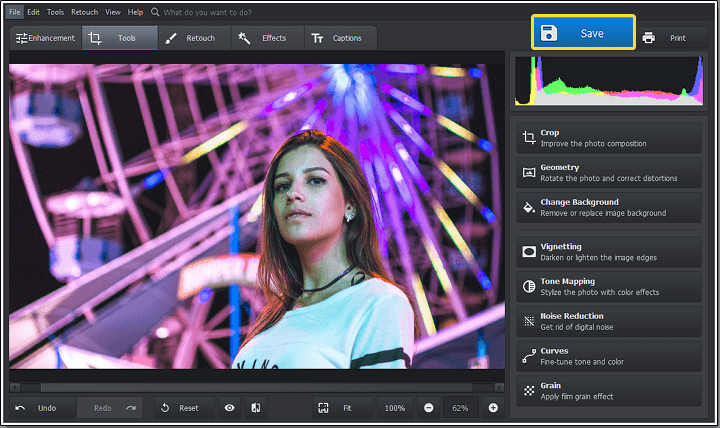
Apply the changes and click Save to save the pic to your PC or Mac
Now, you have learnt how to crop headshots with the help of PhotoWorks. Are you ready to put your knowledge into practice? Apart from cropping, the software offers you a wide list of photo editing options. For instance, you can make a photo look old and scratched, correct exposure issues or change eye color in pictures with just a couple of mouse clicks. So, download PhotoWorks right now and start editing your pictures at a professional level!

