How to remove red eyes from pictures without Photoshop
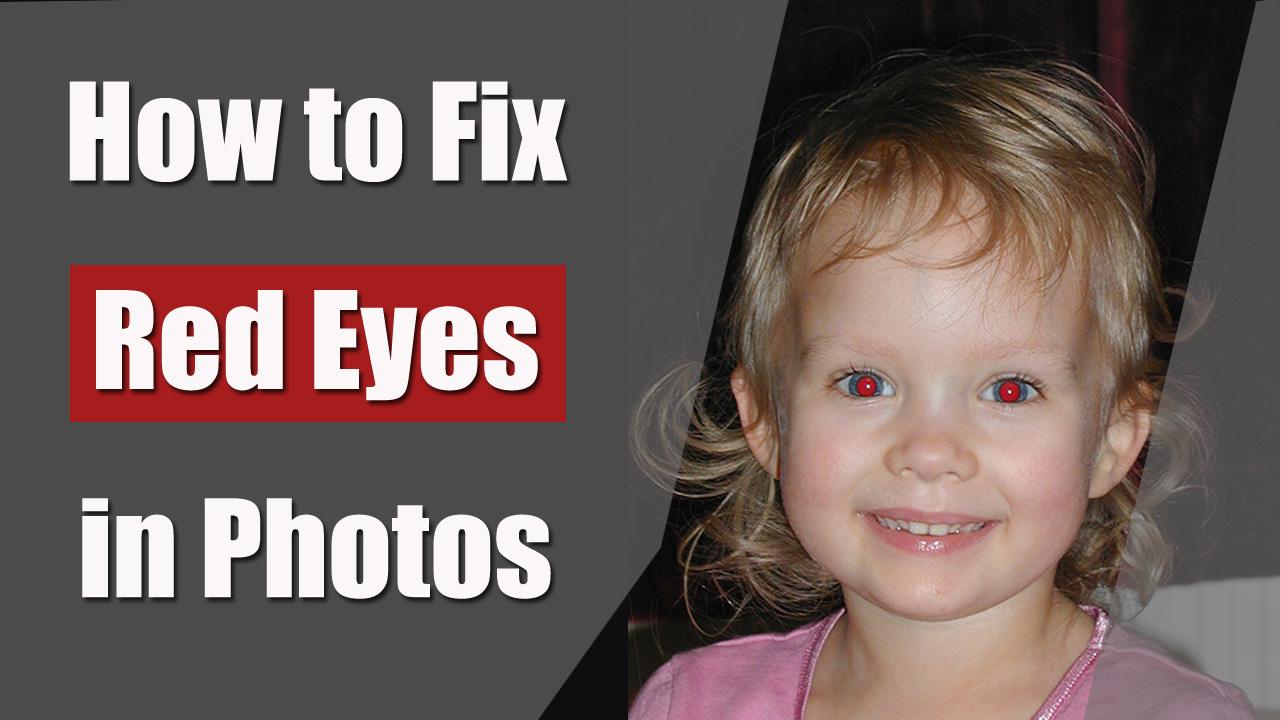
Prefer taking flash pictures? Then you are familiar with the red eyes effect in images. Those spooky glowing eyes are really annoying and can ruin even the finest shots. Thanks to the better technologies, it's become possible either to remove red eyes from photos or to avoid them during the process of shooting. Let's discover what causes the 'demon eyes' effect on pictures and how to eliminate it using a photo editor with red eye remover. And by this we don't mean Photoshop.
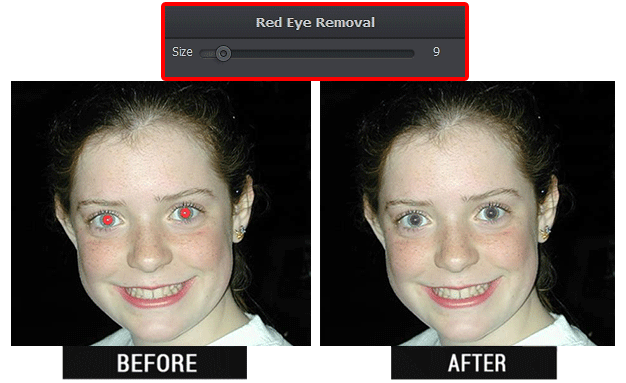
Remove red eyes from a photo: Before-After
What Causes Red Eyes in Photos?
The most common reason of red eyes glow that appears in flash photographs is a low lit scene. It's a well-known issue of smartphone and point-and-shoot cameras. The phenomenon of red eyes in photography is caused by the human eye structure and a camera flash that's placed very close to the lenses.
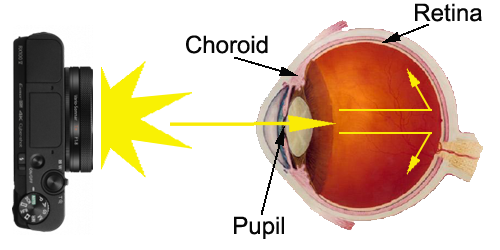
How we get red eyes in photographs
In a dark place, pupils get larger in order to allow as much light into the eyes as possible and to focus a better image onto retina. When a flash light enters your eyes, the pupils do not get sufficient time to constrict. Hence, all the amount of light gets reflected off the choroid - a very vascular tissue that covers your eyegrounds. As a result, the light gathered by the camera lens turns red.
4 Effective Ways to Prevent Red Eyes in Your Portraits
Most photographers know some professional secrets on how to avoid glowing eyes on portraits. Want to be in the know? Here are a few essential tips for you:
- Improve the lighting in the room. Turn on more lights or move to a better lit area - the brighter the environment, the less likely you will face the red eye problem in your photos.
- Use the red-eye reduction option. Most compact cameras have this feature - they send flash twice. The first one, pre-flash, gives your pupils some time to constrict and adapt to the light.
- Look a little aside the camera lens or focus your eyes on a near object. Thus, you will change the angle of reflection, avoid red eye glare and get a more engaging shot.
- Opt for cameras with an external flash. Moving the lens and the flash further apart helps to reflect the natural color of your eyes.
How to Get Rid of Red Eyes in Pictures During Post-Processing
If you've got the red eyes effect despite all the preventing moves listed above, it's still not that big deal. Removing the 'devil eye' is absolutely easy with a red eyes photo editor. Most people would recommend using Photoshop. This software is powerful, however, it has a steep learning curve and requires an expensive subscription. That's why we suggest trying out PhotoWorks instead. Just download this image enhancer from the official website and follow the clear instruction below.
Step 1. Open the Photo to Edit
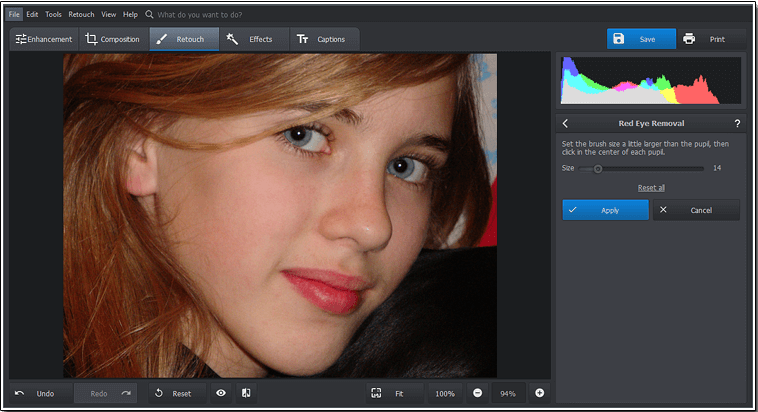
Start the program and add the photo for reducing the red eyes effect. To do that, choose the picture from your computer by clicking the Open Photo button or drag the image from a folder. You will need the Red Eye Removal tool. To find it, type the name of the tool in the search field. Or you can open the Retouch tab and select the red eye fixer on the side panel.
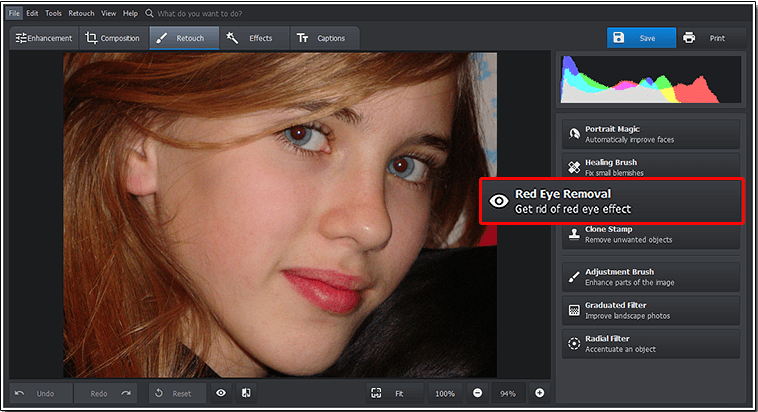
Choose the Red Eye Removal tool
Step 2. Get Rid of Red Eyes in the Photo
PhotoWorks will adjust the image size automatically for your convenience. Also, you can move the picture around the working area to get better access to the eyes. To do that, press & hold the Space button and the left button of your mouse. Place the pointer at the red eye to fix - the brush size should be a little larger than the pupil. When you're done with the settings, click in the center of each pupil in turn. You've finished fixing red eyes and there's no annoying glow in your portrait now.
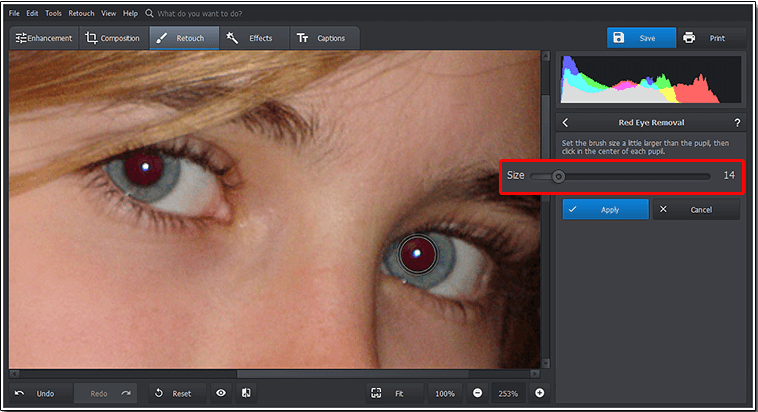
Set the size of the brush
Need to take a step back and correct the settings? Hit the Undo button. In case you want to cancel all the changes and start editing again, just click Reset All.
Save the in-between changes if you like the result
How about applying a digital makeup? Make your eyes even more expressive with a powerful makeup picture editor.
Step 3. Make Pupils Look More Natural
You could go a long way to fix red eye in Photoshop or try following a guide on how to remove red eyes in GIMP but you’ve done it in less than 1 minute in PhotoWorks. It happens that there’s still something to improve about the look of your photo. For example, the pupils seem unnatural and grab all the viewers’ attention. PhotoWorks allows you to fix this issue quickly. Just use the Adjustment brush that you’ll find under the Retouch tab.
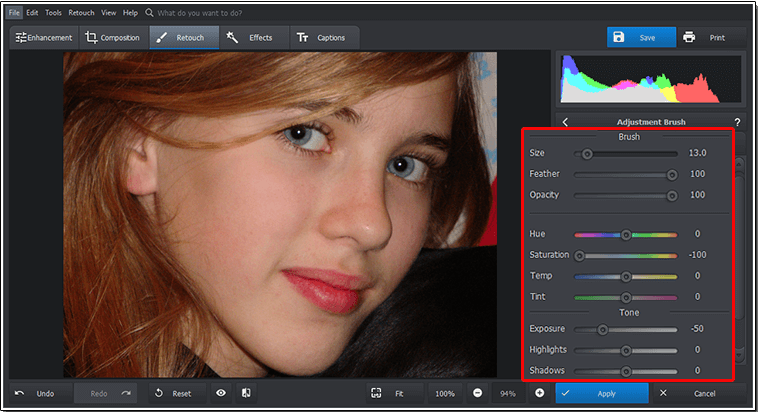
Improve your editing using the Adjustment Brush
Adjust the Feather and Opacity settings of the brush. Then, minimize the Saturation degree and decrease the Exposure level to make your photo look natural and attractive.
Step 4. Add Final Touches and Save the Result
Continue working with the brush and drag the Exposure slider until you are satisfied with the result. Also, this photo retouching software offers a wide range of tools to edit the eyes. Apart from removing eye glow, you can remove dark circles, try a new eye color, apply digital make up, and even tweak the eye size. Now, save your photo and switch to the next picture.
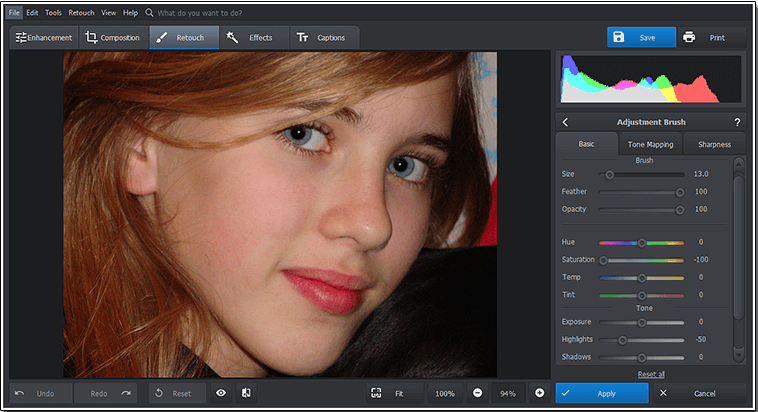
No more red eyes effect - save the photo
Prefer to see the red eye correction in action? Then watch this video tutorial. It shows you a quick and safe way to clean the nasty red color from your precious eyes. You can use this tool on any type of portrait photos:
Have all your photos on a mobile phone? Then try out Fix+. This app will help you remove eye glow in a few taps.
PhotoWorks software has made image manipulation really easy and turned it into fun. Apart from fixing glowing eyes in pictures, you can get rid of nasty glare, change the hair color on your photos, completely reshape your facial features, remove undesired shadows from photos, auto improve your portraits, straighten wonky horizon and stylize your pics with instant effects for a vintage look with just a couple of mouse clicks.

